Wiki Home Troubleshoots Set BIOS to boot clients from LAN
Set BIOS to boot clients from LAN
2018/04/25 15:09
Notice: This wiki is for the old version CCBoot. Please click HERE to access the new version wiki
Configure client PC for diskless bootFor new motherboard -
1. Turn on the client PC and go in to the BIOS by pressing "F2 or Del or ESC key
2. Go to "Advanced" tab, and select the "Integrated Peripherals" option and press "Enter" (Figure 1).
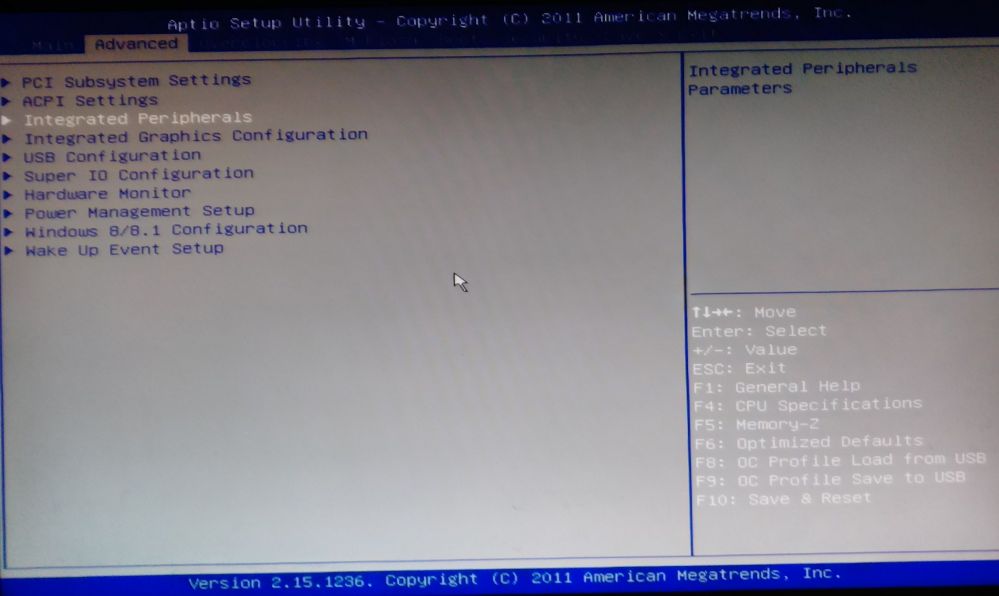
Figure 1
3. In "Integrated Peripherals", look for "Lan Option ROM" or "Boot from LAN" and then change the option to "Enabled". (Figure 2)
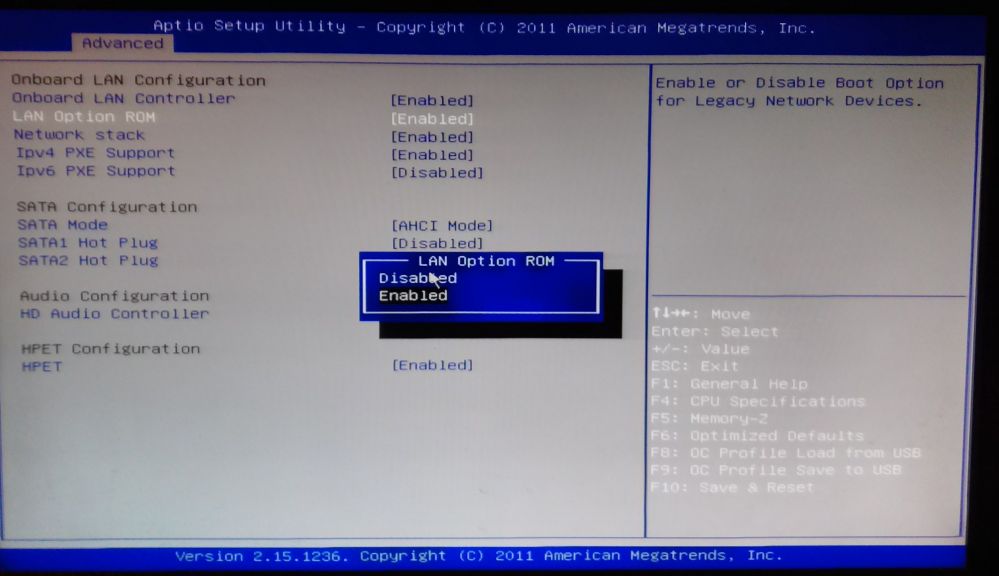
Figure 2
4. After that, go to "Boot" tab and then select "Boot Sequence" or "Boot Priority".
5. You need to set the "Network" to be the first priority (Figure 3).
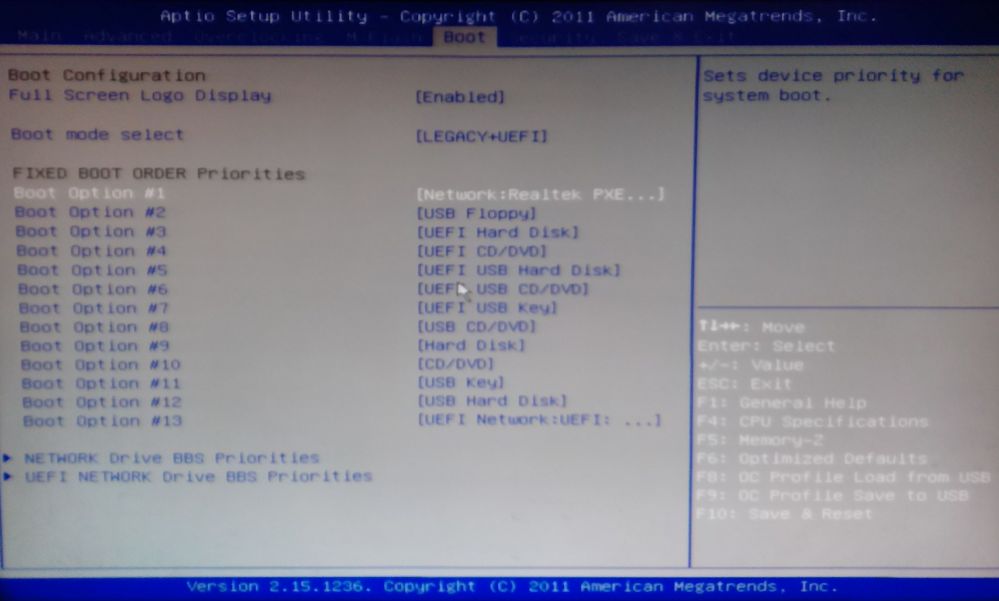
Figure 3
Important: Keep in mind that in new motherboard with UEFI BIOS, you need to set the Boot Mode to either “Legacy” or “Legacy+UEFI” in order for the boot to work
1. Turn on the client PC and go in to the BIOS by pressing "F2" or "Del" or "ESC" key
2. Select "Integrated Peripherals" and press "Enter" key (Figure 4).
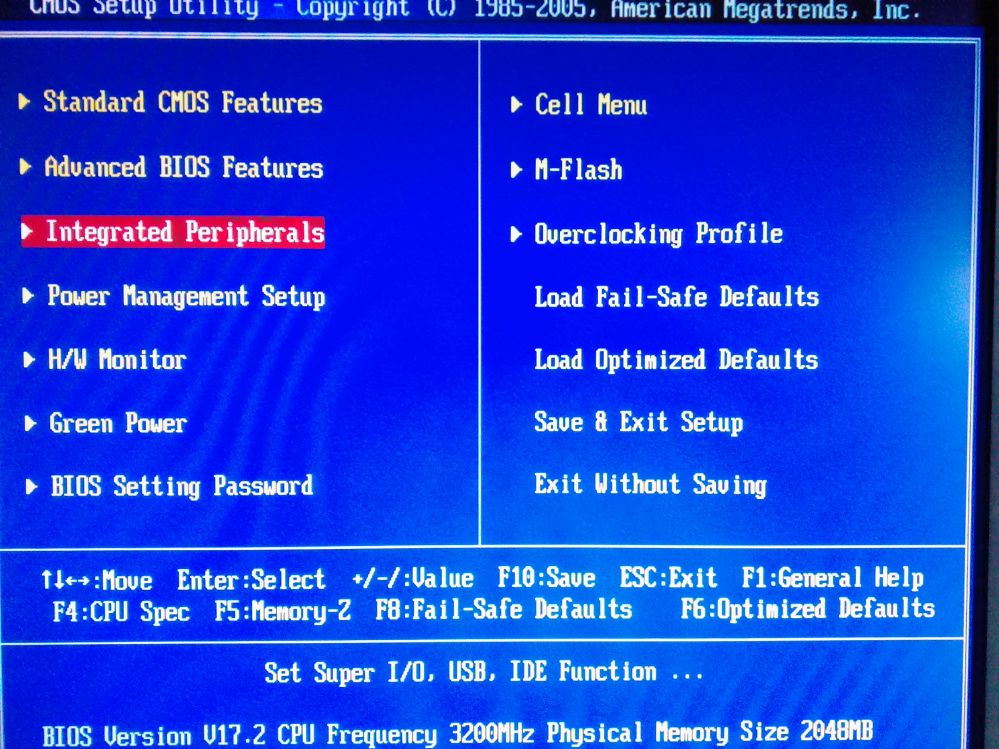
Figure 4
3. Look for “LAN Option ROM” (Figure 5)
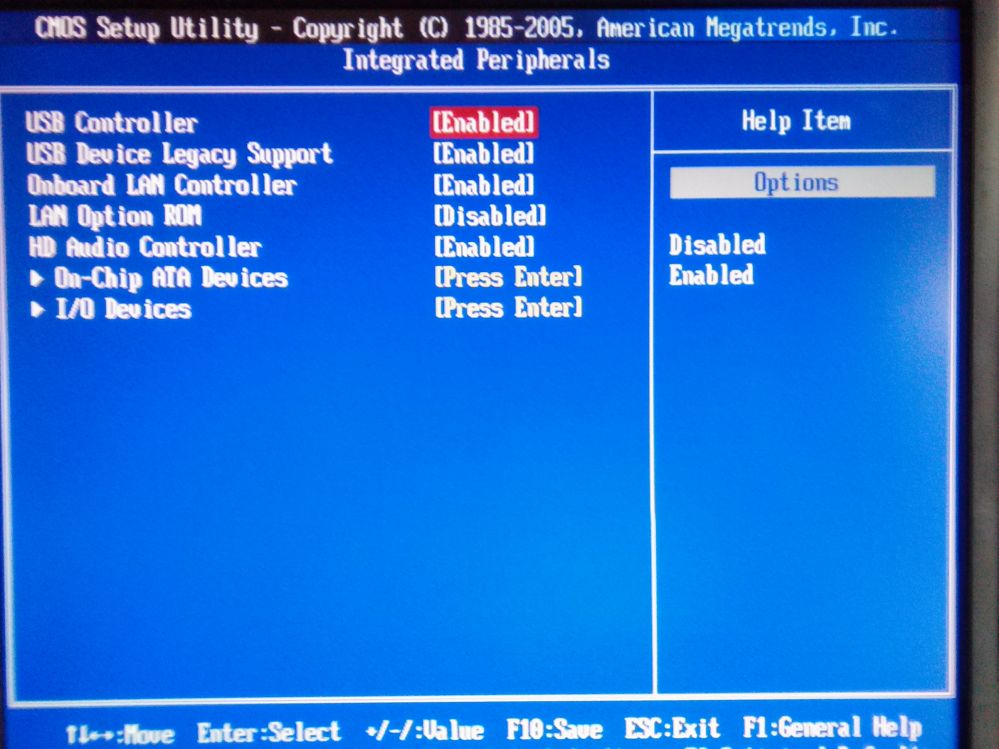
4. Highlight the “Disabled” option beside the “LAN Option ROM” and then change it to “Enabled” (Figure 6)
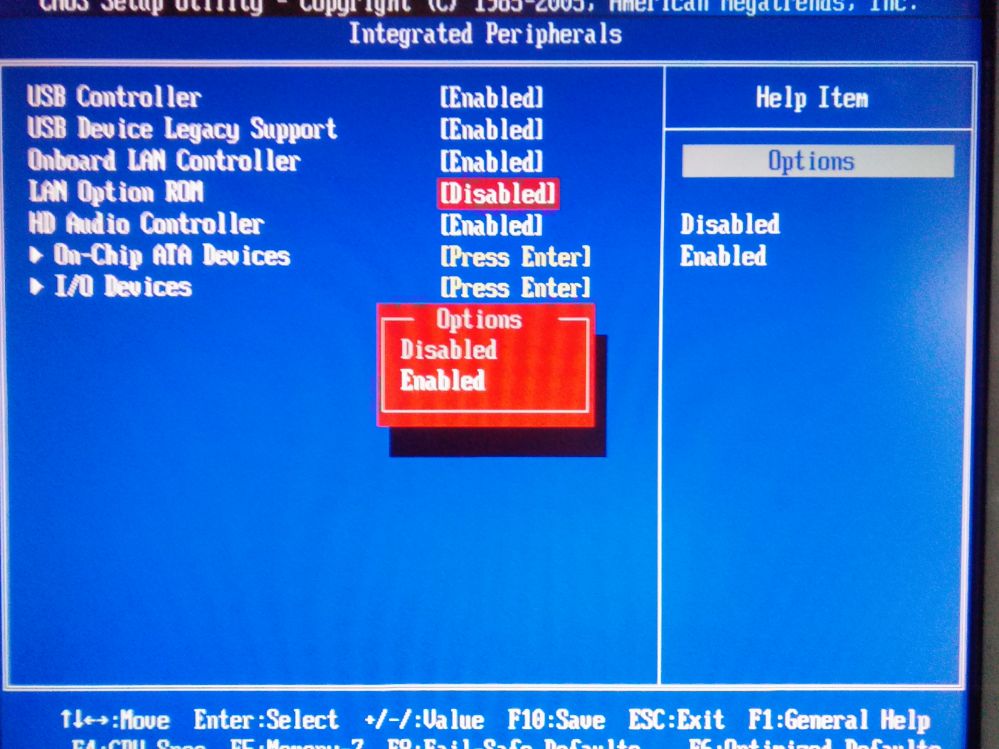
Figure 6
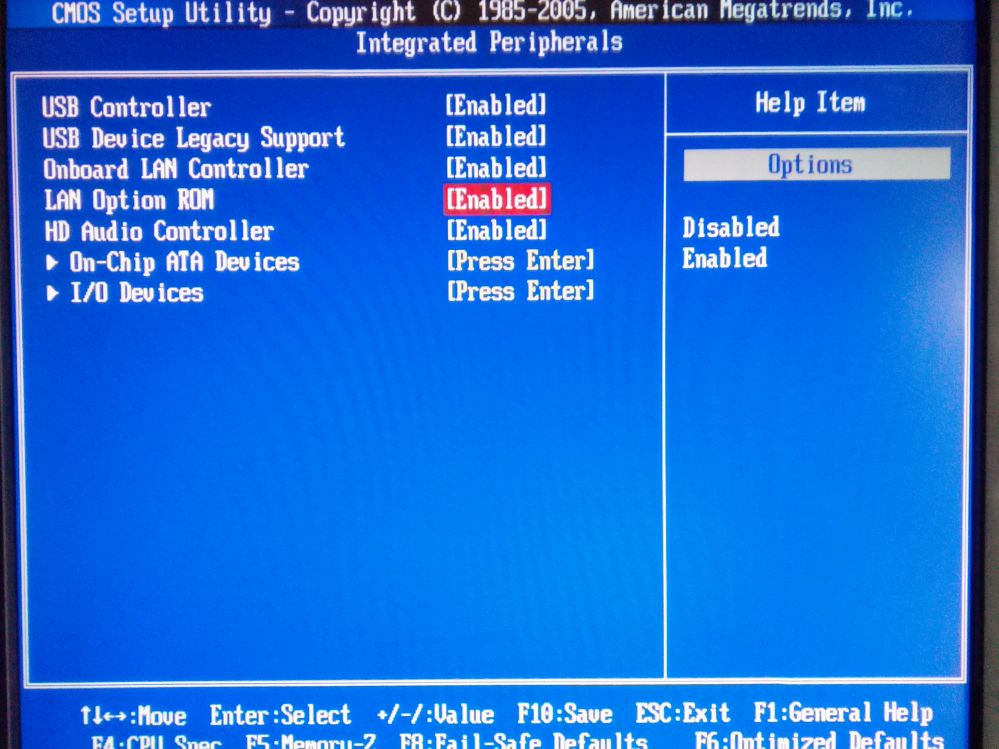
Figure 7
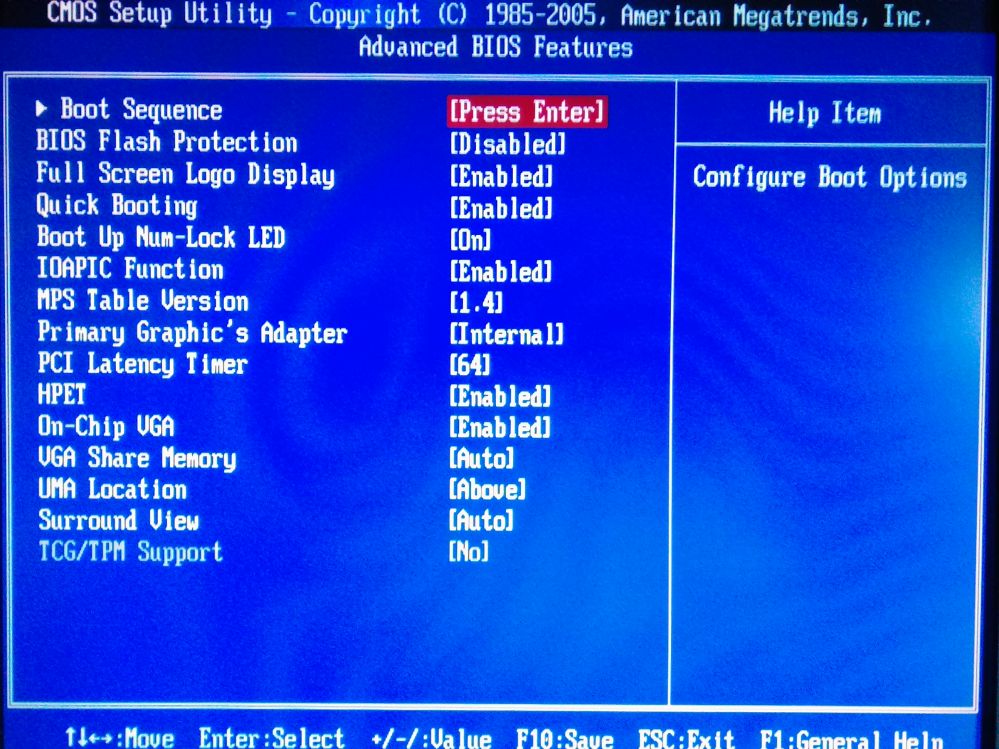
7. Select “Advanced BIOS Features” option and press "Enter" (Figure 8).
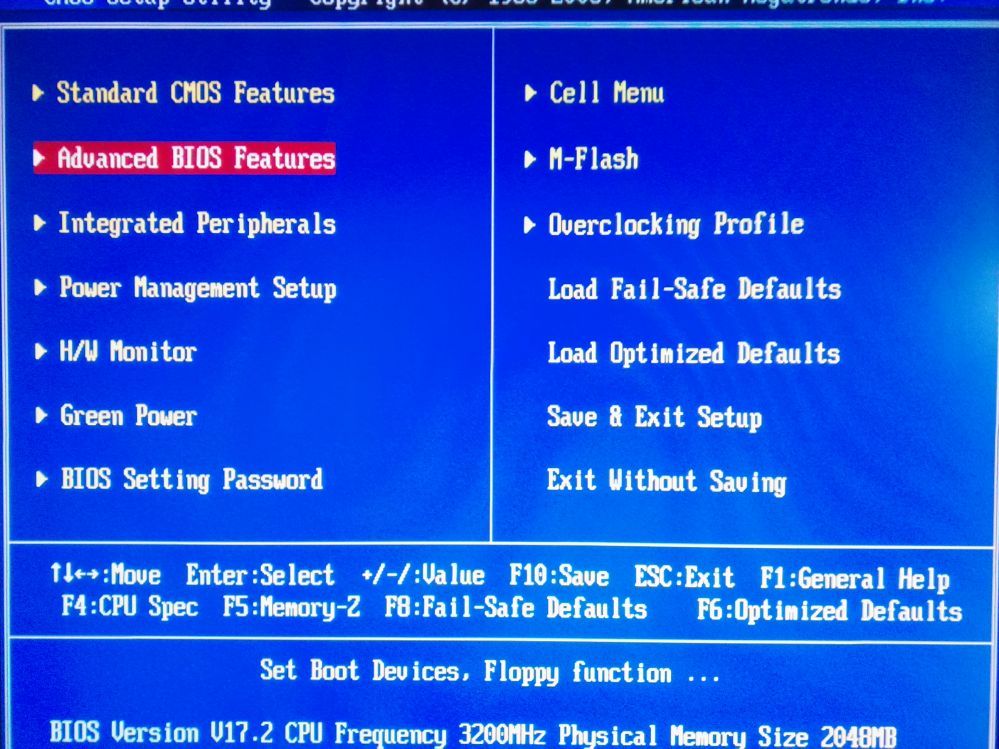
Figure 8
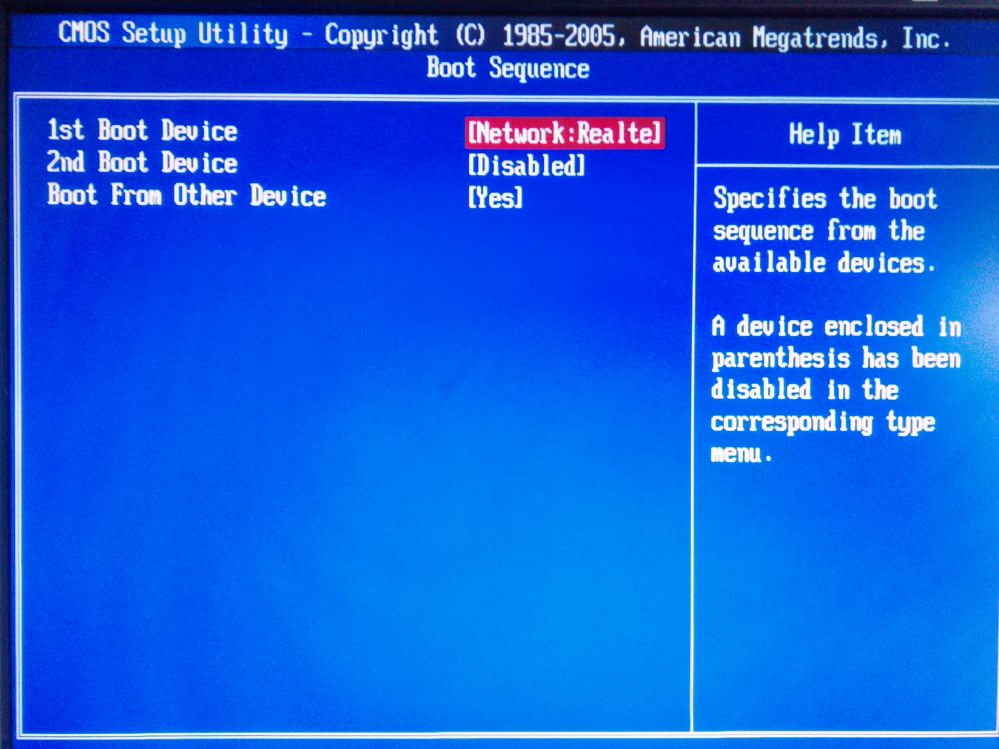
10. Once the above settings are set, save bios settings and reboot the client, it will now boot from CCBoot
