Wiki Home Create Boot Image Create boot image for PCs with UEFI
Create boot image for PCs with UEFI
2020/08/15 00:30
Notice: This wiki is for the old version CCBoot. Please click HERE to access the new version wiki
Recommendation : We recommend to use clean windows ISO, use of image from microsoft site is better because images have modifications on patches made by third-party so they can cause lags and issues in future on diskless PC.
To create fresh a clean copy of Windows 10 for UEFI system, use these steps:
1. Start your device with the USB bootable media.
2. On "Windows Setup," click Next to begin the process (Figure 1).
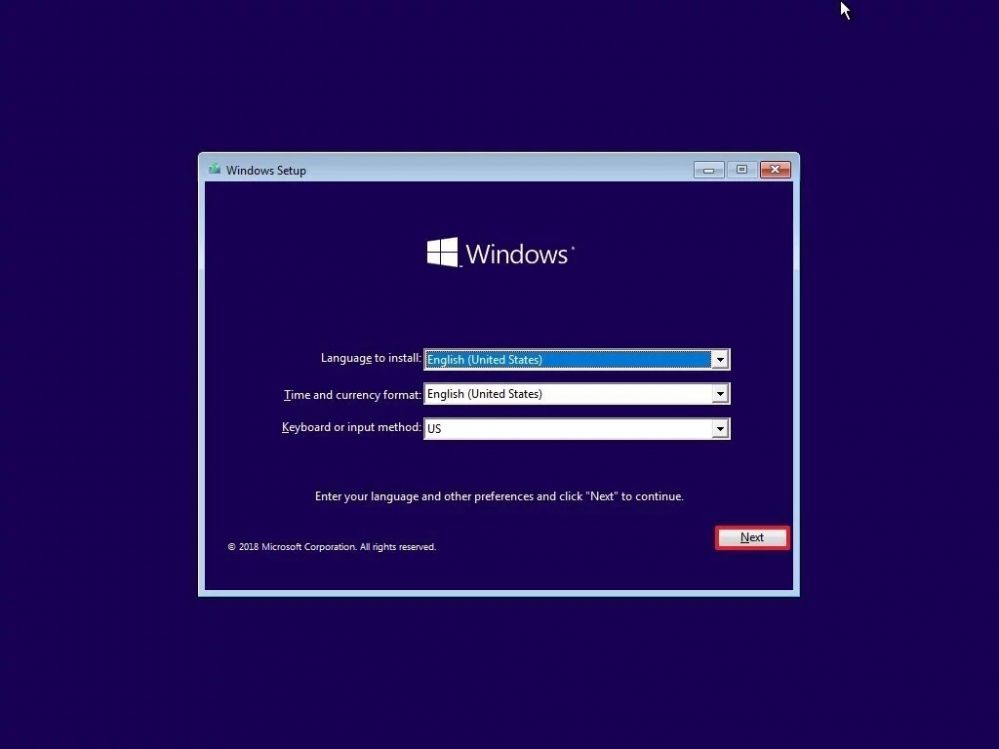
Figure 1
3. Click the Install Now button (Figure 2).
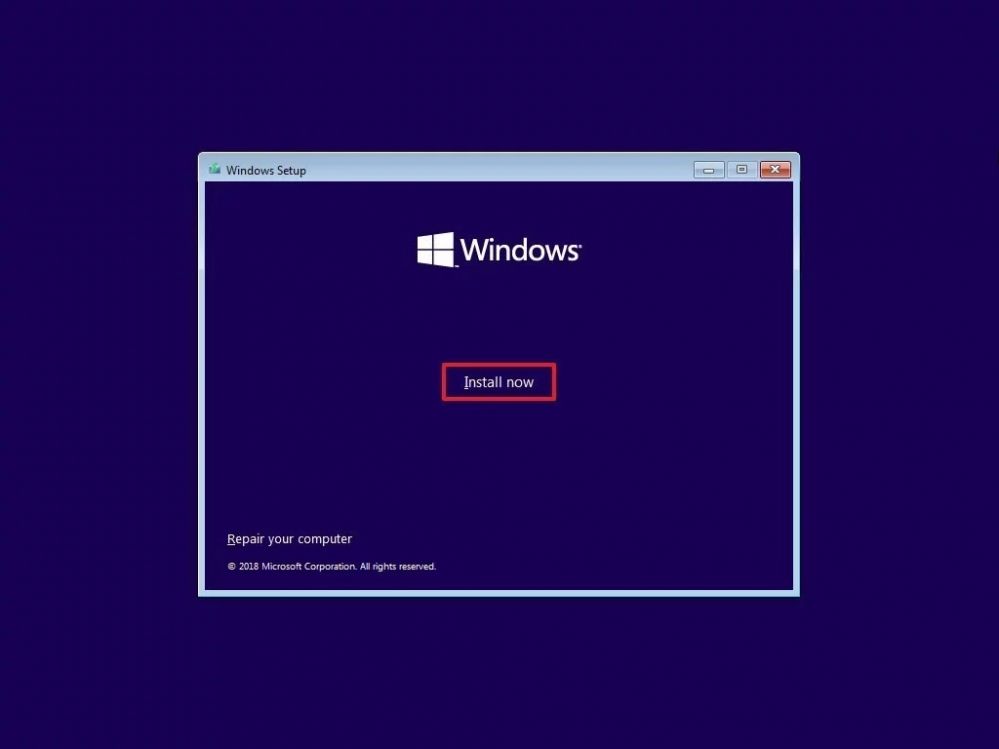
Figure 2
4. Click the I don't have a product key option to continue (Figure 3).
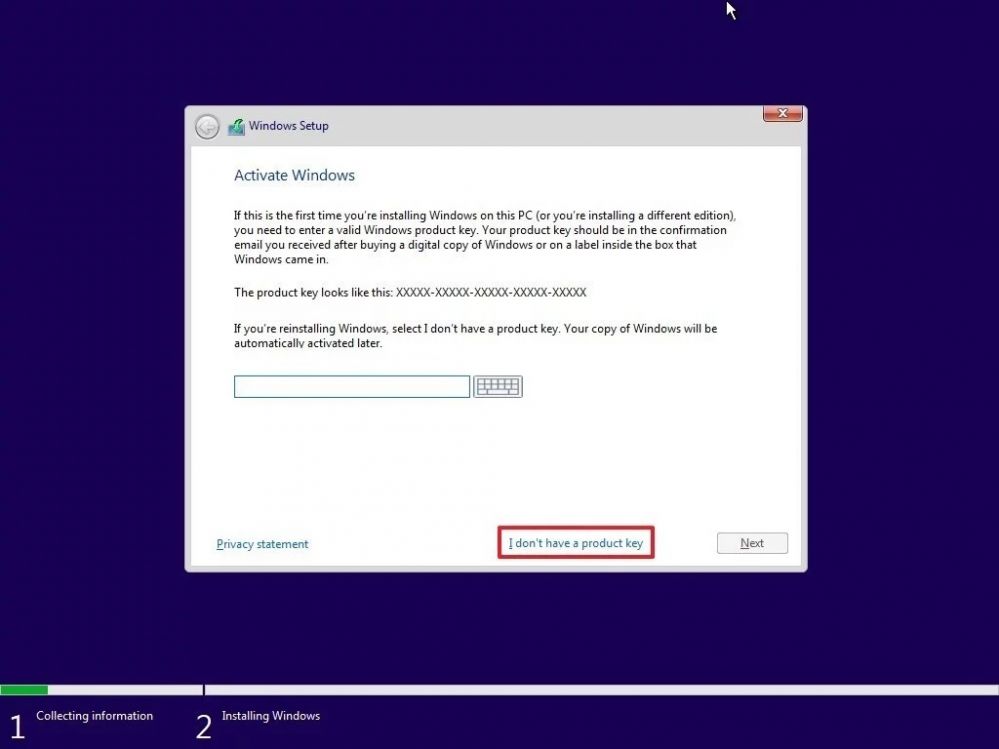
Figure 3
5. Click the Offline account option at the bottom left corner to create a traditional local account (Figure 4).
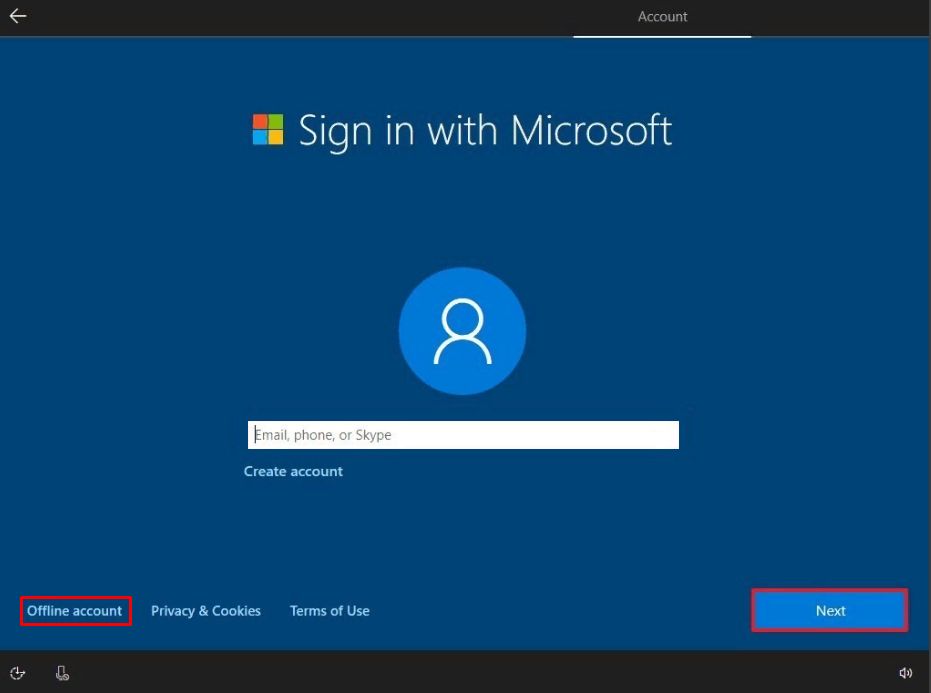
Figure 4
6. Set any name for your user and don't set any password just click "Next' leaving the password field blank.
7. Now set static ip in client side (Figure 5).
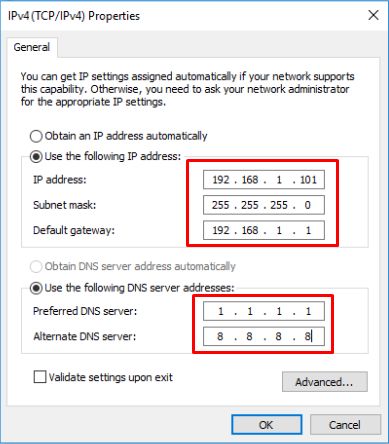
Figure 5
Note: Static ip depend on your network.
8. Enable .Net framework 3.5 (Figure 6,7).
Figure 6
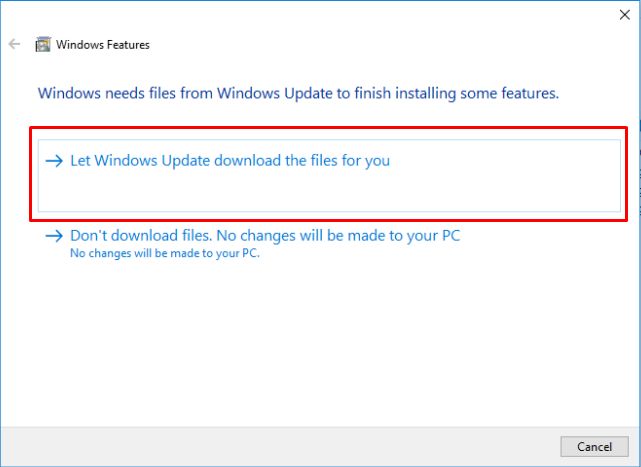
Figure 7
9. Install CCBoot client (Figure 8).
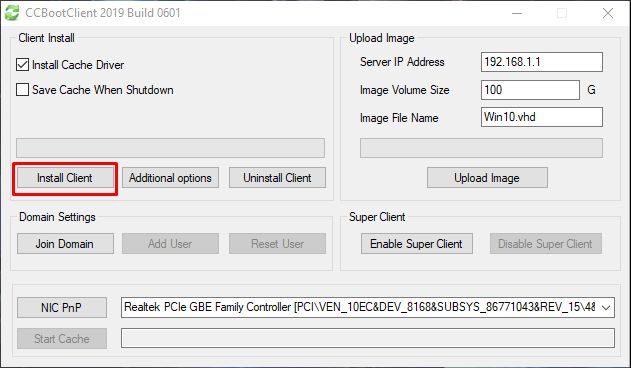
Figure 8
10. Optimize system, refer to wiki: Client Services Optimization.
11. Install latest NIC driver from vendor NIC site and optimize NIC, refer to wiki: Client Network Optimization.
12. Do manual upload image on server by clicking upload image (Figure 9).
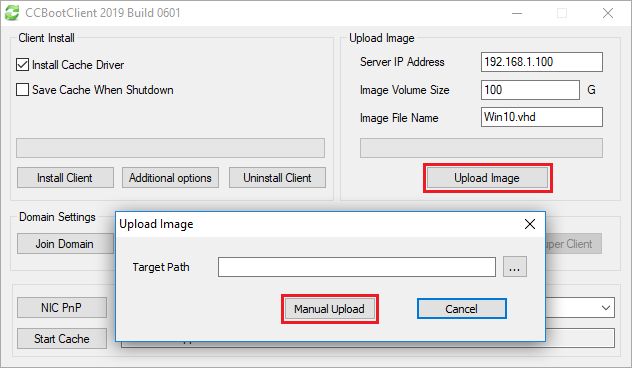
Figure 9
13. Choose all hidden partitions and uncheck "Use vhdx" in this case will be create .vhd image. Then choose the path where the image will be uploaded and press "Create" button (Figure 10).
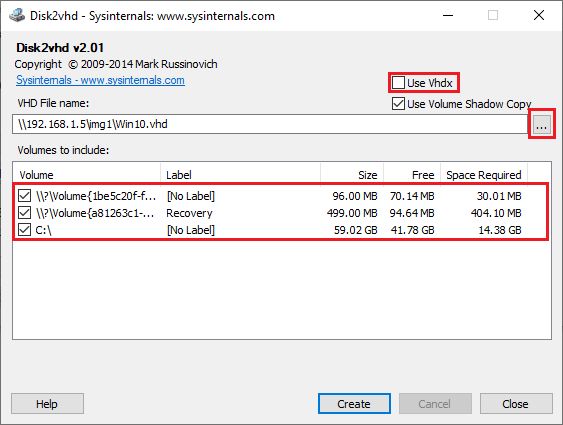
Figure 10
Note: It is better to upload directly on server.
14. Once the image is unloaded, copy the vhd file on image disk and add to CCBoot, refer to wiki: Add boot image.
15. After you assigned image(the UEFI image) to client, choose for PXE - ipxe.efi (Figure 11).
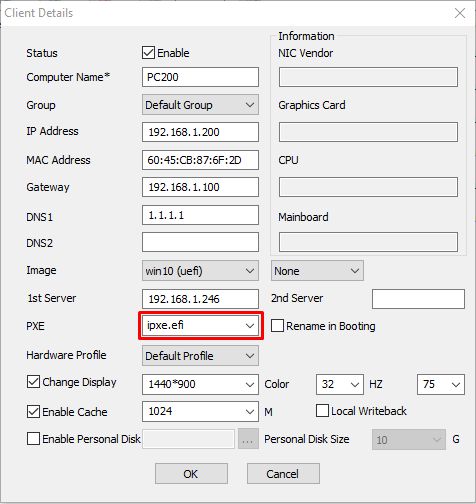
Figure 11
Related:
Standard Method to Create Boot Image for Legacy PCs
