Wiki Home Troubleshoots How to fix Google Chrome black screen issues in Windows 10
How to fix Google Chrome black screen issues in Windows 10
2019/09/20 07:20
Notice: This wiki is for the old version CCBoot. Please click HERE to access the new version wiki
Google Chrome is one of the most popular browsers, but even the best browser can have certain issues. Speaking of issues, here are some problems that users reported:
- Google Chrome black screen Windows 8, 7, after minimize, on startup, crash – According to users, Chrome issues can occur on any version of Windows, and Windows 8 and 7 aren’t exceptions. Almost all of our solutions are compatible with older versions of Windows, so be sure to try them out.
- Google Chrome screen went black – Many users reported that their screen suddenly turns black in Google Chrome. This is a big problem, but you might be able to solve it by disabling problematic extensions.
- Google Chrome new tab black screen – Sometimes this problem can occur when opening a new tab. To fix that, simply disable hardware acceleration and check if that helps.
- Google Chrome black window – This is another variation of this error, but you might be able to fix it by running Chrome in Compatibility mode.
Various users have recently reported a strange issue where the Google Chrome window simply goes black while browsing. Luckily for all those users experiencing this problem, there’s a solution.
Solution 1 – Disable hardware acceleration
The most common workaround for black screen issues in Google Chrome is to disable GPU compositing on all pages. In case you don’t know how to do that, follow these instructions:
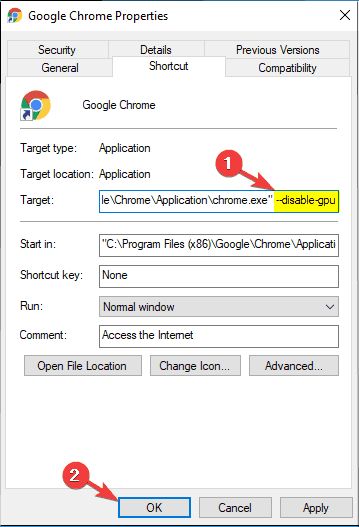
1. Create Google Chrome shortcut on Desktop (in case you don’t have it)
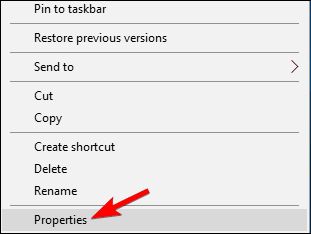
2. Right-click the shortcut, and select Properties.
3. Click on Shortcuts tab.
4. In Target window, add the following text: “[space]–disable-gpu“ (so the path should look like chrome.exe” –disable-gpu”) (Figure 1).

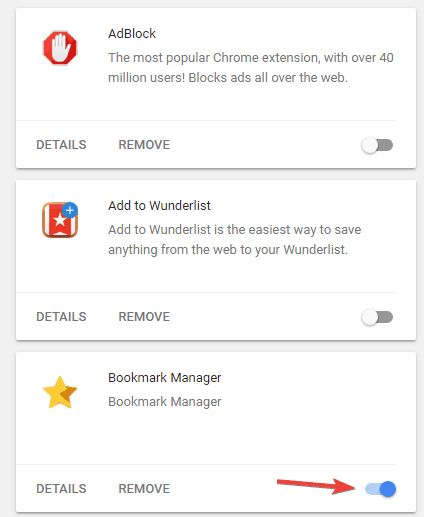
To fix the problem, you need to find and disable the problematic plugin. This is quite simple, and you can do it by following these steps:
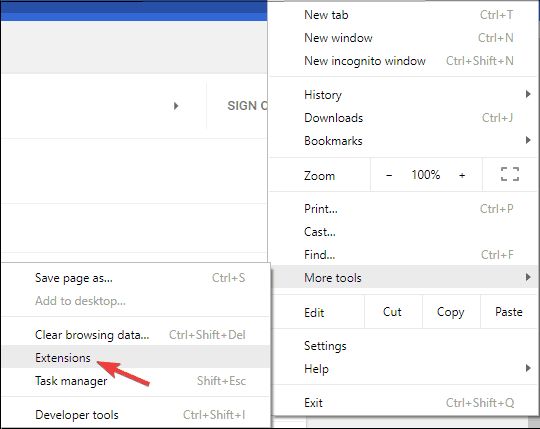
1. Click the Menu icon and choose More tools > Extensions (Figure 3).
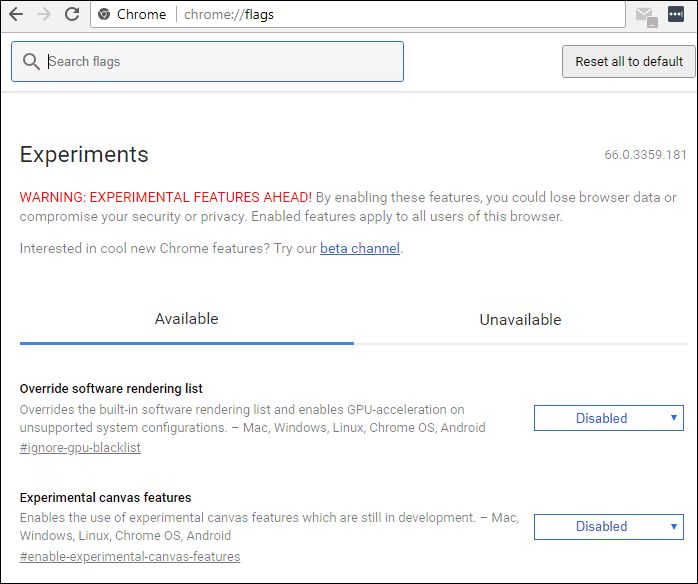
- GPU compositing on all pages
- Threaded compositing
- Do SHOW Presents with GD
1. Locate Chrome shortcut, right-click it and choose Properties from the menu (Figure 6).
Solution 6 – Add -no-sandbox launch parameter
According to users, you might be able to fix the problem simply by adding -no-sandbox parameter to Chrome’s shortcut. In case you don’t know, Google Chrome uses a Sandbox mode in order to separate its processes
This means that even if your browser encounters malware, the malware will be contained thanks to the Sandbox mode.
As you can see, Sandbox mode is a useful security feature, but sometimes it can cause black screen issues in Google Chrome. To fix the problem, some users are suggesting to disable Sandbox mode, and to do that, you need to follow these steps:
1. Right-click Chrome’s shortcut. Choose Properties from the menu.
2. Navigate to the Shortcut tab and in the Target field add –no-sandbox at the end. Now click Apply and OK to save changes (Figure 8).
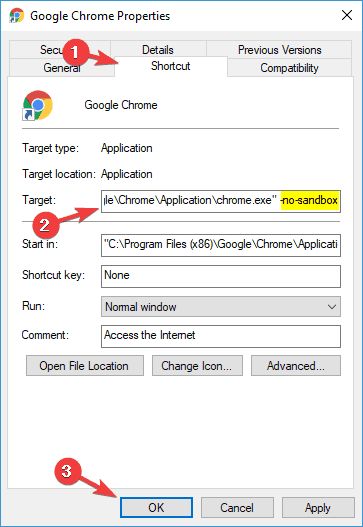
Figure 8
Solution 7 – Reset Google Chrome
If you’re having problems with the black screen in Chrome, you might be able to solve the problem simply by resetting Chrome to default. By doing that you’ll reset all its settings and remove all extensions.
Keep in mind that this will remove all your bookmarks and history, so be sure to enable syncing or export your data. You can do that easily and efficiently with these tools.
To reset Google Chrome, you need to do the following:
1. Click the Menu icon in Chrome and choose Settings from the menu (Figure 9).
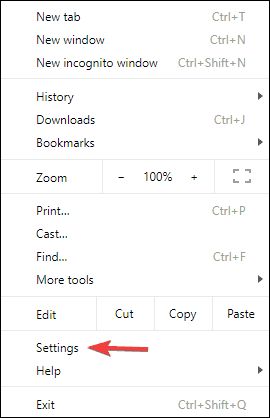
Figure 9
2. When Settings tab opens, scroll all the way down and click Advanced (Figure 10).
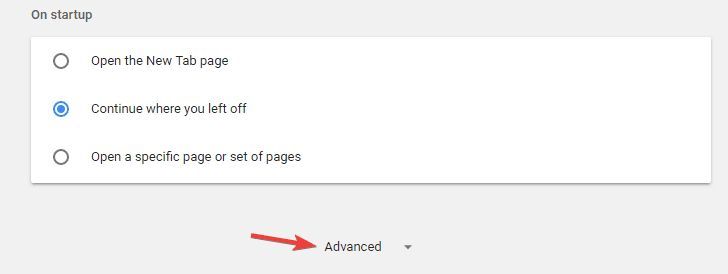
Figure 10
3. Navigate to Reset and clean up section and click Reset settings (Figure 11).

Figure 11
4. Click the Reset button to confirm (Figure 12).
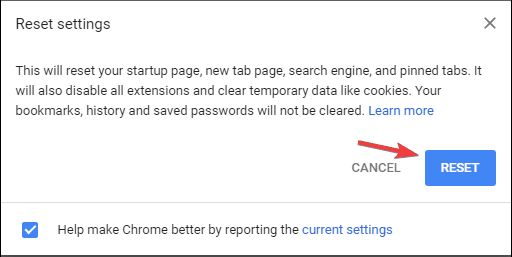
Figure 12
Wait for few minutes while Chrome resets to default. Now check if the problem is still there.
Solution 8 – Reinstall Chrome
According to users, sometimes in order to fix this problem you need to reinstall Chrome completely. Reinstalling Chrome might remove all your bookmarks and history, so you should export them or enable syncing.
There are several ways to uninstall Chrome, but the best one is to use uninstaller software. In case you’re not familiar, uninstaller software is a special application that will remove the selected application along with all of its files and registry entries.
There are many great uninstaller applications, but one of the best is IOBit Uninstaller, so be sure to try it out. Once you remove Chrome with this tool, install it again and check if the problem is resolved.
In addition, you can also try using Beta or Canary version of Chrome. These are experimental versions, but they offer the latest bug fixes, so using them might be a good temporary solution.
Solution 9 - Set Compatibility
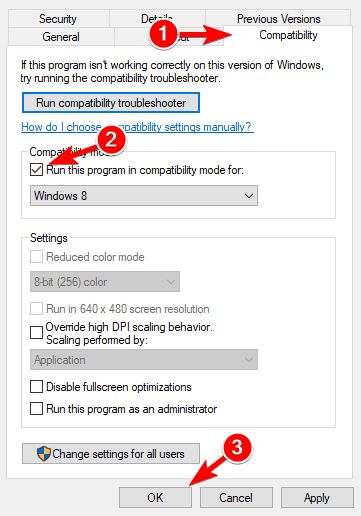
1. Go to "Properties" of chrome and select "Compatibility" tab.
2. Check on "Run this program in compatibility mode for: " and select "Windows Vista (Service Pack 2)" (Figure 13).
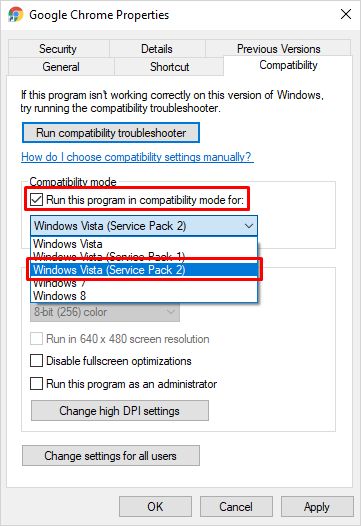
3. Click on "Apply" button.
