Wiki Home Cafe Billing Issues Handycafe billing works on CCBoot
Handycafe billing works on CCBoot
2018/07/24 23:21
Notice: This wiki is for the old version CCBoot. Please click HERE to access the new version wiki
Handycafe billing works on CCboot
First download Handycafe billing then install it on your server
1.Open handycafe.exe follow the image below. Click “next” button (Figure 1).

Figure 1
2. Check the checkbox then click “next” button (Figure 2)

Figure 2
3. Select handycafe server click “next” button (Figure 3)

Figure 3
4. Now click “next” button (Figure 4)

Figure 4
5. Click “install” button (Figure 5)
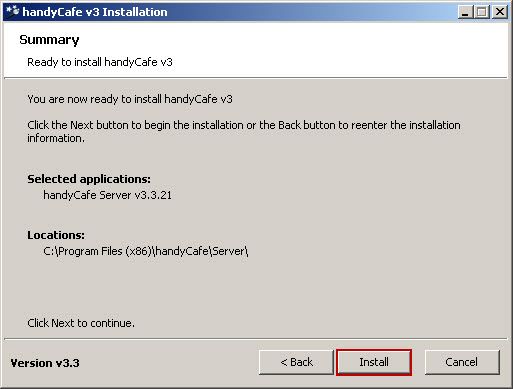
Figure 5
6. After installation complete, Check the check box then click “finish” button (Figure 6).
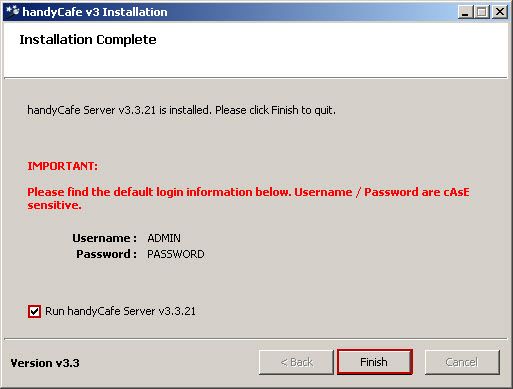
Figure 6
7.Login handycafe default “username - ADMIN password is PASSWORD (Figure 7).
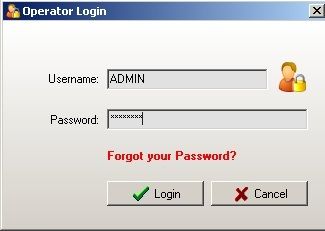
Figure 7
8.Choose your language click “OK” button” (Figure 8)
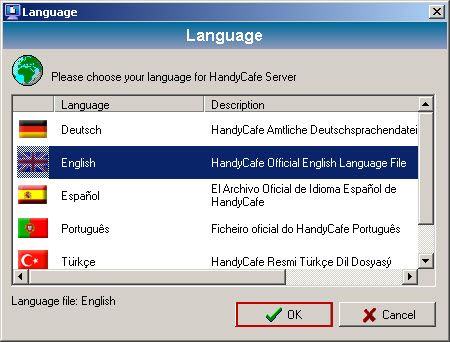
Figure 8
9.Type in your registration license, if you do not have license just register to their website. Once you’re registered put the product key and serial number click “register” button (Figure 9).
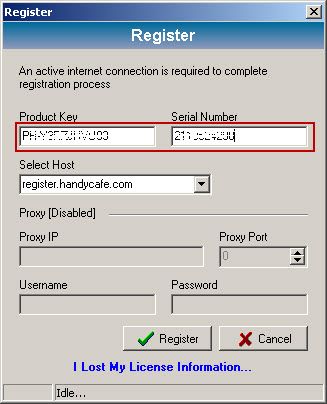
Figure 9
10. Click “tools” button then click “option” (Figure 10).
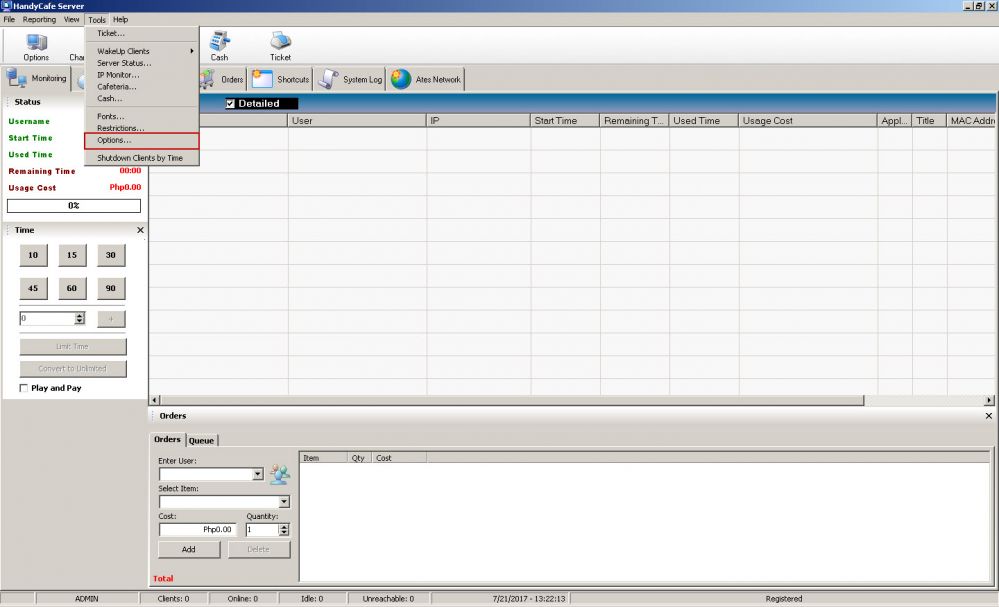
Figure 10
11. If you have multiple lan just choose your preferred lan ip network, Now click network select your server ip click “ok” button (Figure 11).
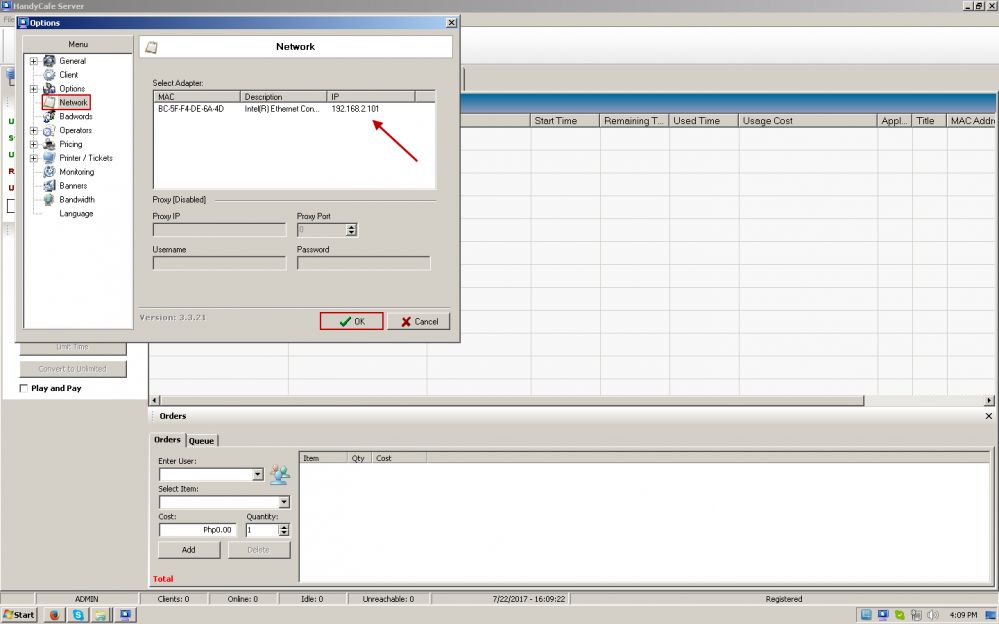
Figure 11
Handycafe client installation
1.Open handycafe.exe follow the image below (Figure 12).
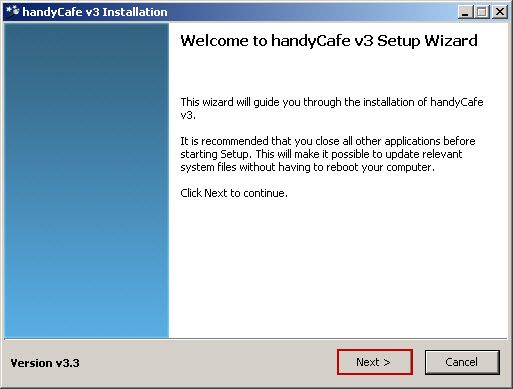
Figure 12
2.Check the check box and click “next” button (Figure 13).
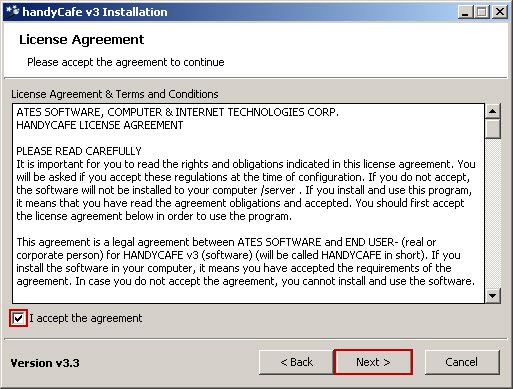
Figure 13
3.Choose your destination folder or leave it default click “next” button (Figure 14).
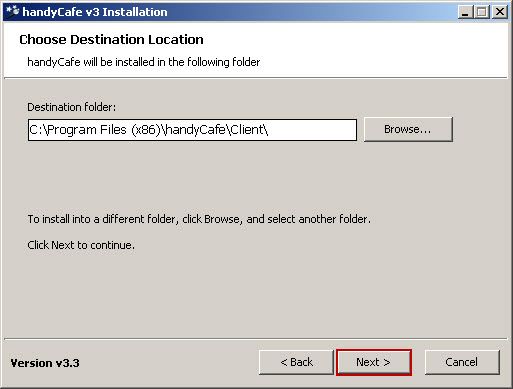
Figure 14
4.Now, proceed to installation click “install” button (Figure 15).
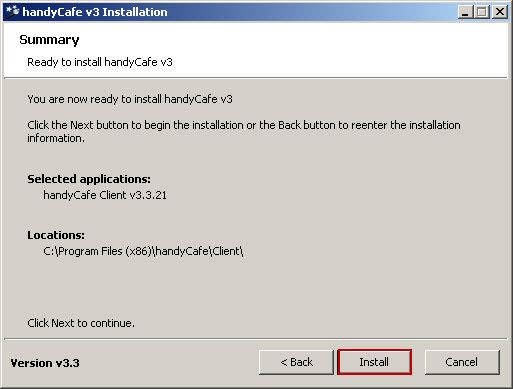
Figure 15
5.After installation complete, check then click “finish” button (Figure 16).
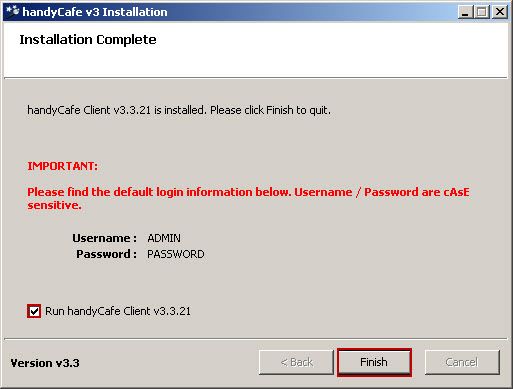
Figure 16
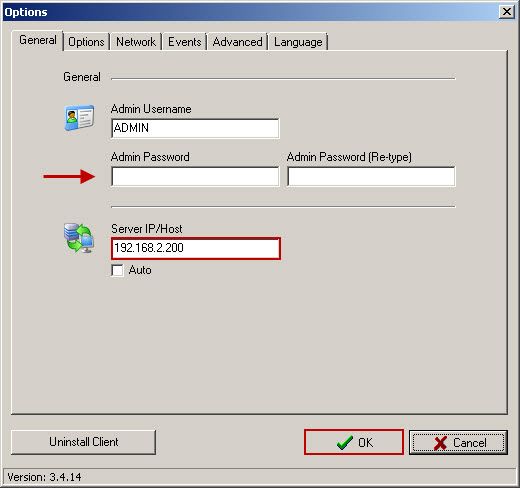
6.Login the handycafe client default user and password “ ADMIN, PASSWORD” click “option” button (Figure 17).
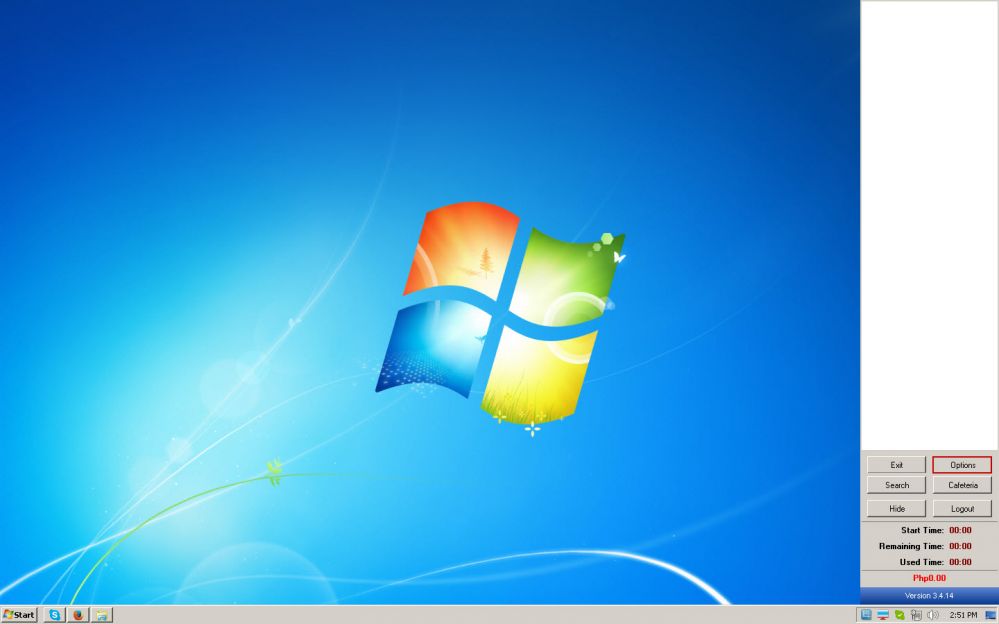
Figure 17
7.Set your server IP or check auto detect click “ok” button. Once done restart your client (Figure 18).
