Wiki Home Troubleshoots Steps of Removing NIC Drivers
Steps of Removing NIC Drivers
2016/05/13 13:02
Notice: This wiki is for the old version CCBoot. Please click HERE to access the new version wiki
We take removing "NVIDIA nForce Networking Controller" and "3Com 3C2000-t Gigabit Adapter" NIC driver as an example.
1) On the CCBoot server, enable super client for a PC (such as PC101).
2) Diskless boot PC101.
3) Run the "CCBootClient" program.
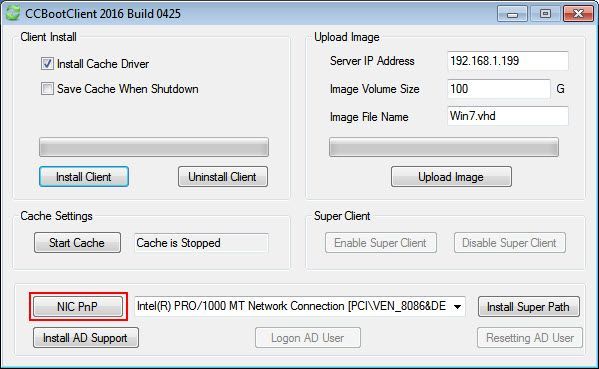
4) In the "CCBootClient" dialog box, click the "NIC PnP" button (Figure 1-1).

Figure 1-1
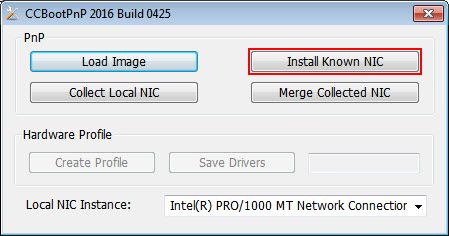
5) In the pop up "CCBootPnP" dialog box, click the "Install Known NIC" button (Figure 1-2).

Figure 1-2
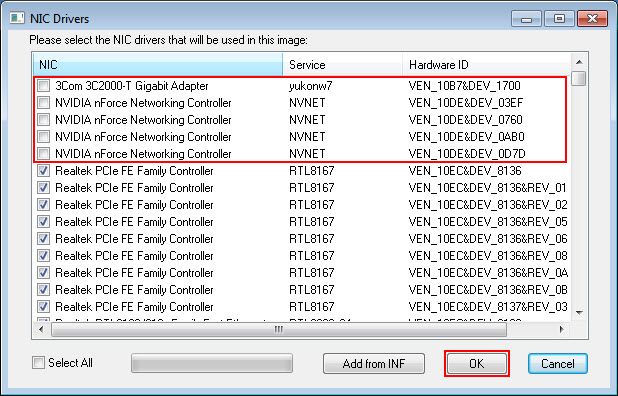
6) In the pop up "NIC Drivers" dialog box, uncheck the check boxes of the NIC you want to remove, and then click the "OK" button (Figure 1-3).

Figure 1-3
7) Shutdown PC101.
8) On the CCBoot server, disable supper client.
Related:
Realtek NIC Problem in Win7 x64
