Wiki Home Quick Start Install CCBoot client
Install CCBoot client
2019/09/30 08:18
Notice: This wiki is for the old version CCBoot. Please click HERE to access the new version wiki
Before installation of CCBoot client:
1. Download and Install Microsoft Visual C++ 2015 Redistributable Update 3 RC (x86 and x64 versions).
2.If ip is dynamic, set static ip in image.
Why to set?
a) If gateway is set in image, it always use that gateway.
b) If gateway is not set in image, the client will use the gateway settings from CCBoot server and set gateway by dynamic route.
How to set?
1. Open Network and Internet setting, click on "Change Adapter Option".
2. Go to properties of network you use.
3. Once properties window is opened. Select IPV4 and go to properties (Figure 1).
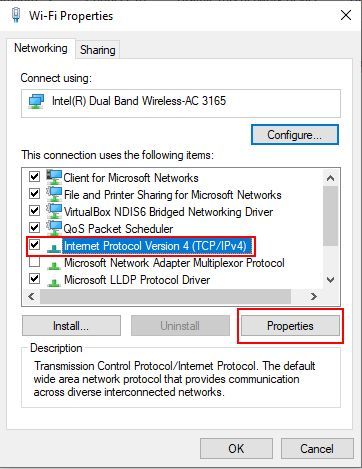
Figure 1
4. Now set static ip, and gateway and click on "OK" button (Figure 2).
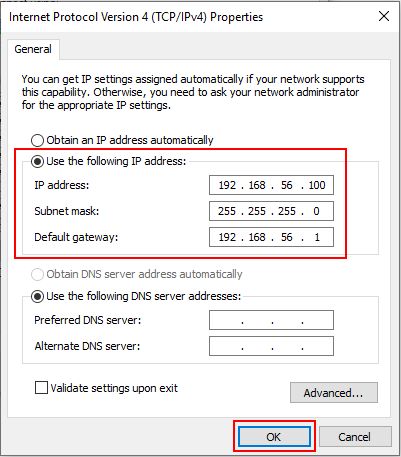
Figure 2
Now follow the steps below to install CCBoot client:
1. Open setup file, select “CCBoot Client installation” and click on “Next” button (Figure 3).
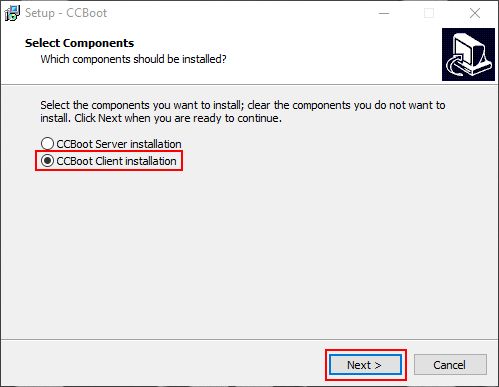
Figure 3
2. Select start menu folder and click on “Next” button (Figure 4).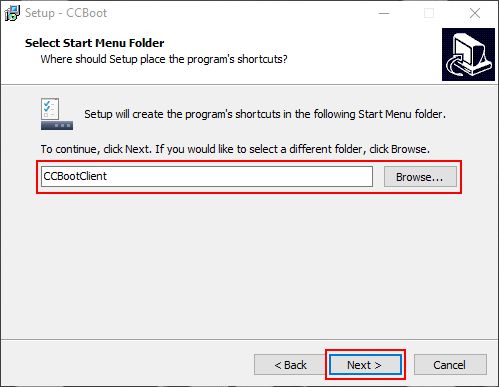
4. Check launch to launch and click on “Finish” button (Figure 6).
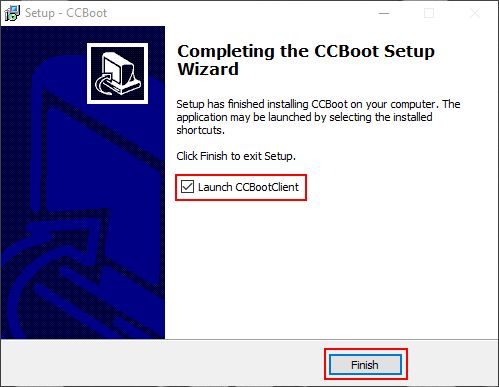
Figure 6
5. Once "Finish" button is clicked. Disable UAC and click on "OK" button (Figure 7).
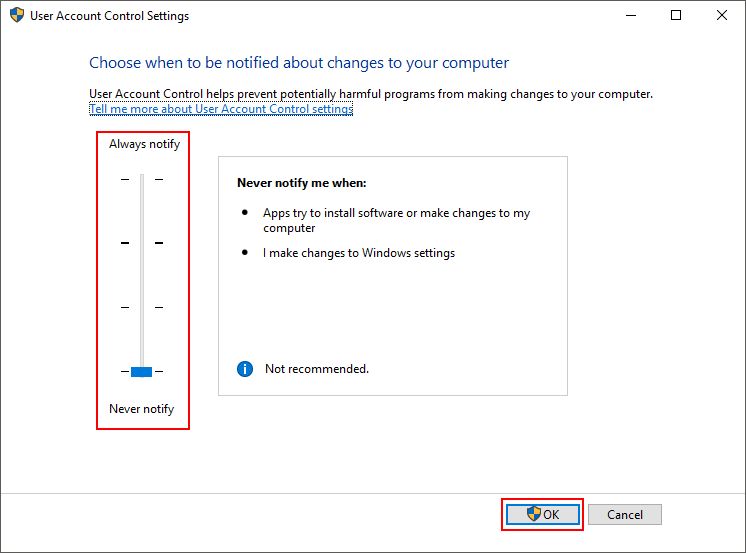
Figure 7
6. Once UAC is disabled, select NIC from dropdown and click on "OK" button (Figure 8).
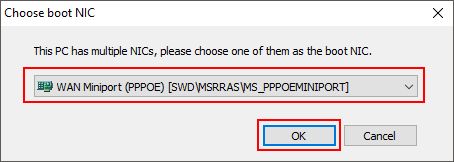
Figure 8
Note:
if your ip is dynamic, then the window below pop up and stop installation (Figure 9).
so set static ip before installation as mention above and start installation again.
Figure 9
7. Once NIC is choosed, select NIC drivers and click on "OK" button (Figure 10).
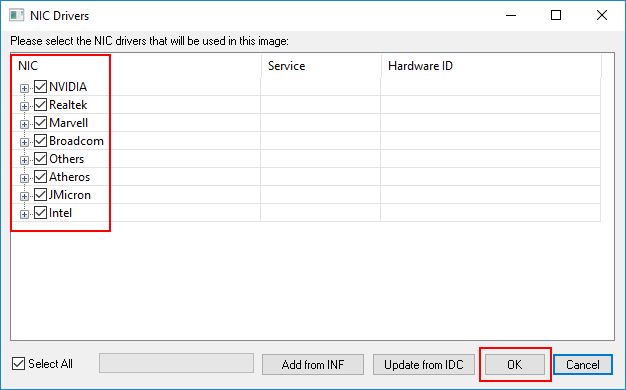
Figure 10
8. Once NIC drivers are selected, you need to reboot your PC (Figure 11),
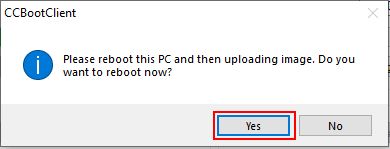
Figure 11
9. After the installation is completed, UI of the ccboot client (Figure 12).
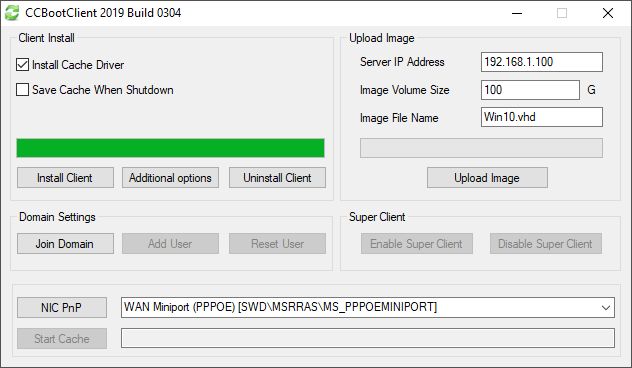
Figure 12
Now you can upload image. To upload image, refer to Upload Windows 10 Image.
Related:
Use Net Limiter on CCBoot client
Fix Windows 10 activation issue on CCBoot client
