Wiki Home Disk Manager Mount and Unmount Images
Mount and Unmount Images
2017/05/29 22:32
Notice: This wiki is for the old version CCBoot. Please click HERE to access the new version wiki
In CCBoot version 20160425 we added a new function to allow users to mount the image directly from CCBoot interface.
Note: this function only support "VHD" format and doesnot support mounting of other virtual disk formats
1.1 Image Mounting
1) Click on the Image Manager node then right click the image you want to mount and choose “Mount Image” from the menu (see Figure 1-1).
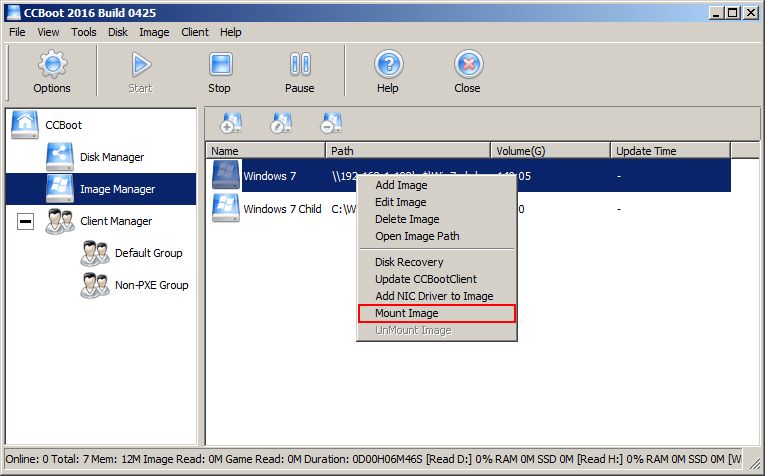
Figure 1‑1
2) You will be asked if you want to mount the image, click “Yes” to confirm (see Figure 1-2).
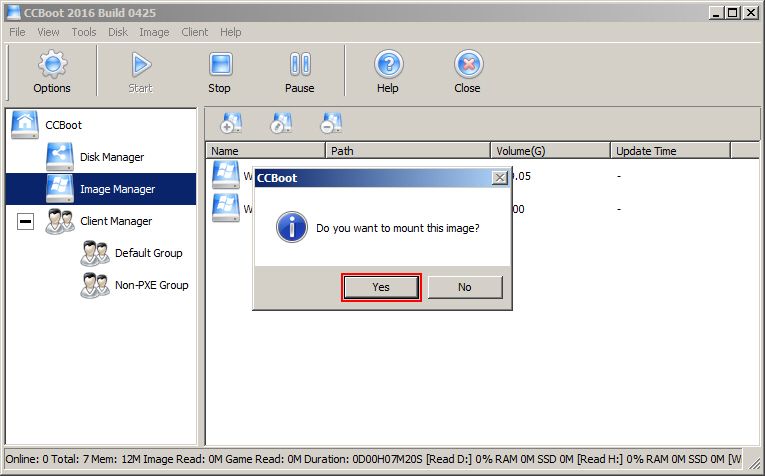
Figure 1‑2
3) If the image is mounted successfully then a prompt box will display. Click OK to close the prompt (as on Figure 1-3).
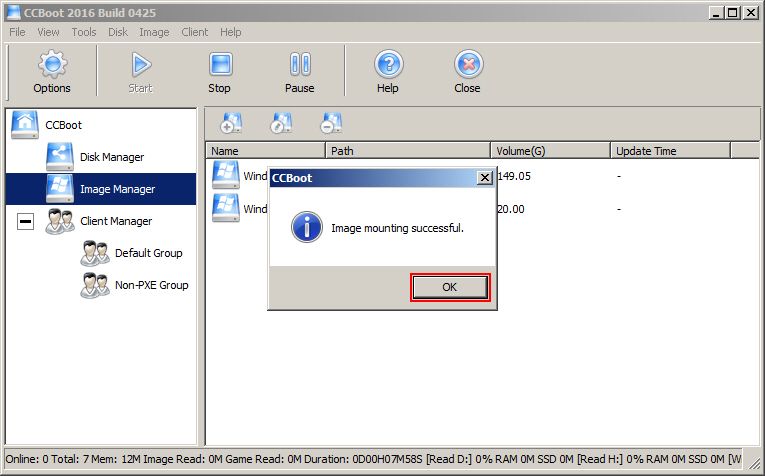
Figure 1‑3
4) Once mounted the icon of the image changes from Blue to Yellow (as seen on Figure 1-4).
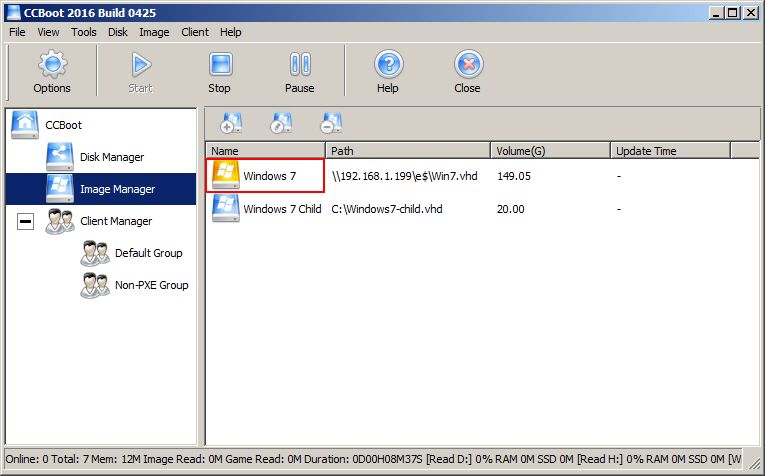
Figure 1‑4
5) Few things you need to keep in mind.
a. Once the image has been mounted you won’t be able to superclient any client with that image assigned, you will see a prompt telling you the image is mounted, unmount the image before making superclient (see Figure 1-5).
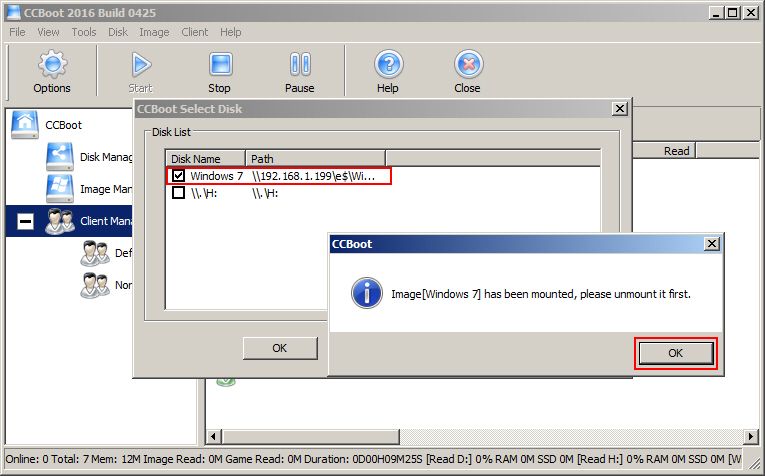
Figure 1‑5
b. Once the image has been mounted and you try to close CCBoot UI, a prompt will open and will ask if you want to save the changes (see Figure 1-6).
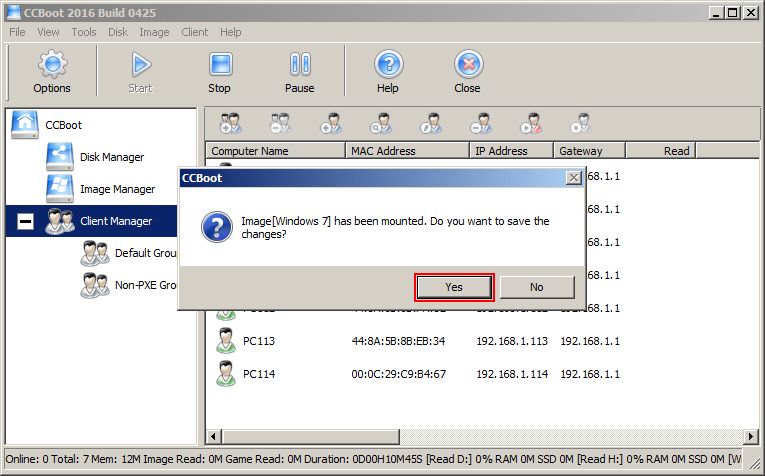
Figure 1‑6
c. Here a client is superclient with ‘Windows 7’ image (see Figure 1-7)
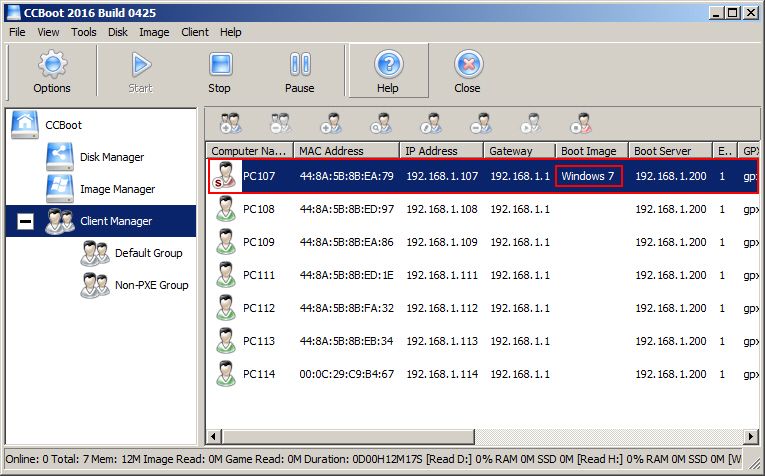
Figure 1‑7
d. Now, if you try to mount the same image, the option “Mount Image” will be disabled (see Figure 1-8).
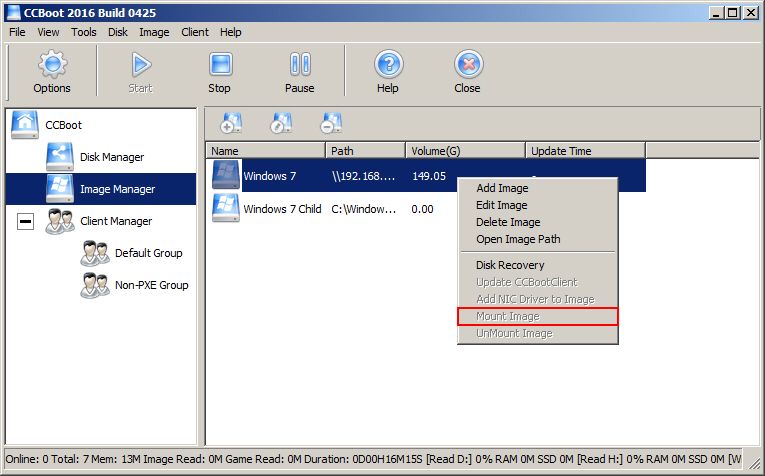
Figure 1‑8
6) Click “Yes” to save changes and “No” to defer from saving on step 5 (b).
7) Now, if you want to add files or delete files from the image or clone it, you can. Once your work is done with the image you can un-mount it.
1.2 Image Unmounting
After your changes have been made then you need to unmount your image to save the changes or not save the changes depending on your requirement.
1) To unmount the image, right click on the mounted image, and choose “UnMount Image” from the menu (see Figure 1-9).
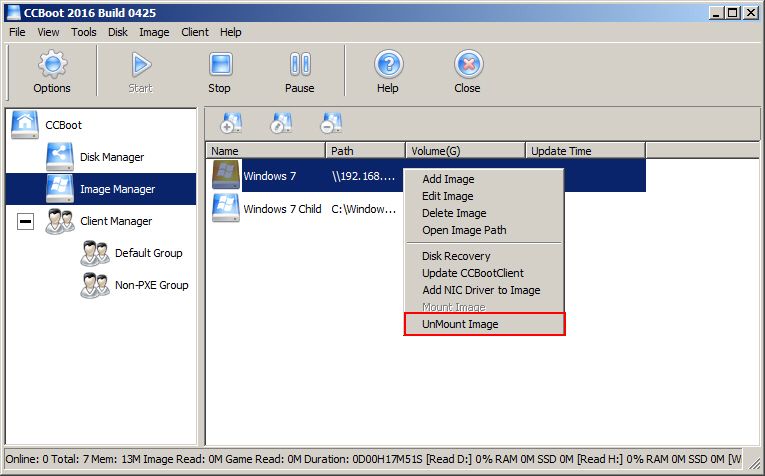
Figure 1‑9
2) You will be asked if you want to unmount the image, click “Yes” to confirm (see Figure 1-10).
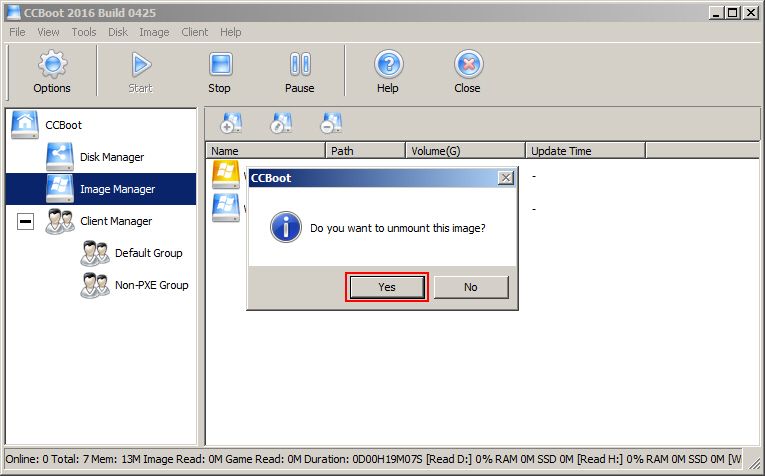
Figure 1‑10
3) Now, another prompt will open, asking you, if you want to save the changes you have made to the image, If you have made changes and want to save them click “Yes” button on the prompt (see Figure 1-11).
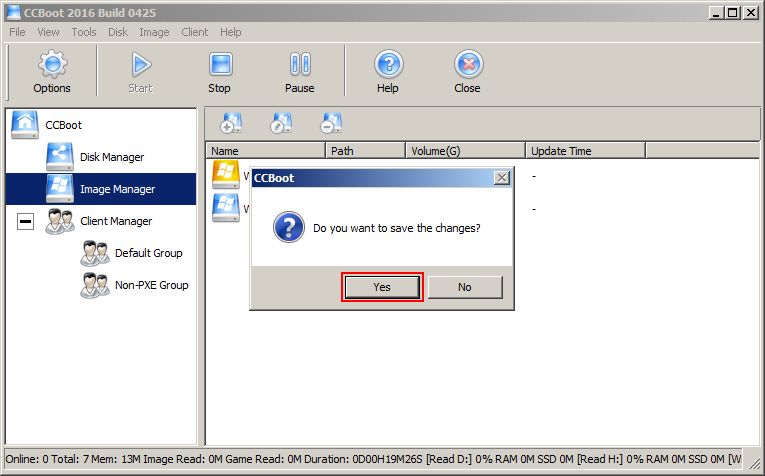
Figure 1‑11
4) If you don’t want to save the changes the click “No” on above prompt.
5) If you clicked “Yes” then CCBoot will save the changes and then unmount the image. Once the image is unmounted successfully,then a prompt box will display. Click OK to close the prompt (see Figure 1-12).
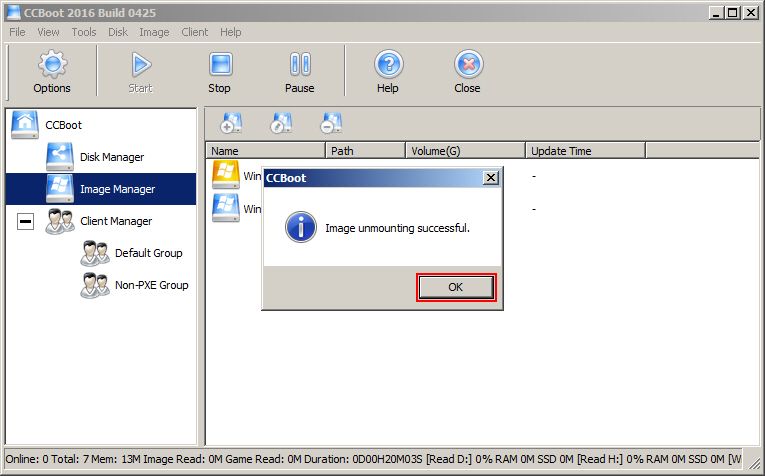
Figure 1‑12
6) If you save the changes to the image, it will create a recovery image for the image with description “Mount Image” (see Figure 1-13).
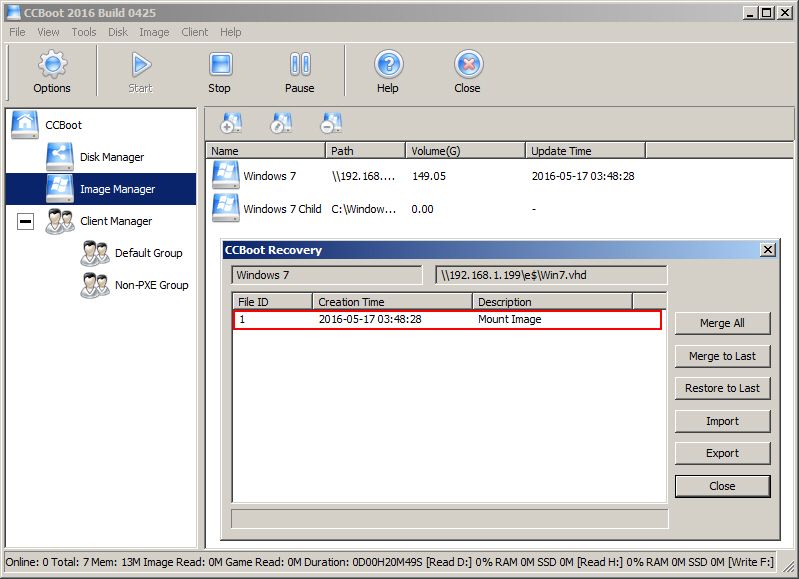
Figure 1‑13
7) You can merge the recovery point or restore it depending on you requirement.
Note: if for some reason you are unable to mount the image using the mount function. Then try using the "Disk Management" of windows to mount the image.
You should be able to mount the image, if you still have mount the image then please make sure the image is proper and booting.
Related:
Using super image to boot clients
Create Client Image with Dual NICs
Create windows bootable USB drive to create client image
