Wiki Home Troubleshoots Working with Outlook in CCBoot client
Working with Outlook in CCBoot client
2016/12/17 20:39
Notice: This wiki is for the old version CCBoot. Please click HERE to access the new version wiki
Here, I assume, you have already installed Outlook in your client image.
1. Enable "Personal Disk" for the client (Figure 1).
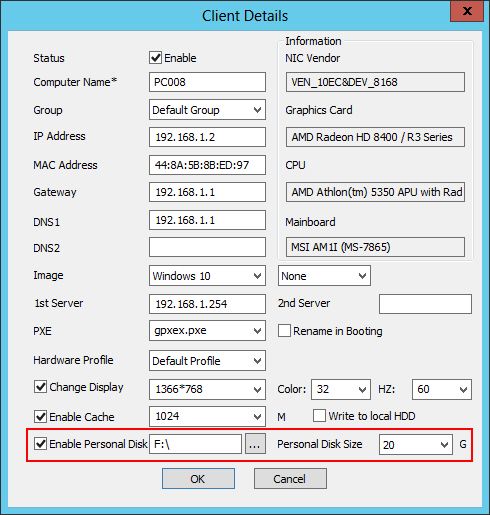
Figure 1
2. Enable Superclient and boot the client to the desktop (Figure 2).
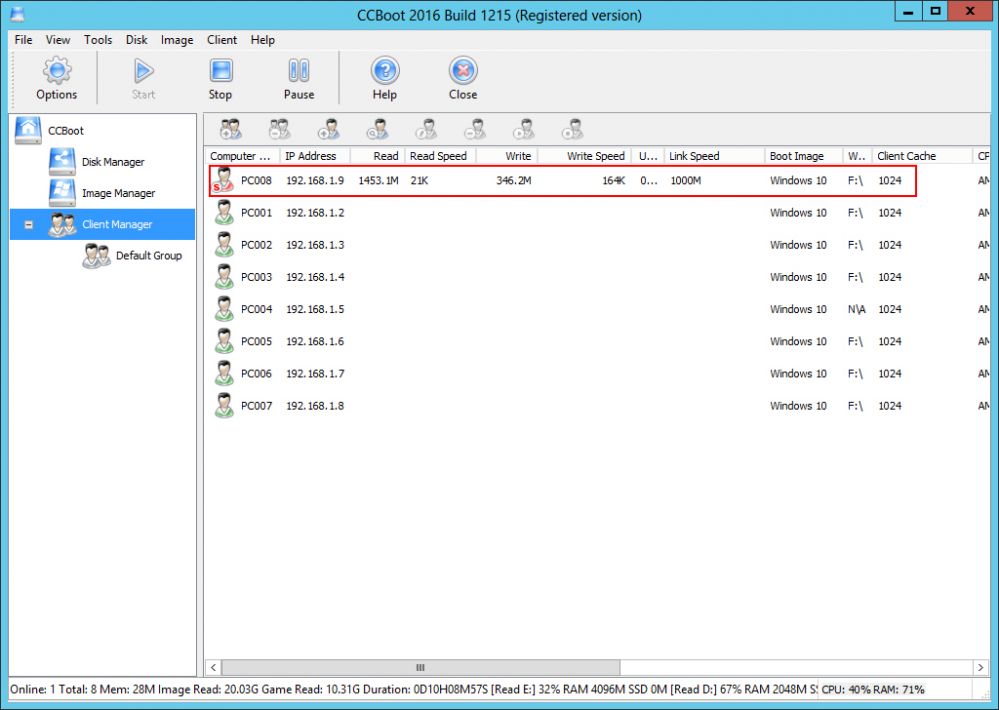
Figure 2
3. Now, open Registry Editor.
4. Locate and then select the following registry subkey:
- HKEY_CURRENT_USER\Software\Microsoft\Office\xx.0\Outlook
Note The xx.0 placeholder represents your version of Office (16.0 = Office 2016, 15.0 = Office 2013).
- Right-click Outlook, select New, and then click Expandable String Value (Figure 3).
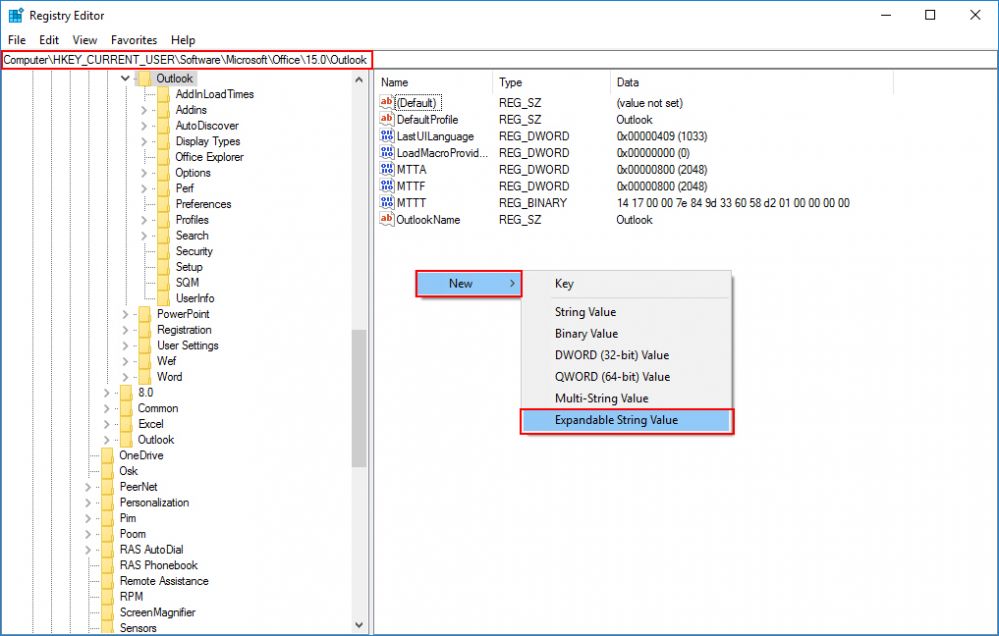
Figure 3
- Type ForceOSTPath, and then press Enter.
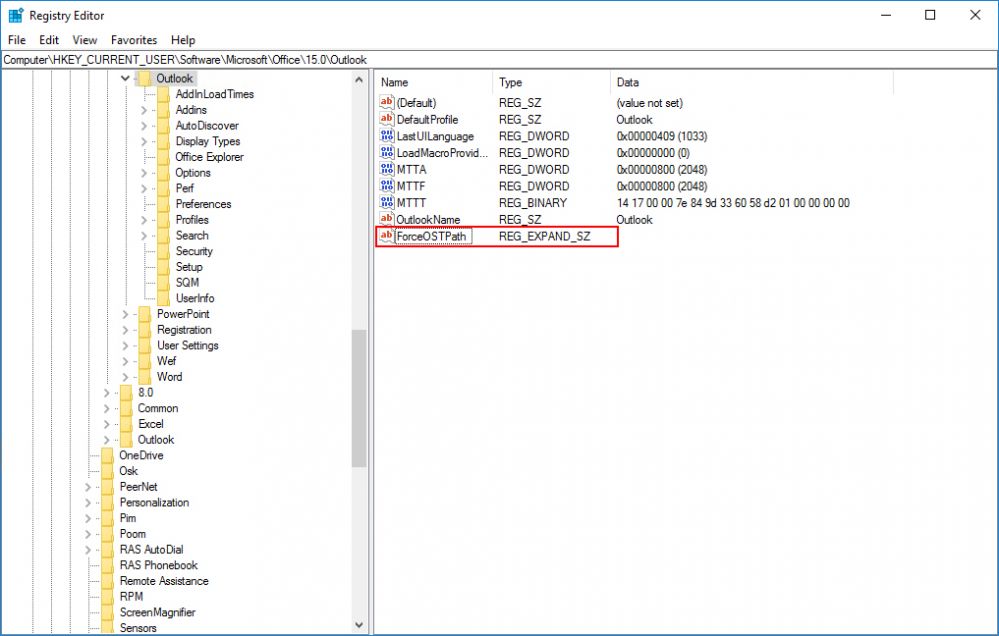
Figure 4
- Right-click "ForceOSTPath", and then click Modify.
- In the Value data box, type the full path of where you want to store the .ost file (Here I user E:\OutlookOST), and then click OK (Figure 2).
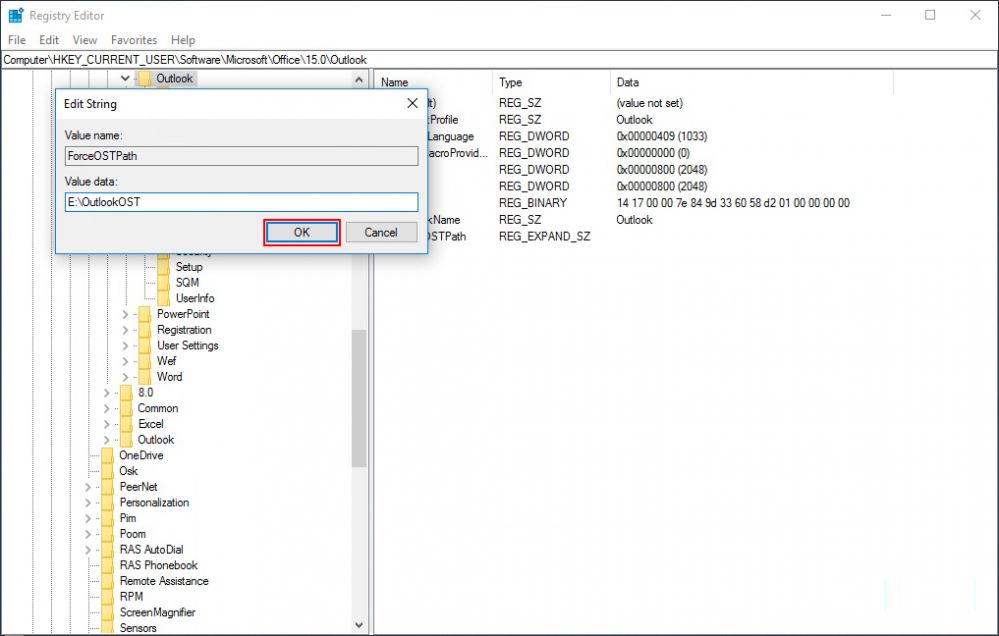
Figure 5
Note: the full path needs to be the "Personal Disk" drive.
5. Now, close the registry editor.
6. Open, outlook and add your email accounts to the outlook.
7. You will see your account OST file in the path defined earlier (Figure 6).
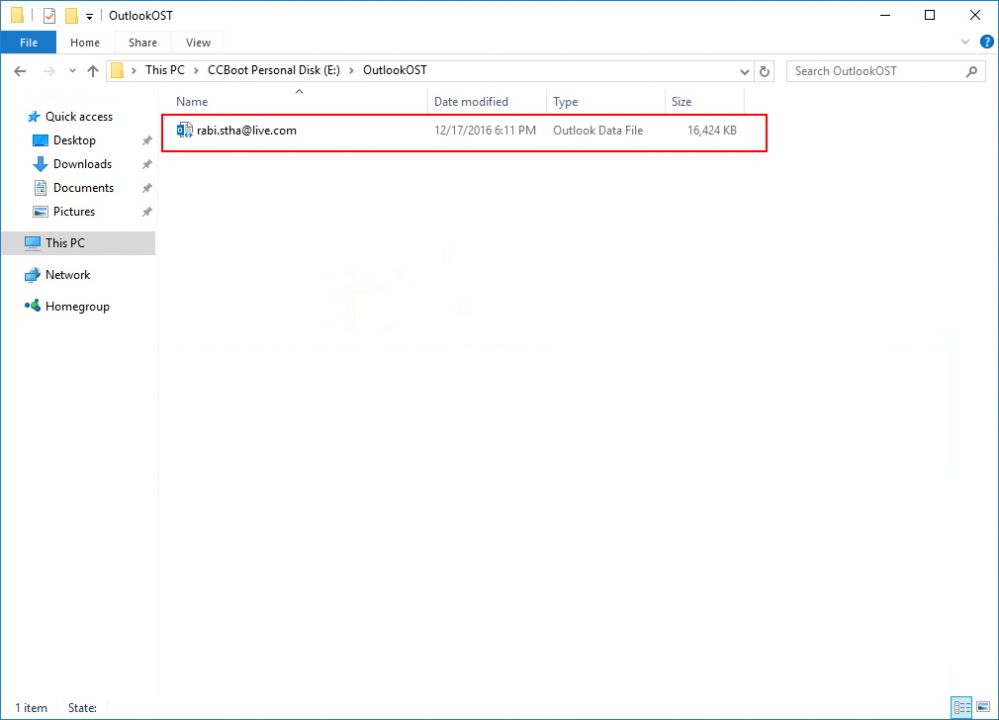
Figure 6
8. Now, turn off your client and then save the superclient data.
9. For other clients as well enable the personal disk and create the OutlookOST folder and add outlook accounts.
