Wiki Home Update Image and Game Use Superclient from Client
Use Superclient from Client
2018/07/04 14:54
Notice: This wiki is for the old version CCBoot. Please click HERE to access the new version wiki
Important: Before you enable super client for any computer, please make sure that you have enough space free in the "Image Disk". To be safe, have atleast 10-20 GB free.
Note: If the client fails to boot when you set the client superclient mode, then change the pxe option for client from gpxe.pxe to gpxex.pxe and then boot. Client will boot normally in superclient mode.
Note: When you have placed the client in super client mode - the client cache will be disabled and will not be enabled until you have disabled super client and saved the image and booted the client in normal mode.
Here is how you do it.
1. Open “CCBoot Client” application on the client PC and click the “Enable Super Client” button (as shown in Figure 1).
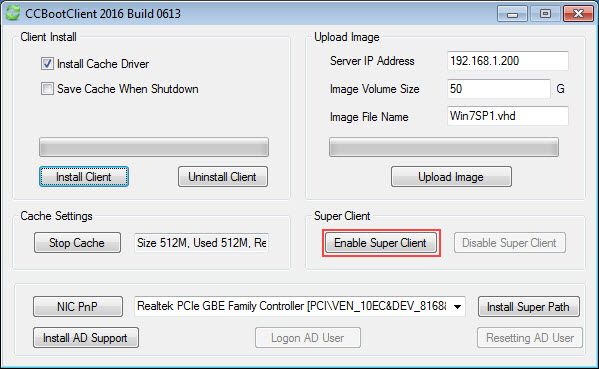
Figure 1
2. It will pop up “Super Client Type” dialog box, choose “image” to update image and click “OK”. ” (as seen on Figure 2)
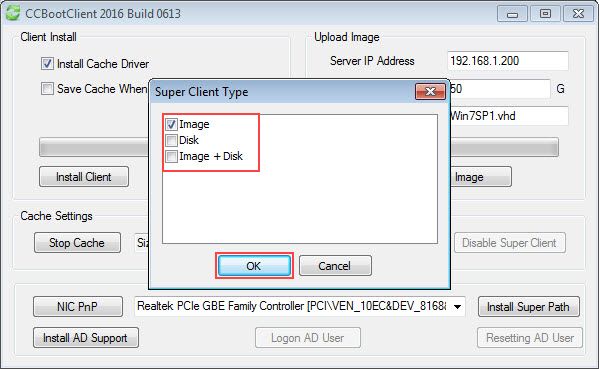
Figure 2
Note: There you can choose between three type “image”, “Disk”, and “Image + Disk”.
3. Another pop up will open asking you to enter “Password”, password for this is the “Admin Password” set in the General Options, enter the password and click “OK” to continue (Figure 3).
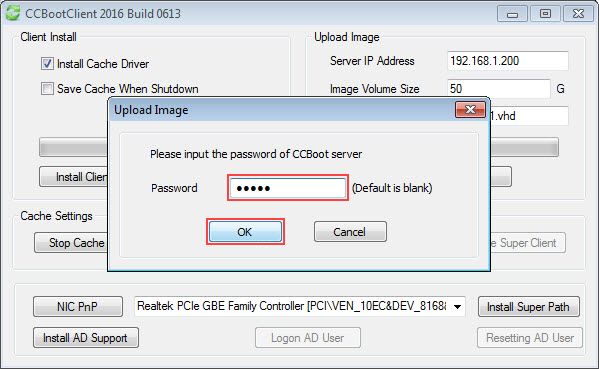
Figure 3
4. After that it will ask you to restart the client PC to enable super client, click “OK” to reboot you client PC (Figure 4).
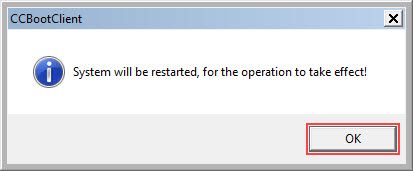
Figure 4
5. Now, once the client has booted, make you changes, add programs, or update the Windows and once done, Open the “CCBoot Client” application and click “Disable Super Client” option (see Figure 5).
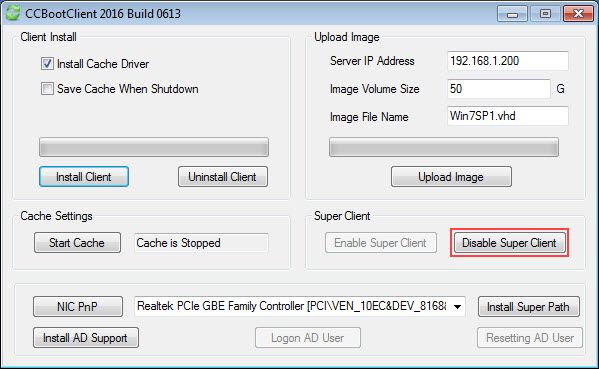
Figure 5
6. A popup will open asking you to enter “Password”, enter the password and click “OK”(Figure 6).
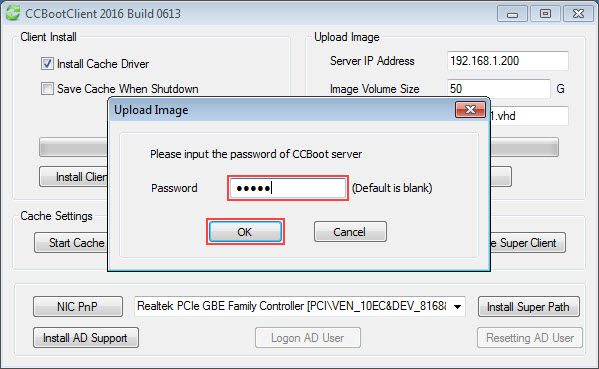
Figure 6
7. Now, a pop up will open and ask you if you want to update the image or not. Click “Yes” to save the changes made to the image and “No” to cancel saving (Figure 7).
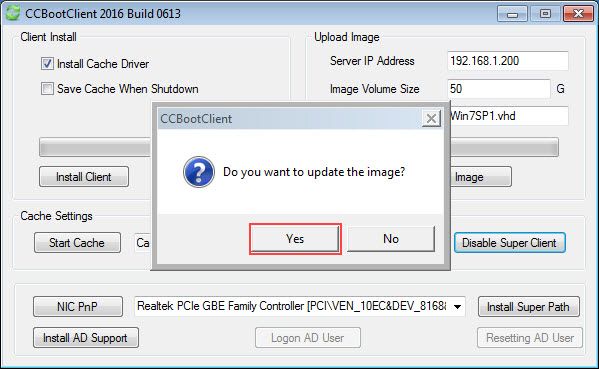
Figure 7
8. If you clicked “Yes” on previous step, then a pop up will open to ask you, if you want to create a restore point for the image. Choose “Yes” to make a restore point or “No” to save to the image directly, without making any recovery points(Figure 8)
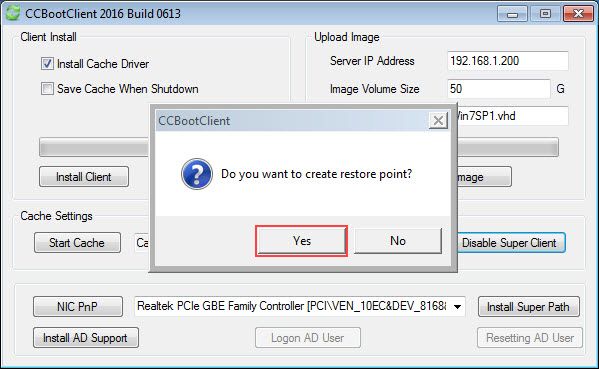
Figure 8
9. After clicking “Yes” a final prompt will ask you to shut down the client PC to save the image and disable super client. Click “Yes” to shut down the client (Figure 9).
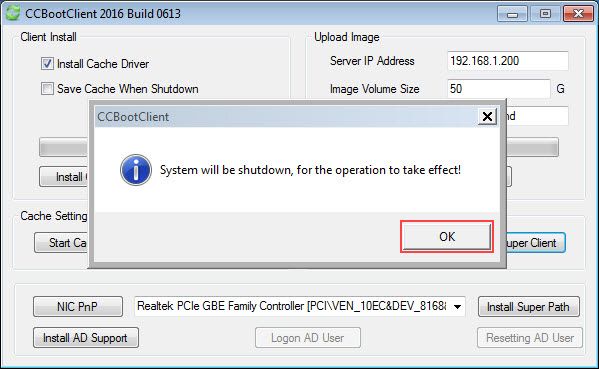
Figure 9
Related:
Using super image to boot clients
Create Client Image with Dual NICs
Fix RTX Graphics card shows black screen on client
