Wiki Home Disk Manager CCBoot Used As Virtual Disk Game Server
CCBoot Used As Virtual Disk Game Server
2017/03/03 01:31
Notice: This wiki is for the old version CCBoot. Please click HERE to access the new version wiki
CCBoot new version have brought back the feature to allow you to use CCBoot as virtual game disk server.
Before you continue, you need to add the client PC to CCBoot server. Refer add client wiki.
Note: You do not need to assign image to the clients when adding to CCBoot server for this purpose.
Here how you can do it
1. On your client pc in which you want to connect the CCBoot disk, click Start Button and open Start Menu, search for iscsi (Figure 1).
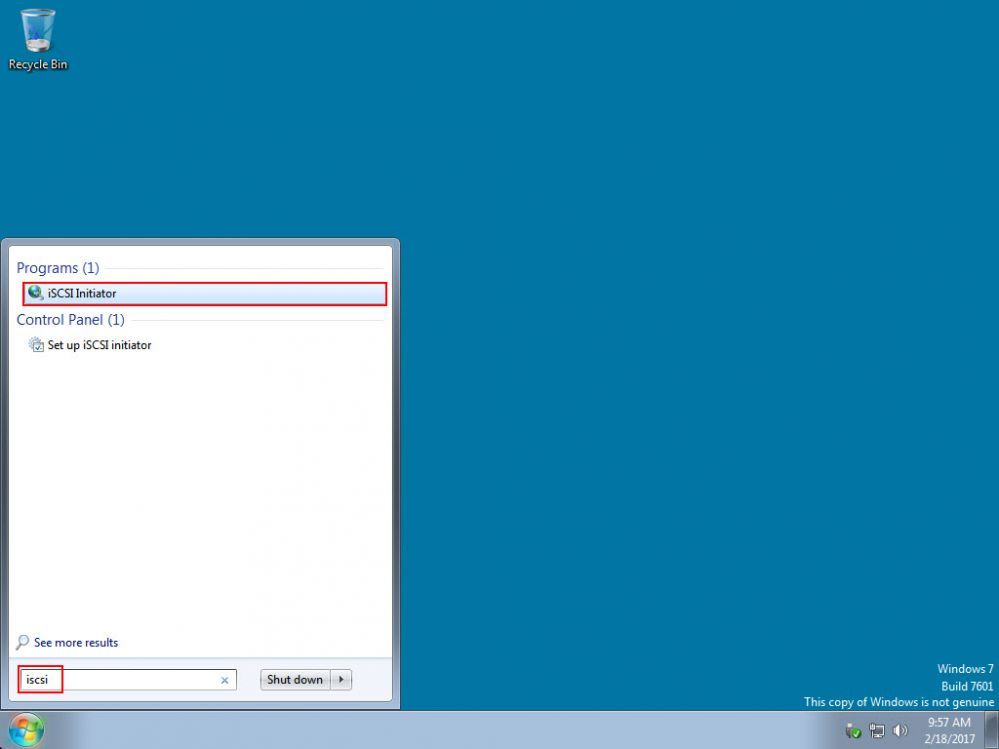
Figure 1
2. Click the, iSCSI Initiator and it will prompt you to start Microsoft iSCSI service. Click "Yes" to continue (Figure 2).
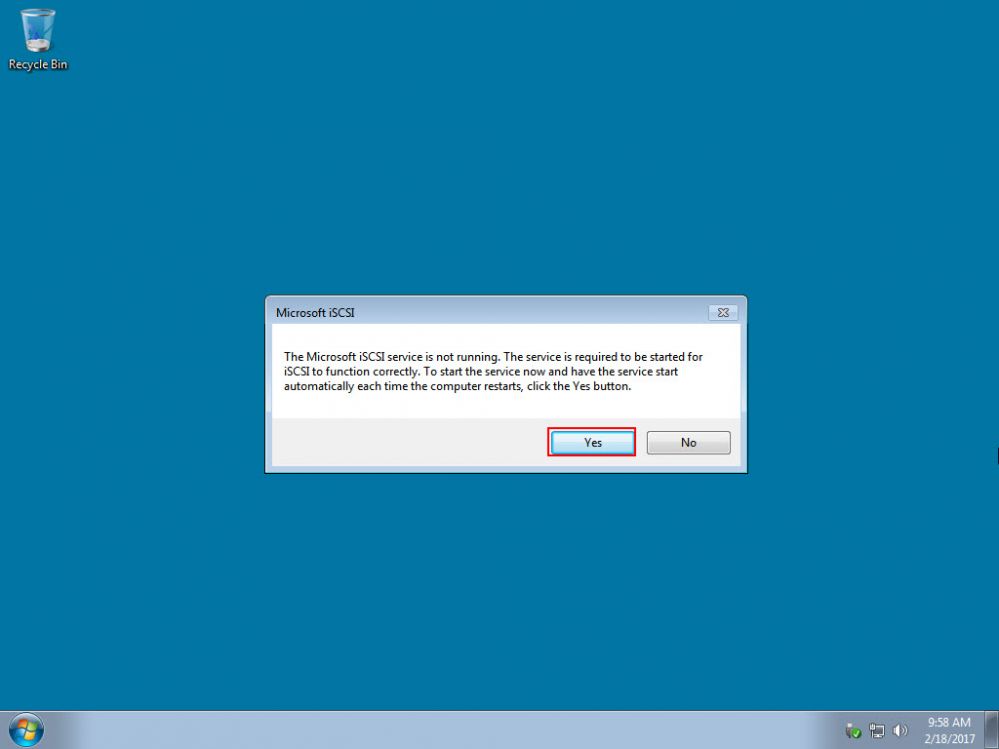
Figure 2
3. Click the "Discovery" tab and click "Discover Porta..." button (Figure 3).
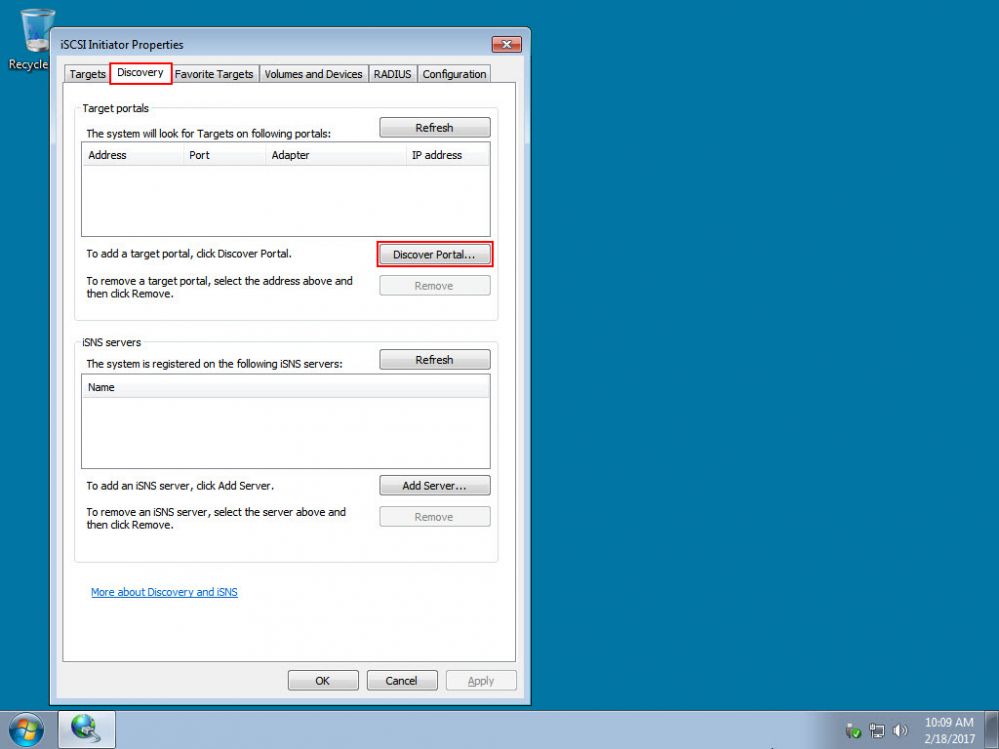
Figure 3
4. Now, enter the IP address of the CCBoot server and the iSCSI port that is used and click "OK" button (Figure 4).
Note: If its set auto on CCBoot, it means 3260.
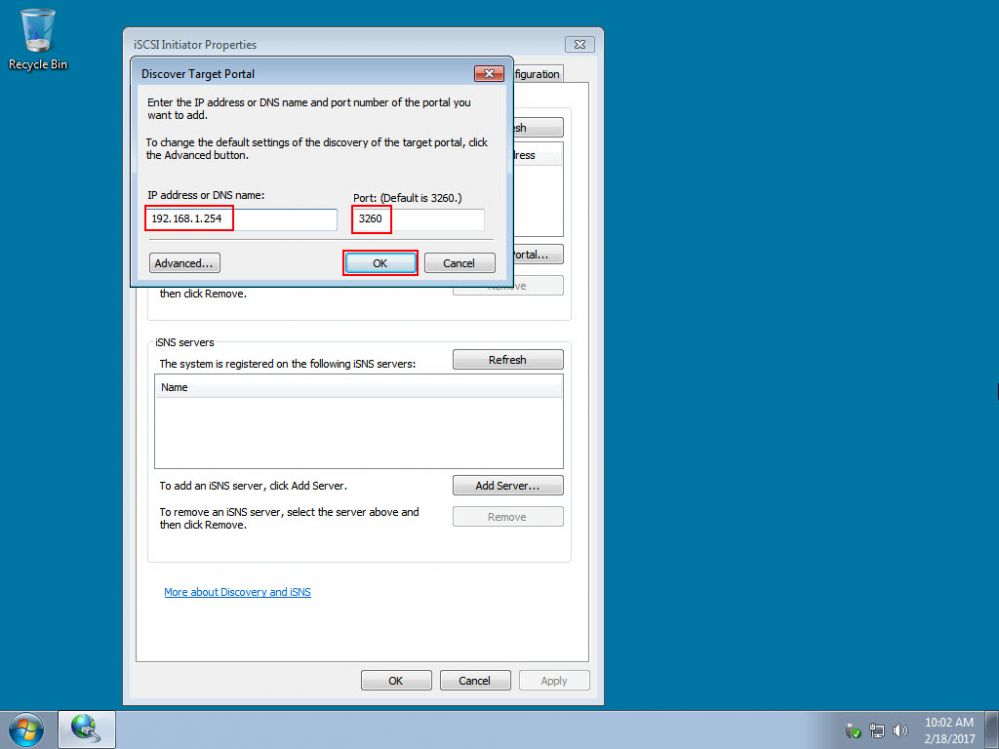
Figure 4
5. The CCBoot iSCSI target will be listed in the target portals (Figure 5).
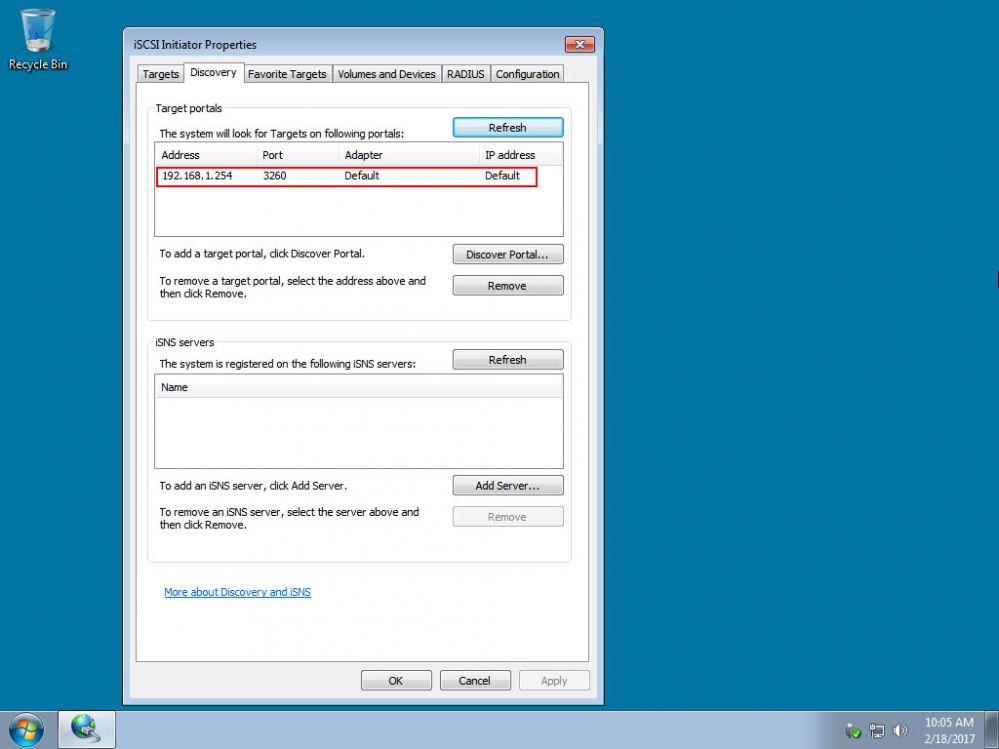
Figure 5
6. Now, click "Targets" tab, select the target and click "Connect" (Figure 6).
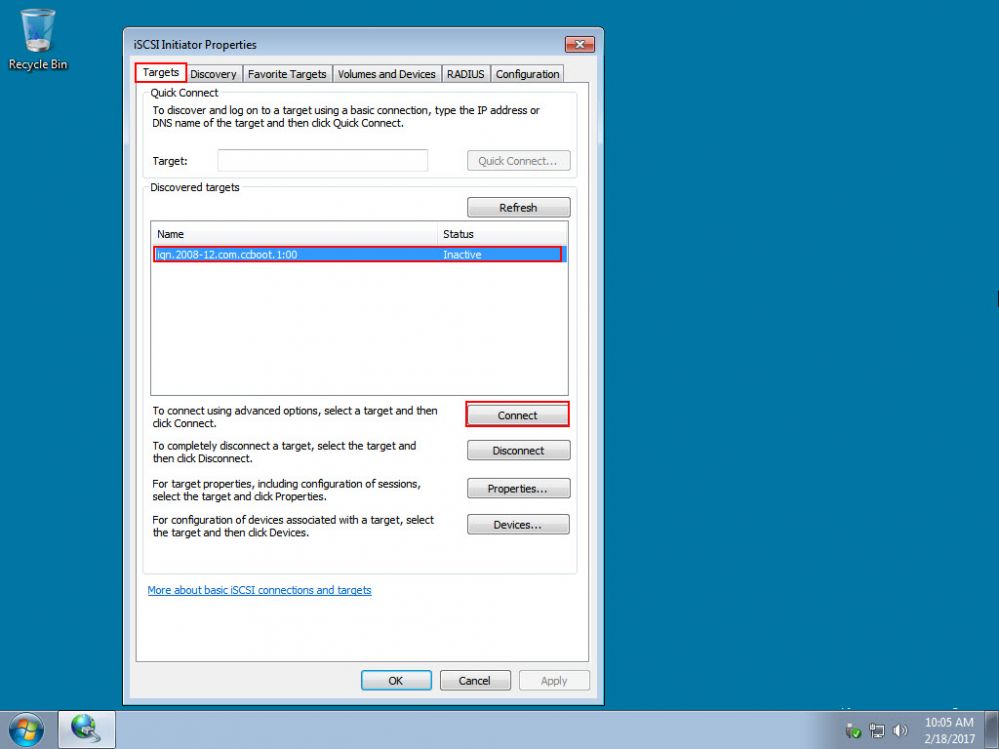
Figure 6
7. It will open "Connect To Target" dialog box, click "OK" to connect to the CCBoot disks (Figure 7).
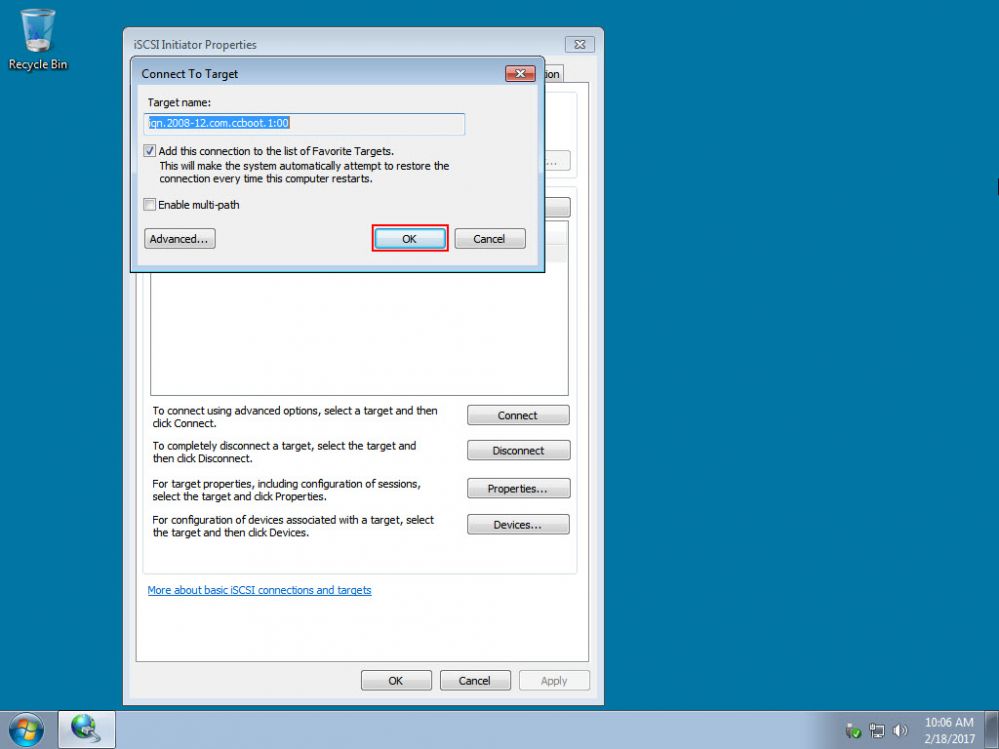
Figure 7
8. Now, the target will show "Connected" status, click "OK" to close the iSCSI Initiator Properties (Figure 8).
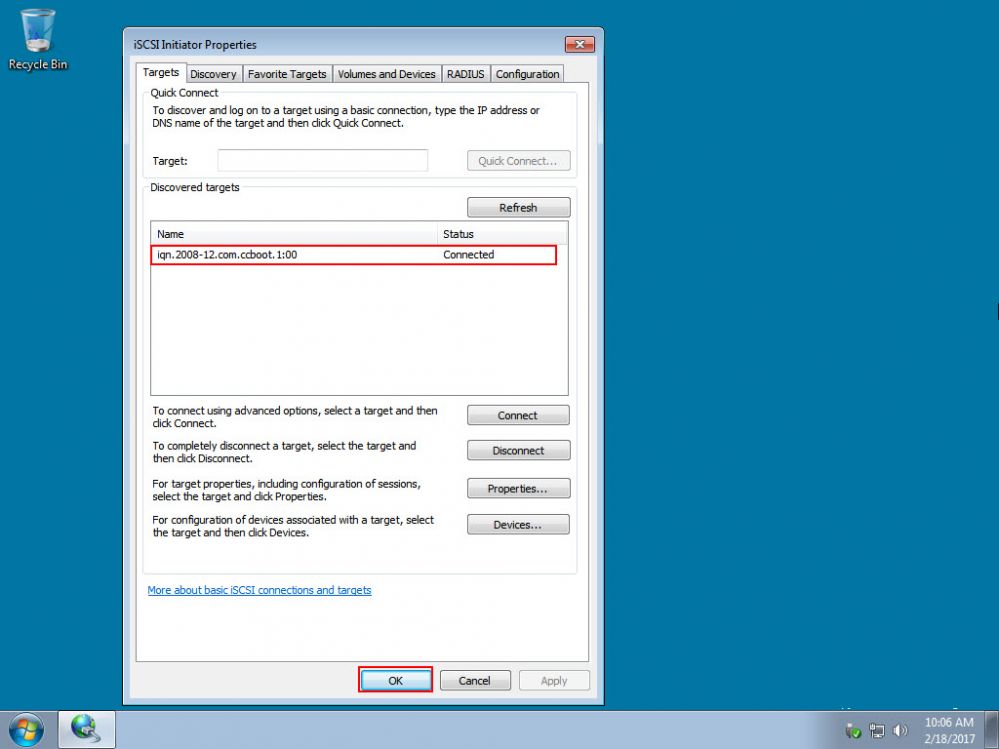
Figure 8
9. Open Windows Explorer and check computer and you will see the CCBoot Game disk as the clients local disk (Figure 9).
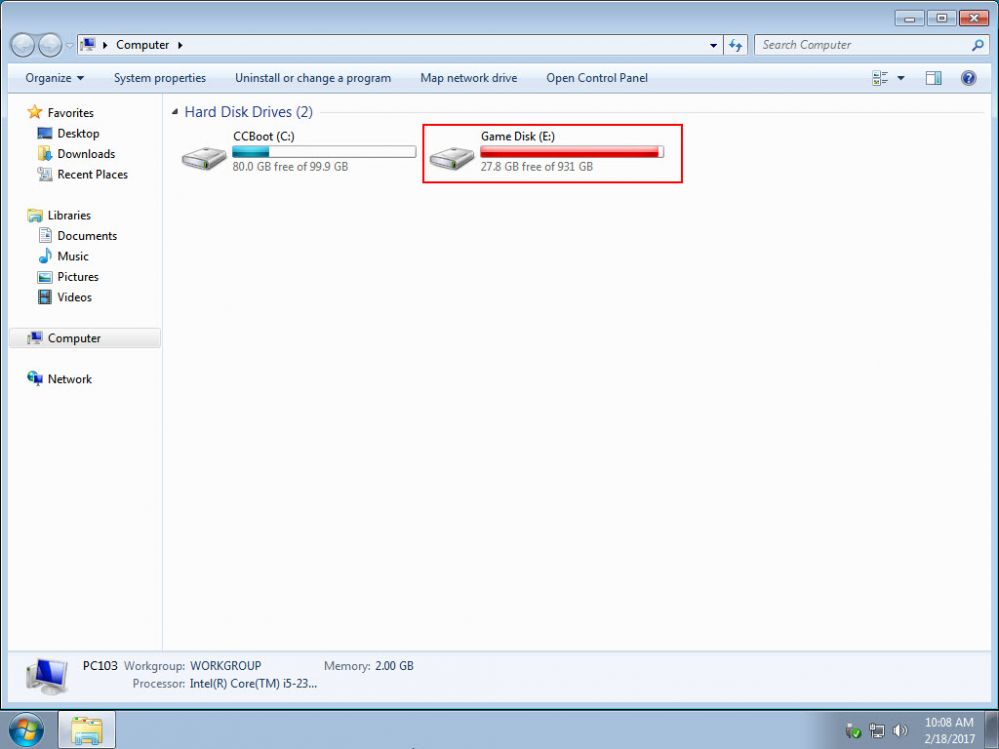
Figure 9
13. You can connect to any number of game disk in the ccboot server and when you connect using iSCSI it will be available to the client.
