Wiki Home Create Boot Image Create Client Image with Dual NICs
Create Client Image with Dual NICs
2020/08/15 17:47
Notice: This wiki is for the old version CCBoot. Please click HERE to access the new version wiki
CCBoot supports diskless booting client PCs which have Dual NICs.
Note: CCBoot does not support booting from Wireless LAN.
1) The client PC is installed of hard disk drive with operating system and also the two Network card.
Notes: In newer version of CCBoot, you do not need to disable second NIC before installing CCBoot Client.
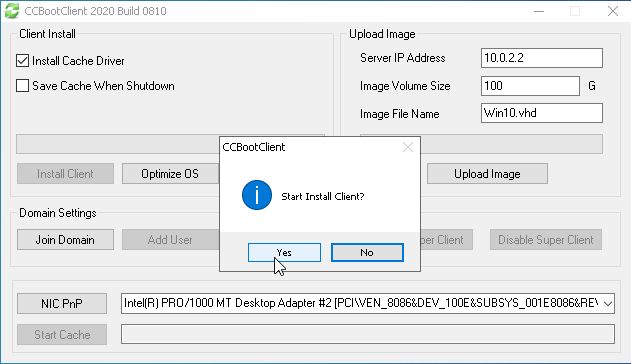
2) Install CCBoot Client, click "Install Client", then press “Yes” button to start installation (see Figure 1-1).

Figure 1‑1
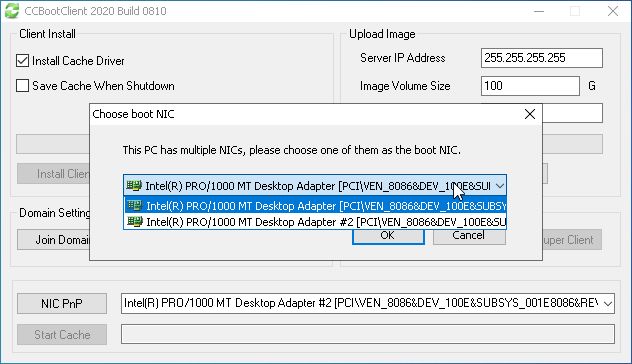
3) Now, A pop up dialog box will open and will ask which NIC to use for booting client diskless, click the drop down and choose the NIC you want to use to boot the client from (as in Figure 1-2).

Figure 1‑2
5) Click “OK” to continue with CCBoot Client installation.
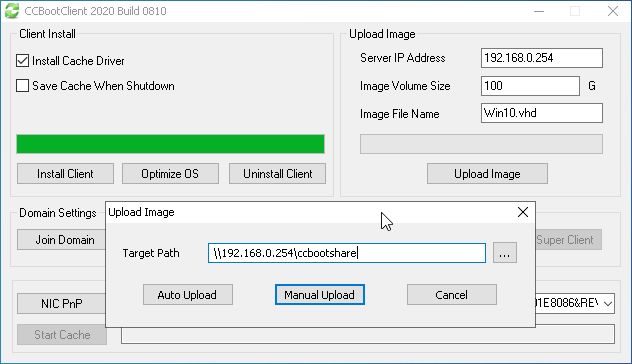
6) Once installation is complete, Click “Upload Image” button, then enter the server “CCBootShare” folder address and click “Manual Upload” button to proceed to upload the image (as in Figure 1-3).

Related:
Single server multi NICs load balance
Standard Method to Create Boot Image for Legacy PCs
