Wiki Home Cloud control panel Disk management
Disk management
2024-07-01
disk, management
This tab allows you to set disk roles on the CCBoot server. Click on the “Disks” tab to access it.
Disk configuration
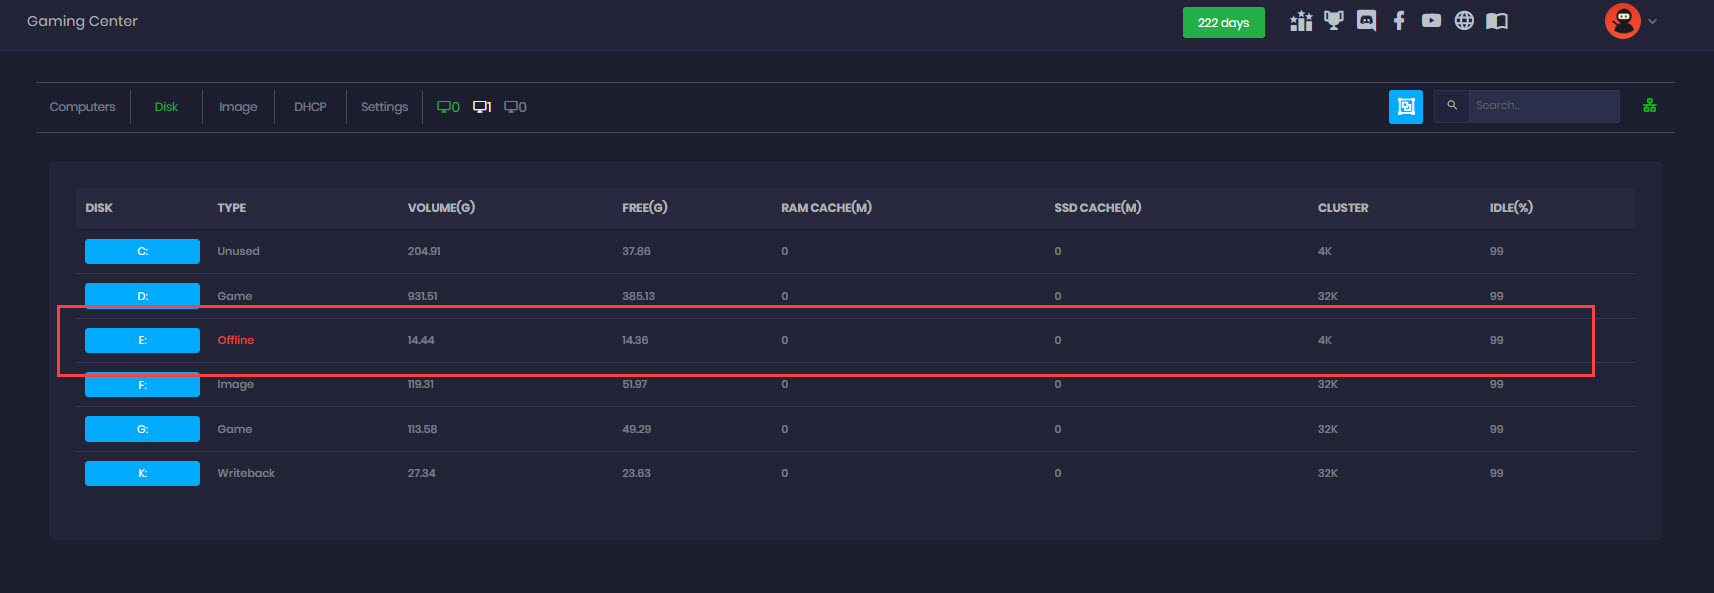
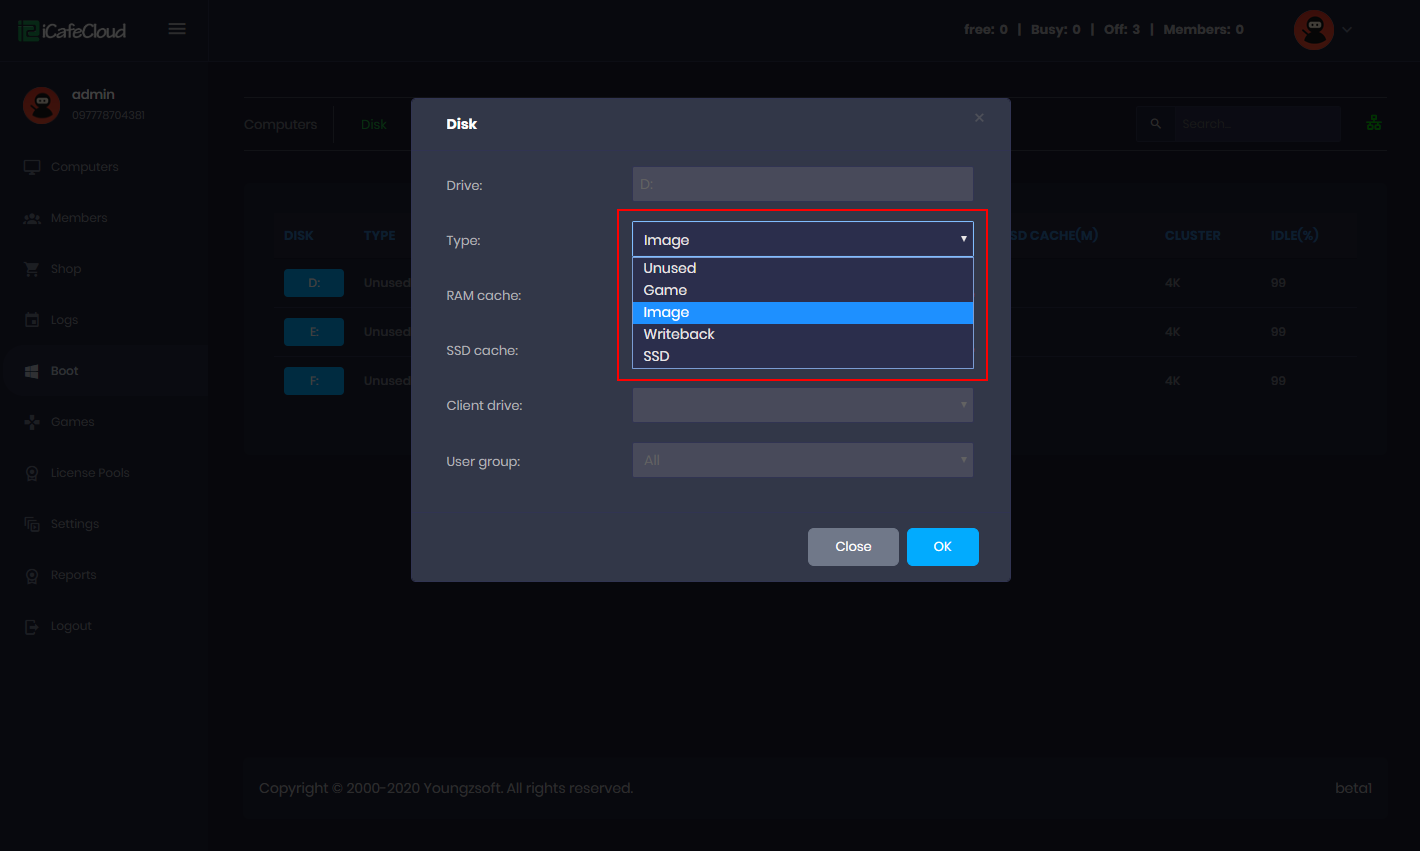
- Click on the new disk and specify what type of disk this will be. There are 5 options: New, Game, Image, Write back, SSD and Offline. (If a disk dissconned will show as offline) (Figure1)
Figure 1
- Here, we choose D: as an Image disk (Figure 2).
Figure 2
- When you change the disk type, the corresponding disk’s name will be changed to reflect the disk type.
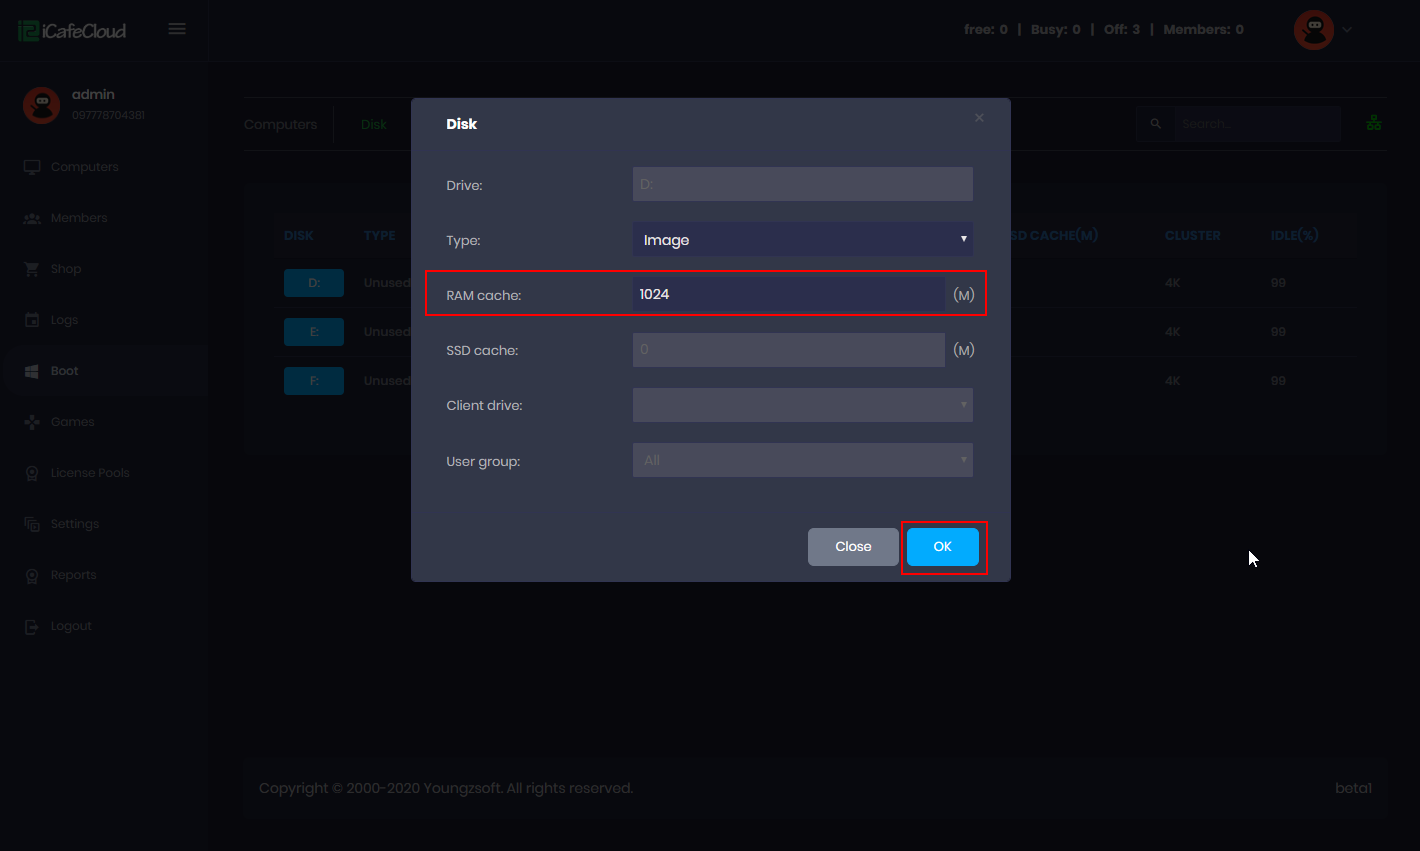
- Now the disk is set as an Image disk. Now let’s setup disk cache. On the RAM Cache field, enter desired RAM cache value for the disk. Press “OK” to apply the settings (Figure 3).
Figure 3
- Only a game disk can have SSD Cache option available.
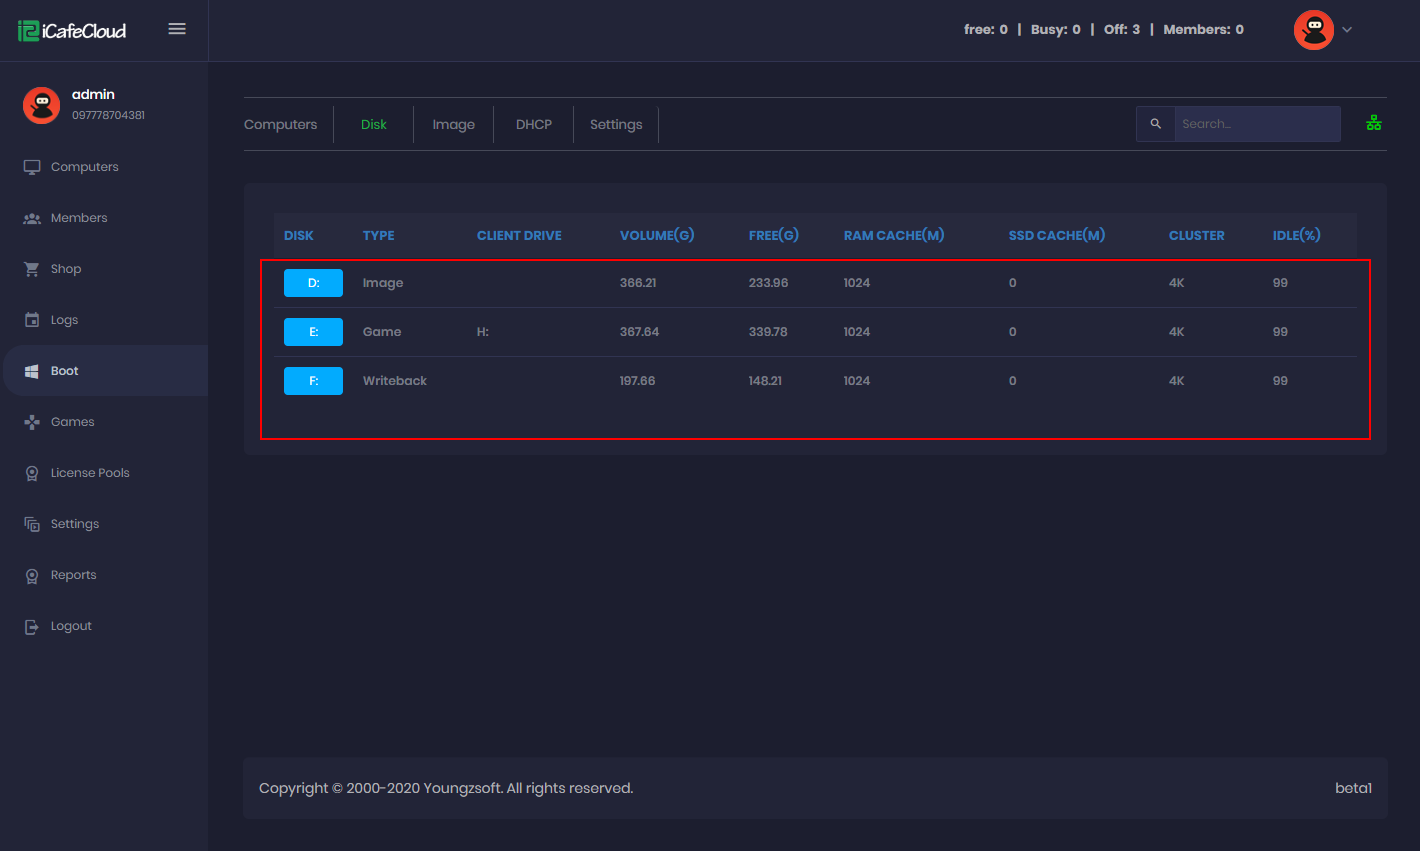
- Similarly, set Game disk, Image disk and its cache (Figure 4).
Figure 4
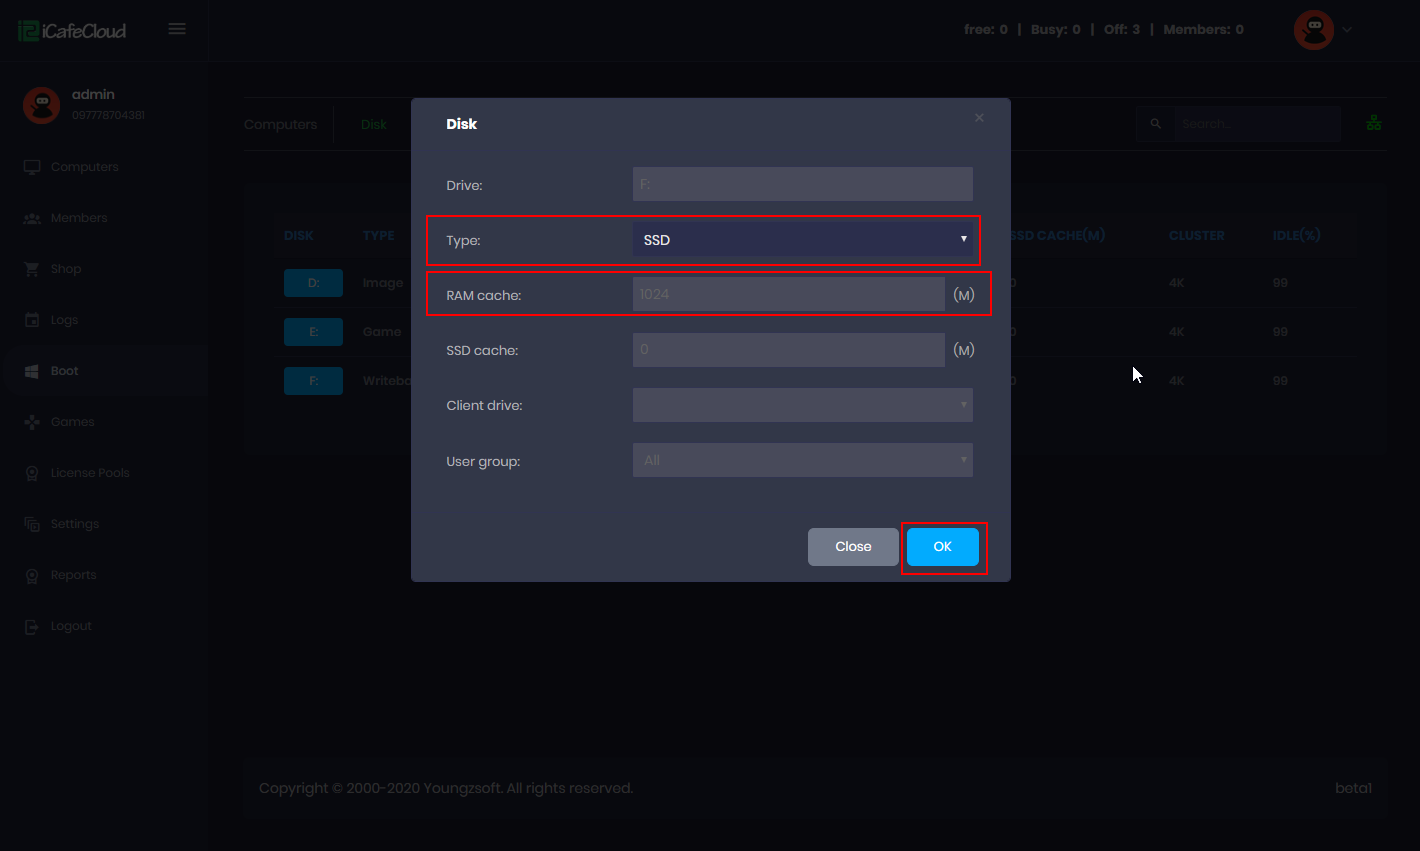
- If you have an SSD you can set it, like other disks. For SSD, there is no need for RAM Cache so it is not available (Figure 5).
Figure 5
- If you forget to set either the writeback disk and/or image disk then by default it will use C: as image disk during upload and writeback disk for clients.
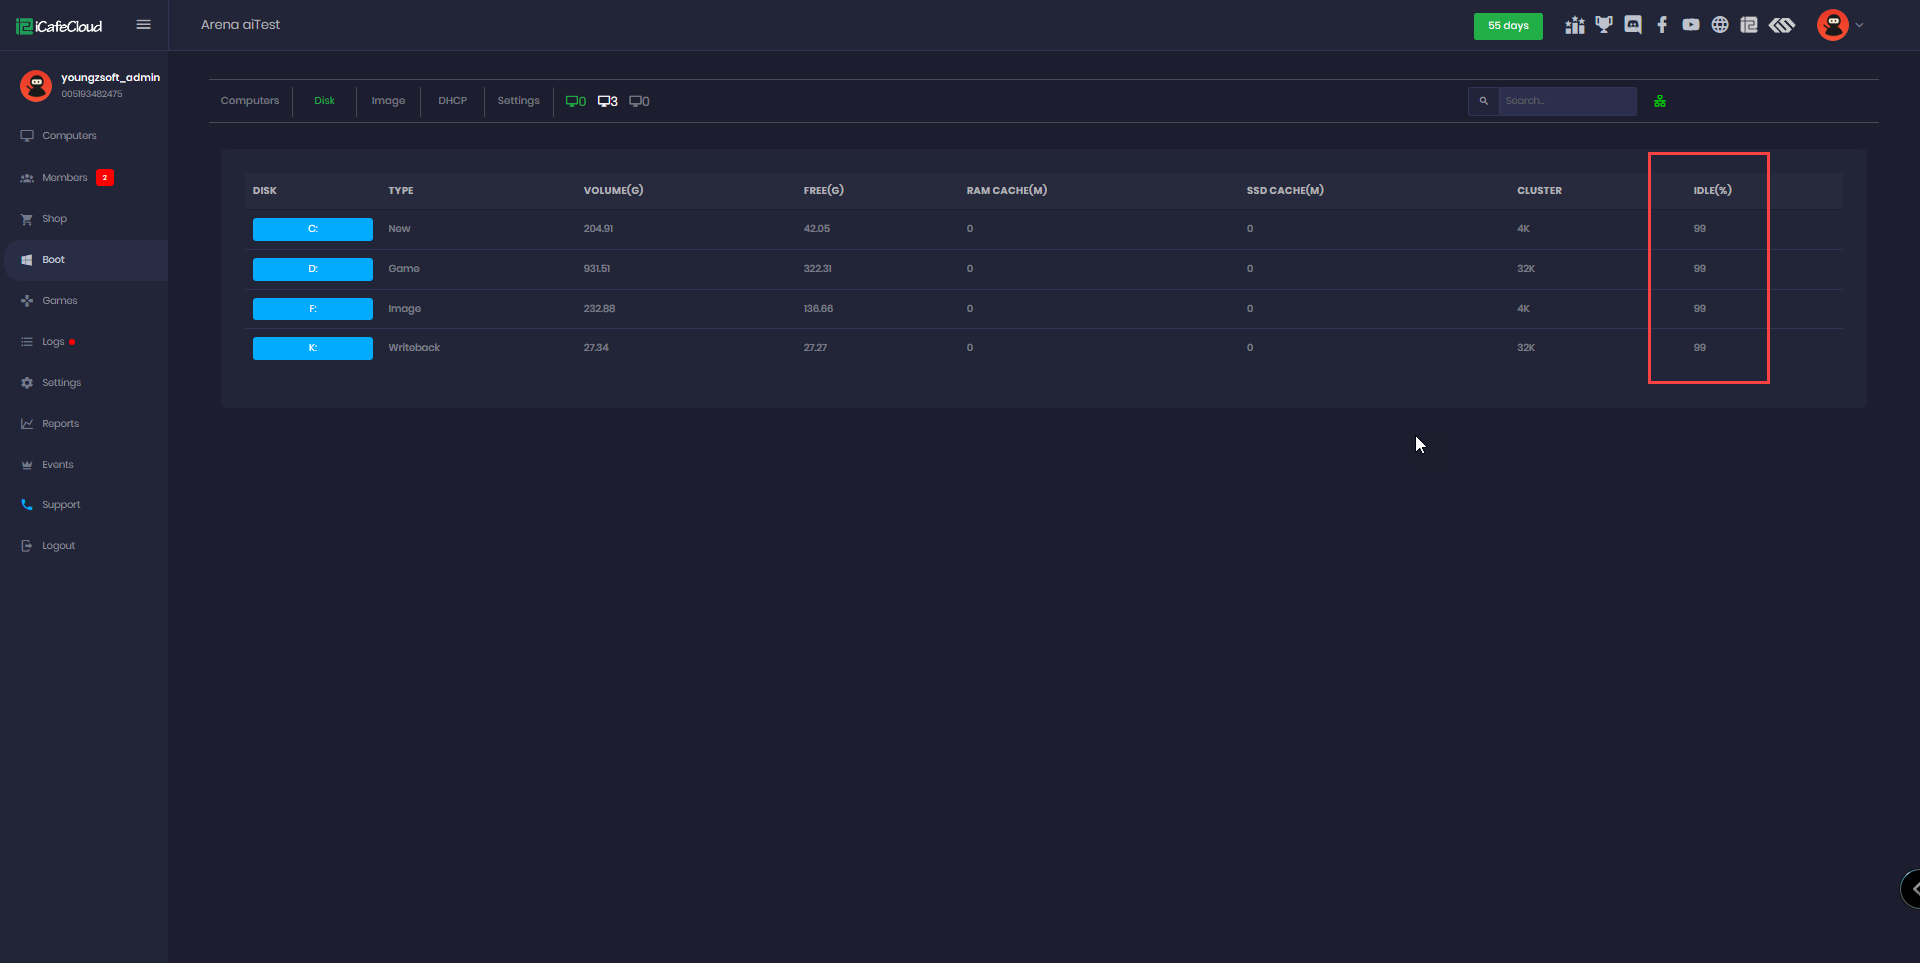
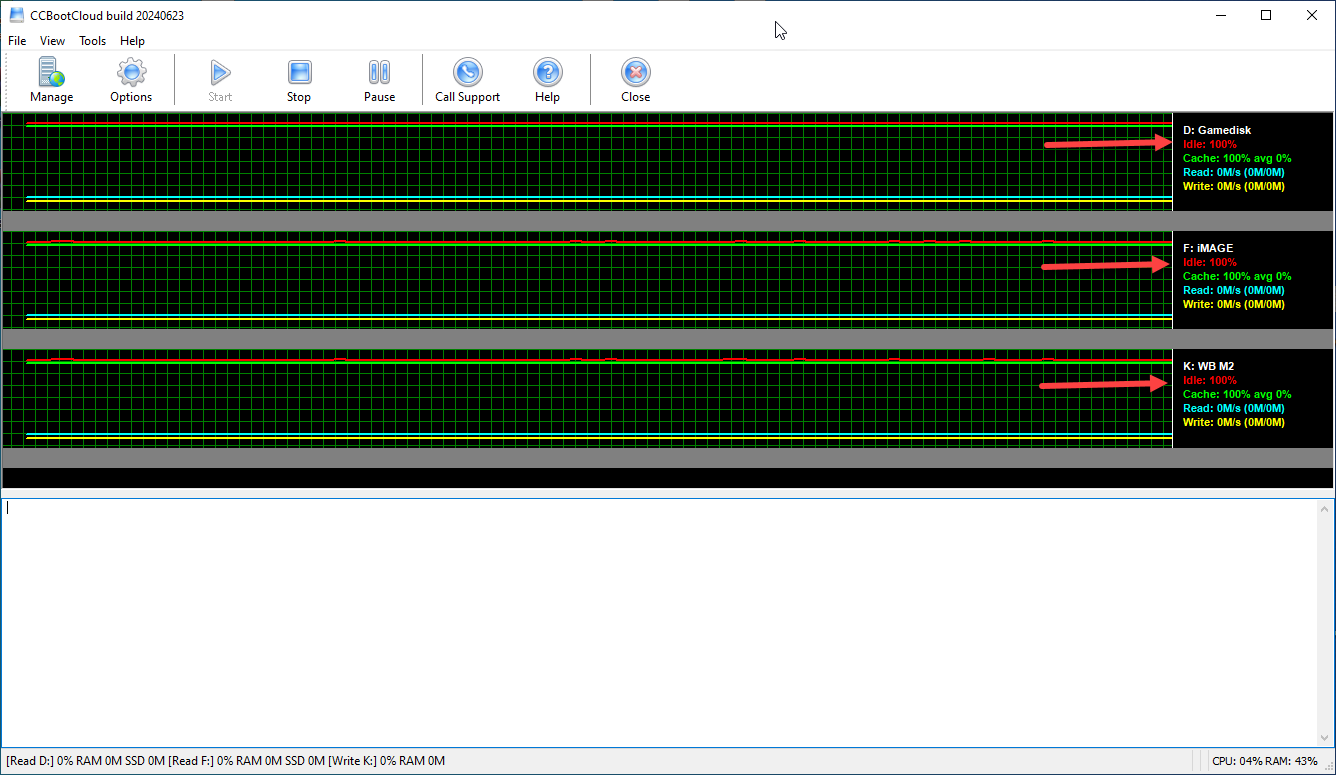
- The disk IDLE percentage will show as 100% when there is no traffic at all. A higher percentage indicates that the disk is handling the load well, while a low percentage (0-20%) means the disk is struggling to handle the load.
- You can check the disk idle either from CP - Boot - Disk - Idle (Figure 6)
Figure 6
- You can also check the disk idle from the CCBootCloud server. (Figure 7)
Figure 7
- In case idle is 0% for long time the client PCs will have lag , to avoid situations like that first you need to check the disk health
- Alternatively, you can check for background activities like Windows updates and pause them until a more convenient time for completing the updates.

