Wiki Home Installation Server NIC teaming
Server NIC teaming
2024-01-23
teaming, nic, network
The following provides guidelines for setting up NIC teaming on Windows Server, by combining multiple network interfaces, and troubleshooting common issues such as cable connectivity.
- If you have more than 1 NIC on the server, we recommend teaming them so that you will get the maximum throughput from your server to clients. When teaming the NICs, choose "Adaptive Load Balancing" to use all available network bandwidth.
- Video for Windows server 2012 R2 and above:
Refer Setting up NIC Teaming for Windows Server 2012*/2012 R2*/2016* video for teaming steps.
- Guide for teaming nic on windows server
Before you team your NIC, please Disable flow control at all of the NICs that will be in the team. You will not be able to optimize them individually once they are teamed.
- To create a NIC Team, open the Server Manager and look for the NIC Teaming field. Click on Disabled (Figure 1).
Figure 1
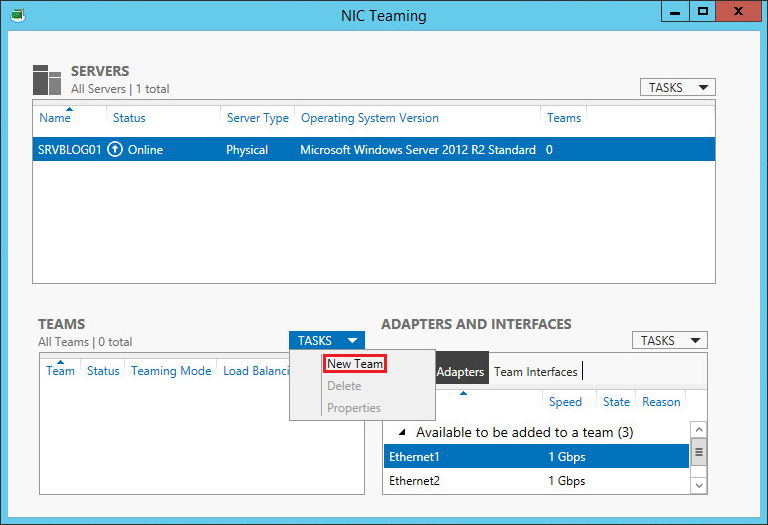
- Select New Team from the TASKS dropdown menu: (Figure 2).
Figure 2
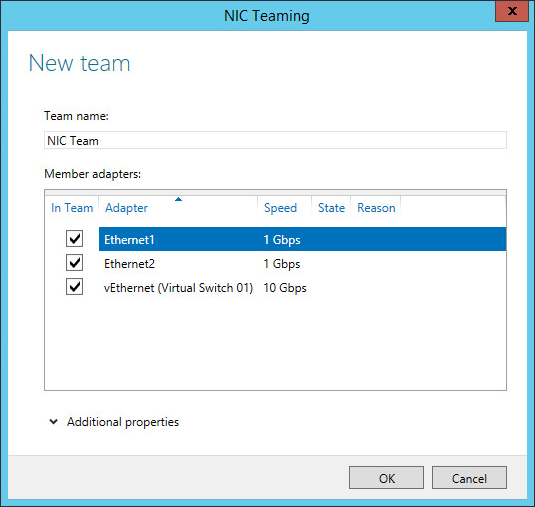
- Select the adapters you want to include in the team and click Ok. The team will be created (Note: it will be created a new adapter with the NIC Team name, you may be unable to reach the machine through RDP depending upon the network configuration): (Figure 3).
Figure 3
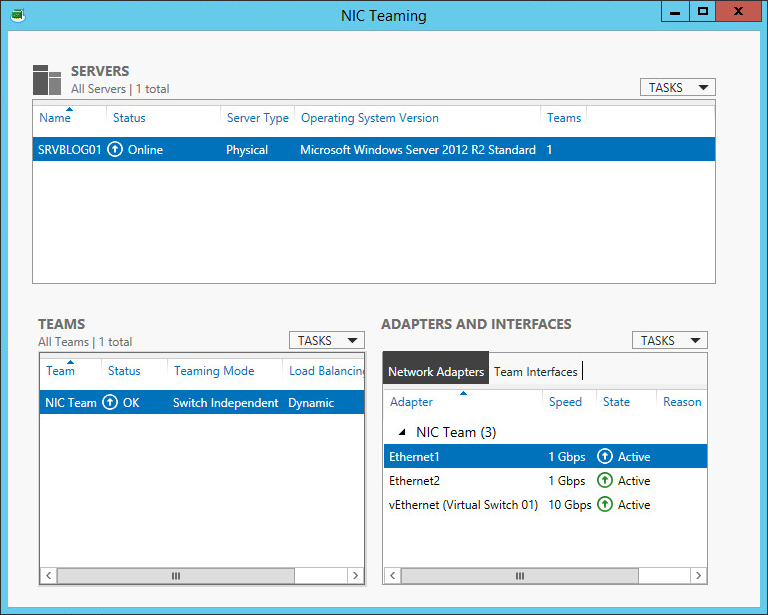
- The team is ready(Figure 4).
Figure 4
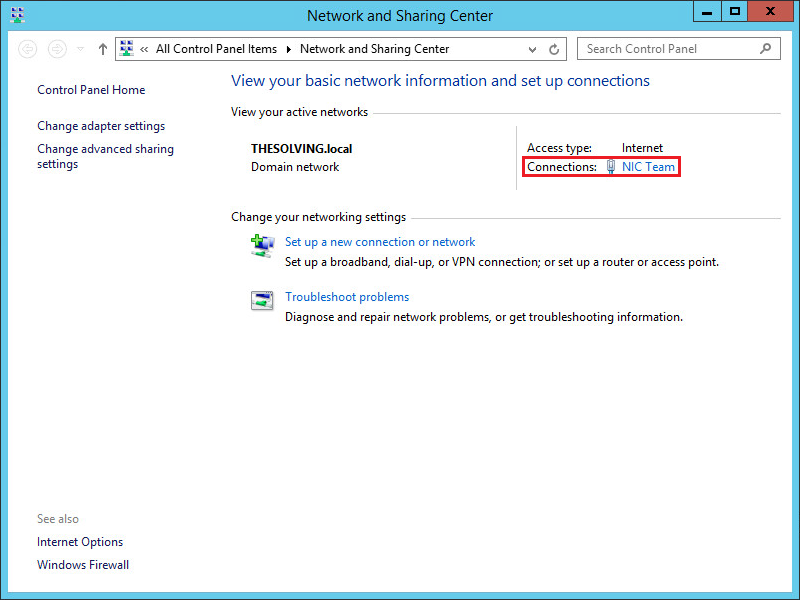
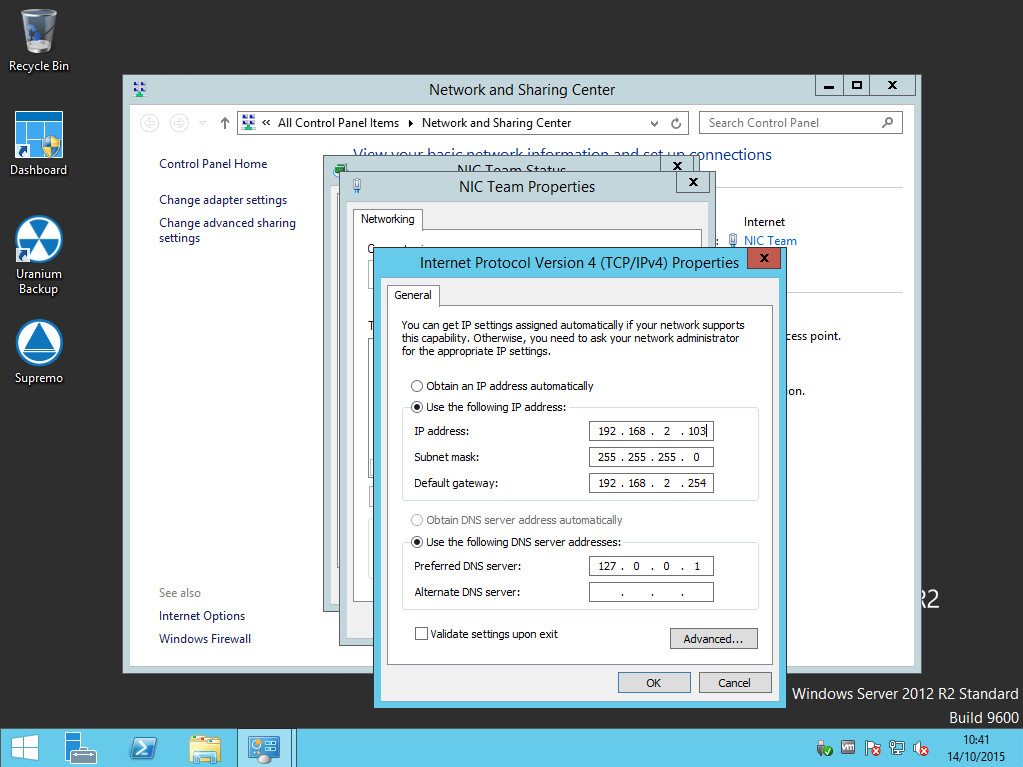
- It’s time to configure the team, open the Network and Sharing Center and click the team name (Figure 5).
Figure 5
- Configure the team and enjoy it (Figure 6).
Figure 6
- Once a team is created, its properties will open.
- If your teaming is not showing full speed - example 4 x 1gbps = 4gbps but shows 3.0 gbps, this means one of the NIC cable is not working.
You need to replace the cable or re-crimp a new RJ45 jack to the cable.


