Wiki Home Installation GIGABYTE with UEFI SECURE BOOT
GIGABYTE with UEFI SECURE BOOT
2024-07-11
diskless, boot, gigabyte, uefi, secure boot
The following provides detailed steps for configuring UEFI secure boot on Gigabyte motherboards, including importing the Youngzsoft certificate and setting secure boot options.
- Before starting to configure the BIOS, prepare the USB for Secure Boot.
- Open BIOS then go to IO ports (Figure 1).
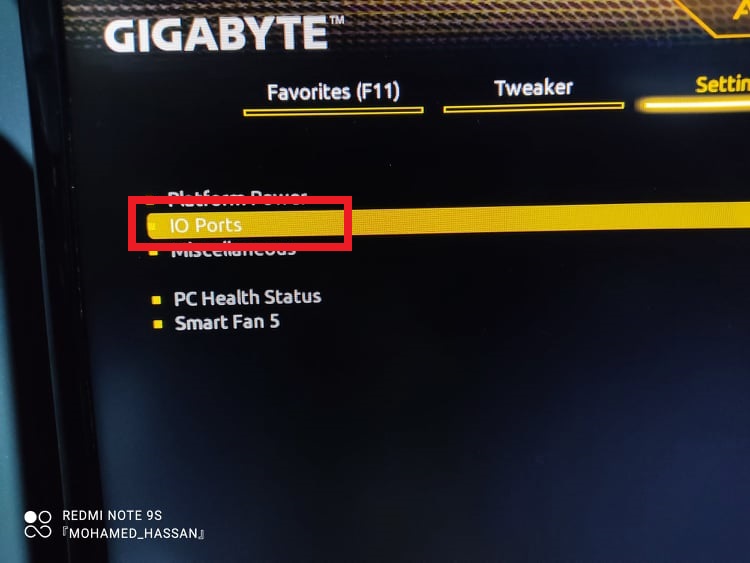
Figure 1
- Then go to “Settings>Network Stack Configuration” (Figure 2).
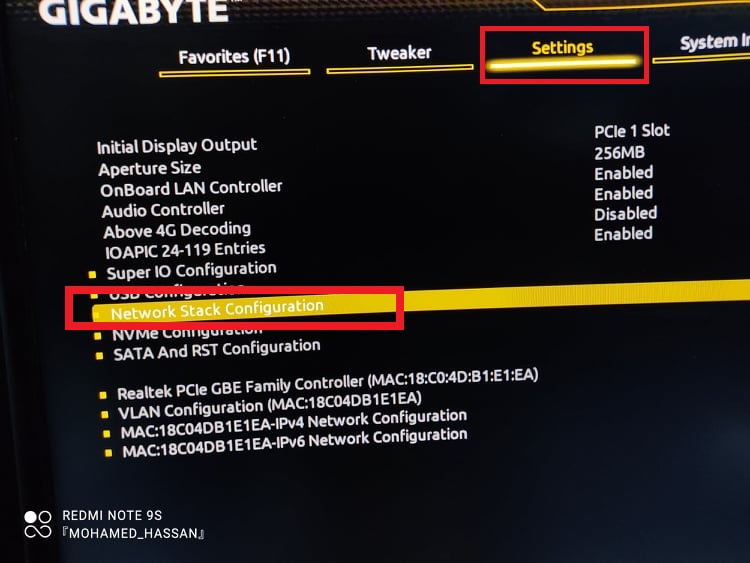
Figure 2
- Enable the network stack if it is disabled (Figure 3).
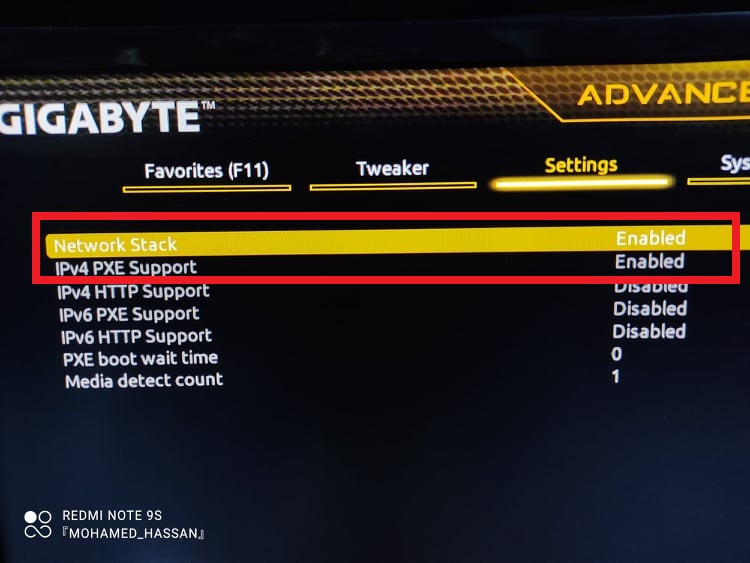
Figure 3
- Then in the “Boot” tab, check the settings as in the following figures 4 and 5.
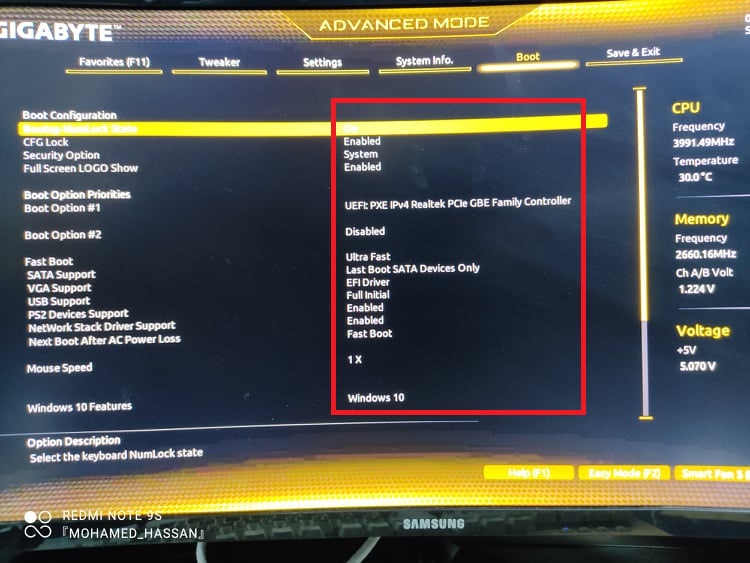
Figure 4
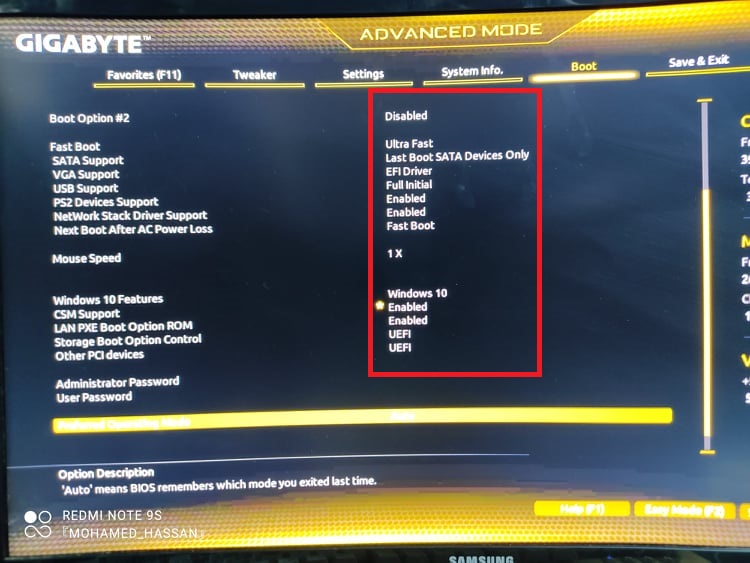
Figure 5
- Finally save and exit(Figure 6).
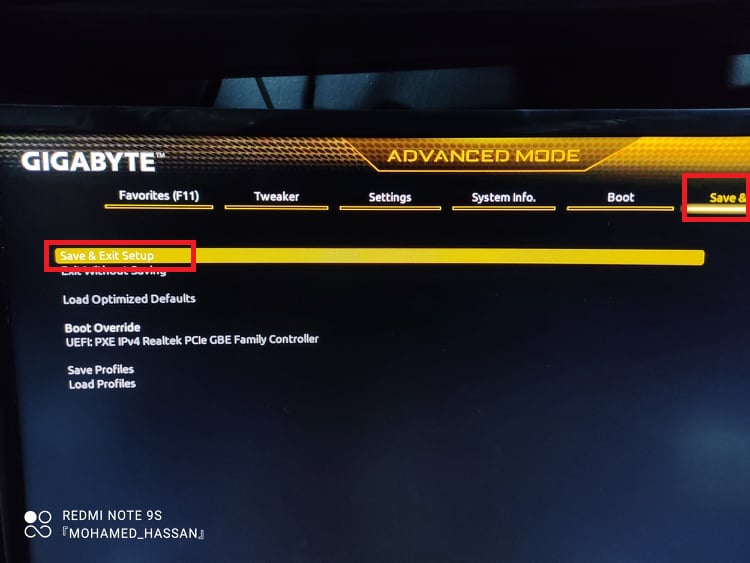
Figure 6
- Once reboot is done Open Secure boot page again. (Figure 7)
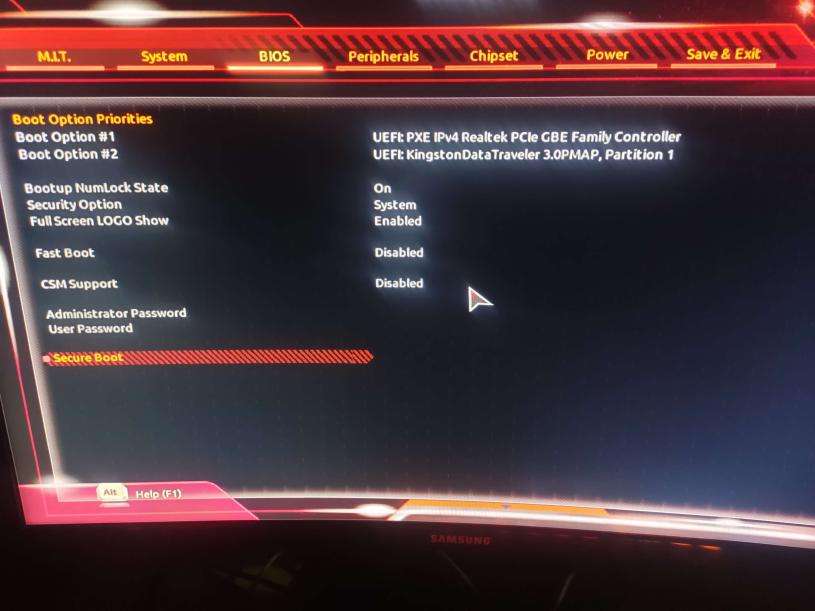
Figure 7
- Navigate to Key management.(Figure 8)
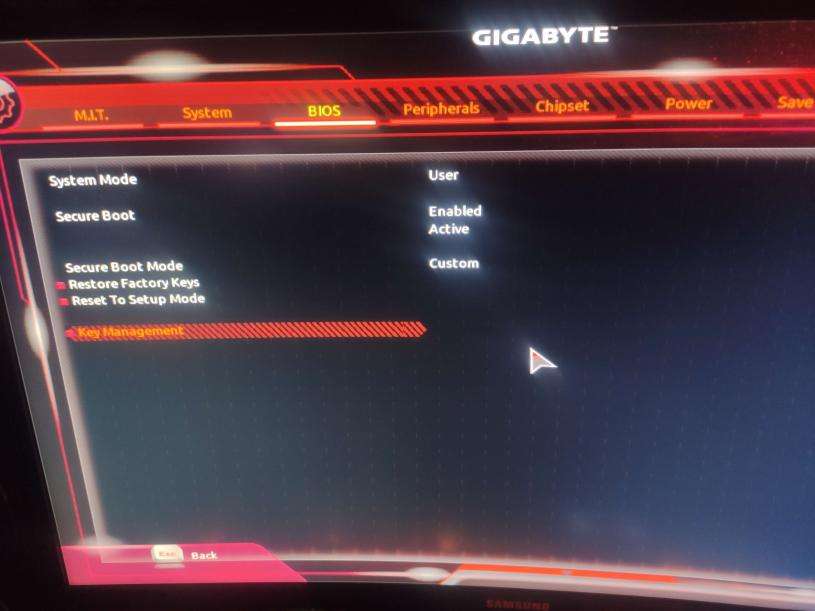
Figure 8
- On the Key management page click on the ‘Authenticated Signatures” and import the Youngszoftv2.cer that you previously created. (Figure 9)
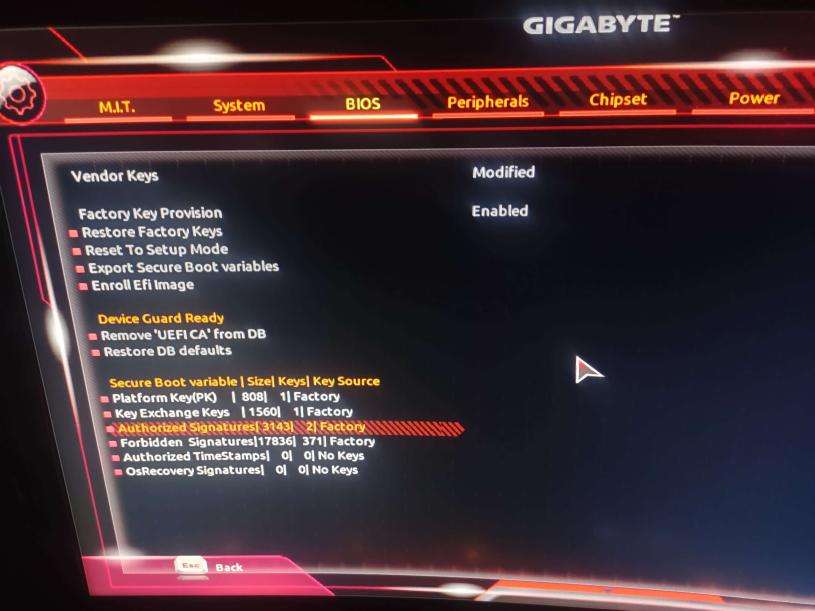
Figure 9
- When opting for "Authenticated Signatures," the system will prompt you to choose the input file format. Select 'Public Key Certificate.'
- Following that, it will inquire whether you want to append Youngzsoftv2.cer , click Yes to proceed.
- Once you done save the changes of BIOS and go back to create boot image
- Once the image is ready on the iCafeCloud admin panel in the Boot section , edit the client PC and select ipxe.pxe(2025) or ipxe.efi(2025) on the PXE field. (Figure 10)
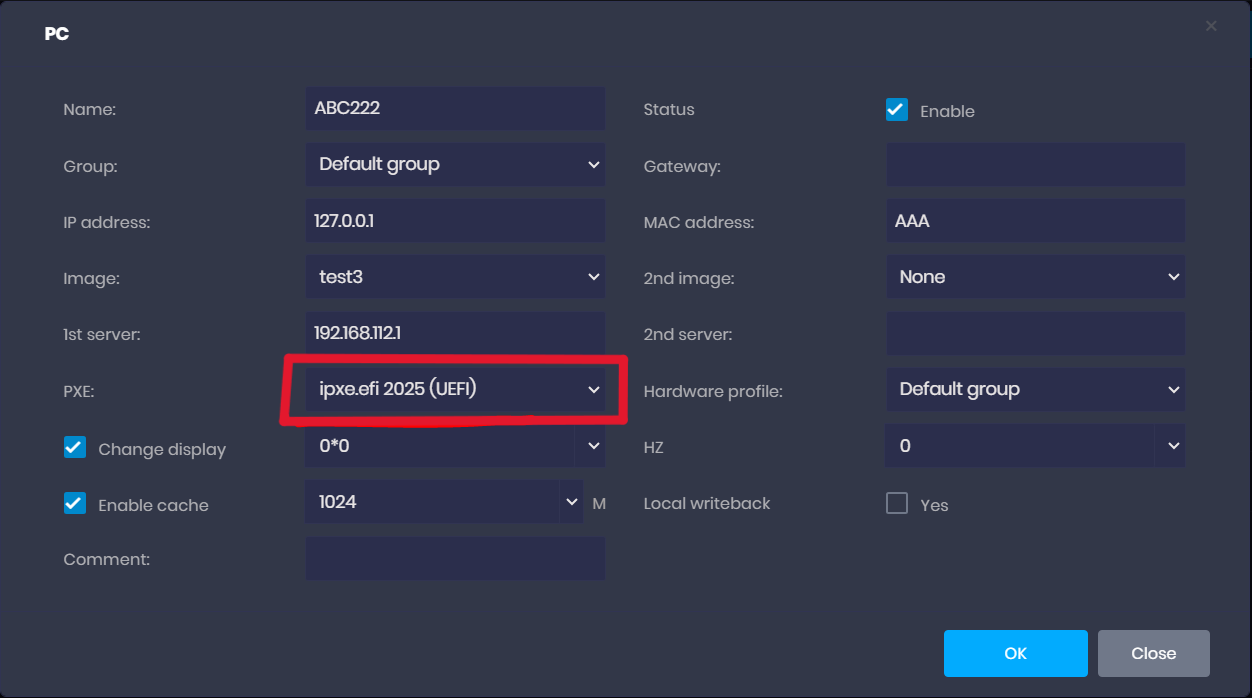
Figure 10
- If your motherboard is Aorus elite disable “Factory key provision” as it reset the keys on every reboot.(Figure 11)
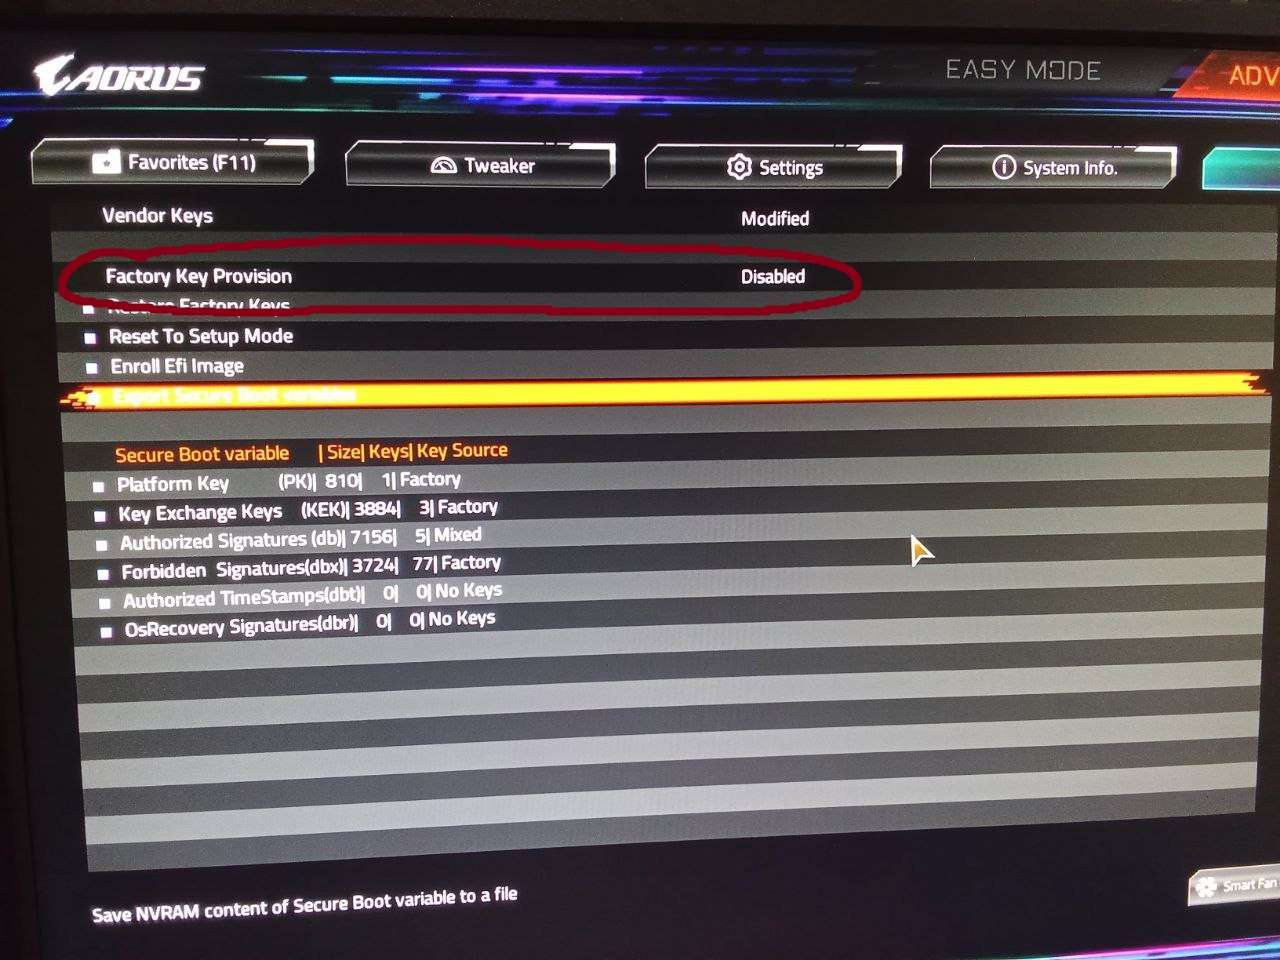
Figure 11
- If a "Failed" error persists after disconnecting the mouse as (Secure boot violation) (Figure 12)
Follow the steps below
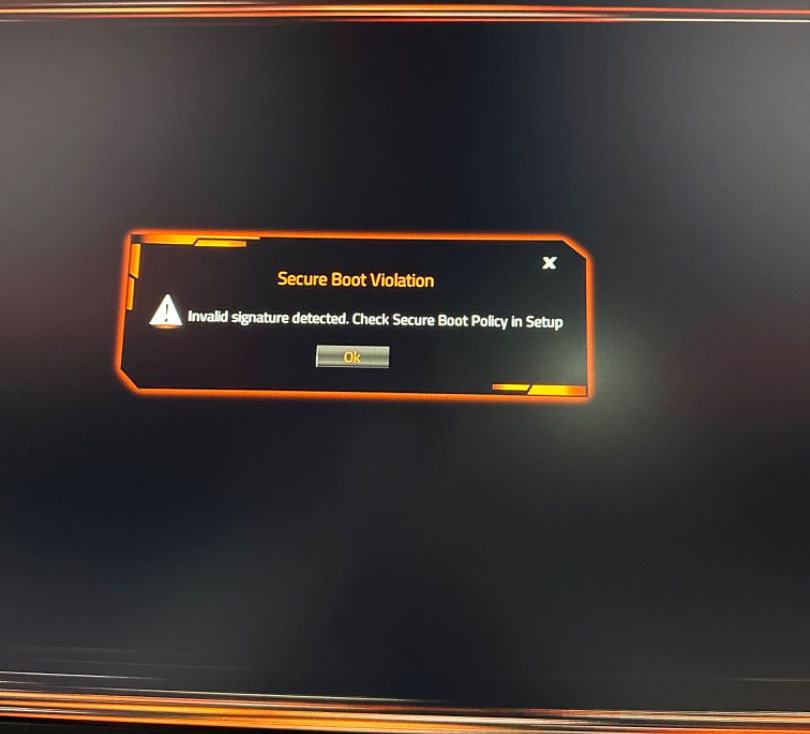
Figure 12
- Locate a PC that can successfully import keys (based on user experience approximately 1/2 of all PCs).
- Import the keys on this PC, save the changes, and navigate to "Export all DB keys".
- Save these keys onto a USB drive.
- Connect the USB drive to the PC that is unable to import keys manually.
- Instead of attempting to append keys from Youngzsoftv2.cer, update the authorized keys using the record from the USB drive (on Gigabyte motherboards, this file is typically named "db").
- Save the changes and exit.