Wiki Home DHCP and PXE boot Mikrotik work with CCBoot
Mikrotik work with CCBoot
2024-01-31
mikrotik, 3rd, party, dhcp,
The following provides instructions on configuring Mikrotik third-party DHCP settings for CCBootCloud
This method will show you how to configure CCBoot Server and Mikrotik Router as CCBoot Third Party DHCP Provider.
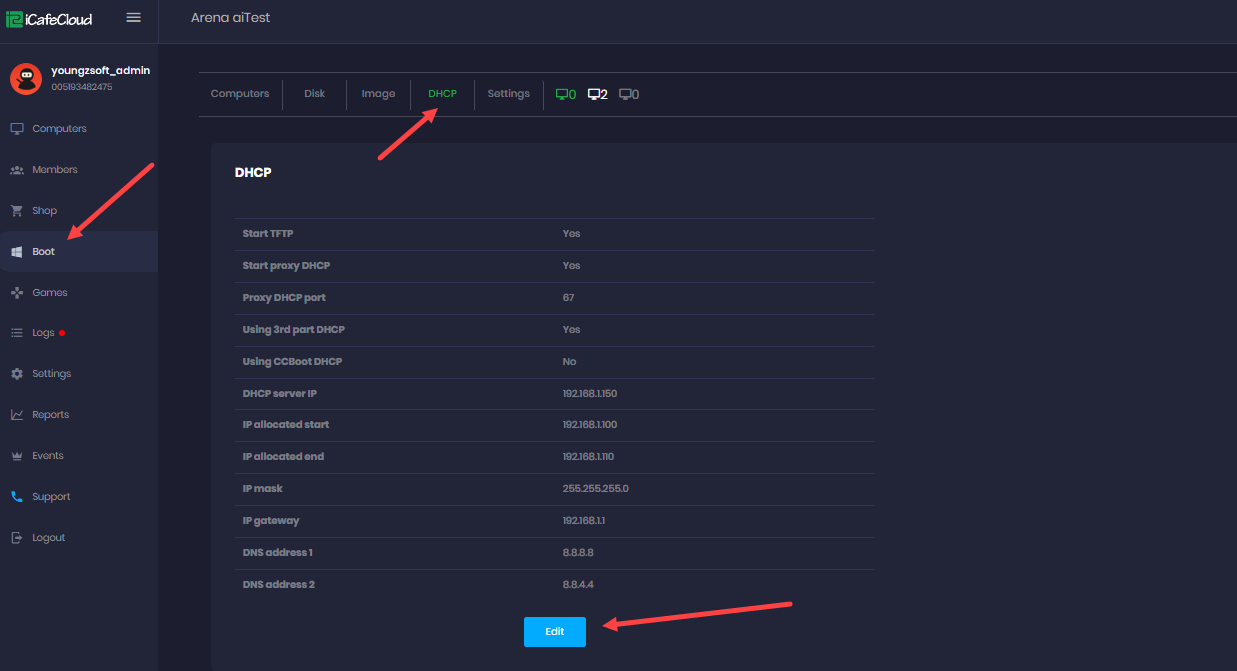
- Navigate to "Boot," then select "DHCP." Click on "Edit" (Figure 1).
Figure 1
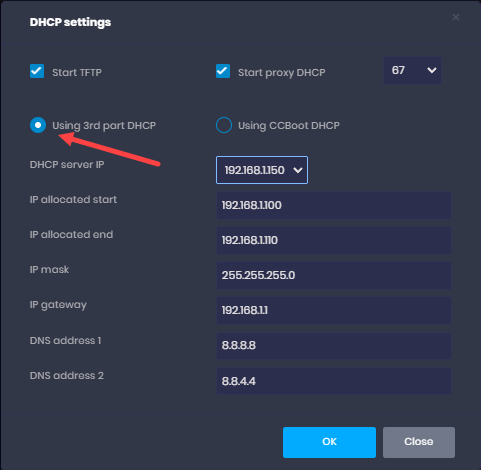
- On the “DHCP Settings” select “Using 3rd Party DHCP” radio button and then click “OK”.(Figure 2).
Figure 2
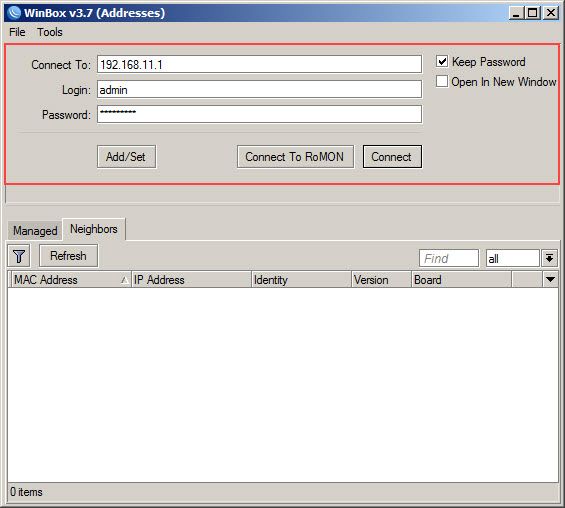
- Now login on your “Mikrotik Router” using “Winbox” (Figure 3).
Figure 3
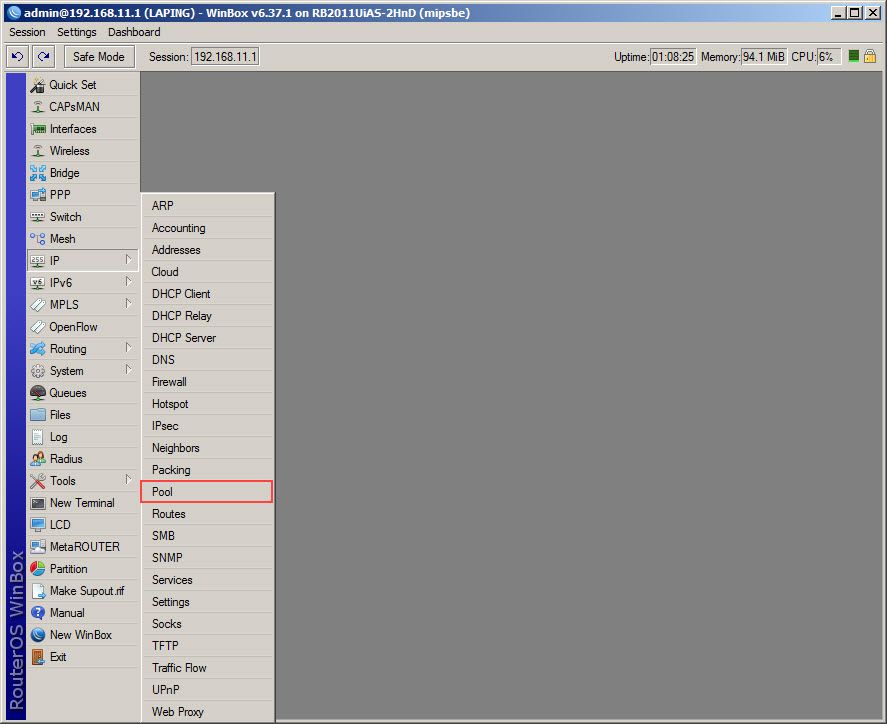
- Once the “Mikrotik” interface is open, click on “IP” then select “Pool” (Figure 4).
Figure 4
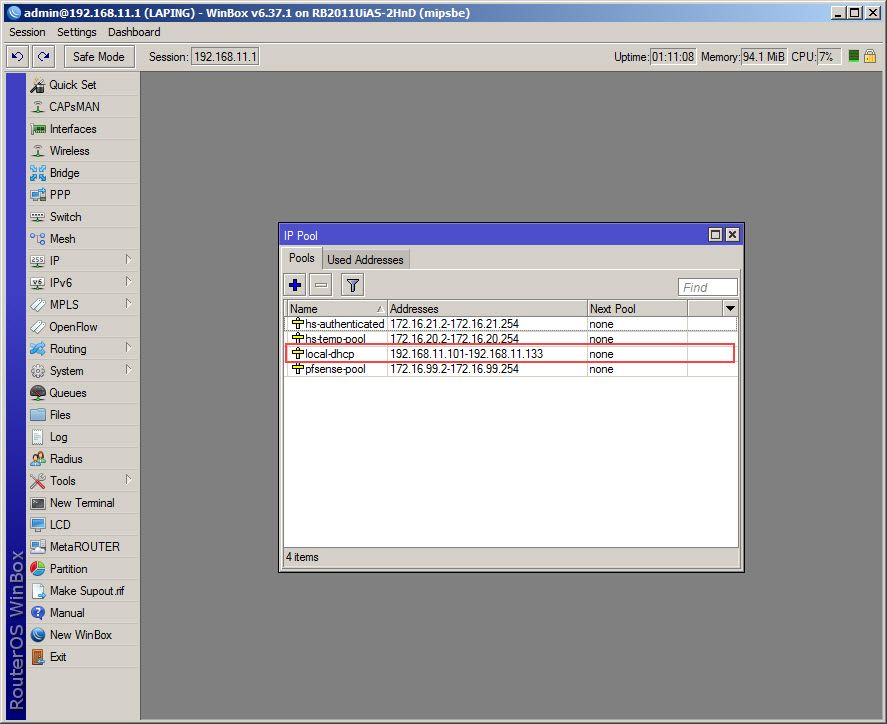
- Here on “IP Pool” interface of Mikrotik Winbox, add your CCBoot Client IP Range, as an example, we have added “192.168.11.101-192.168.11.133” (Figure 5).
Figure 5
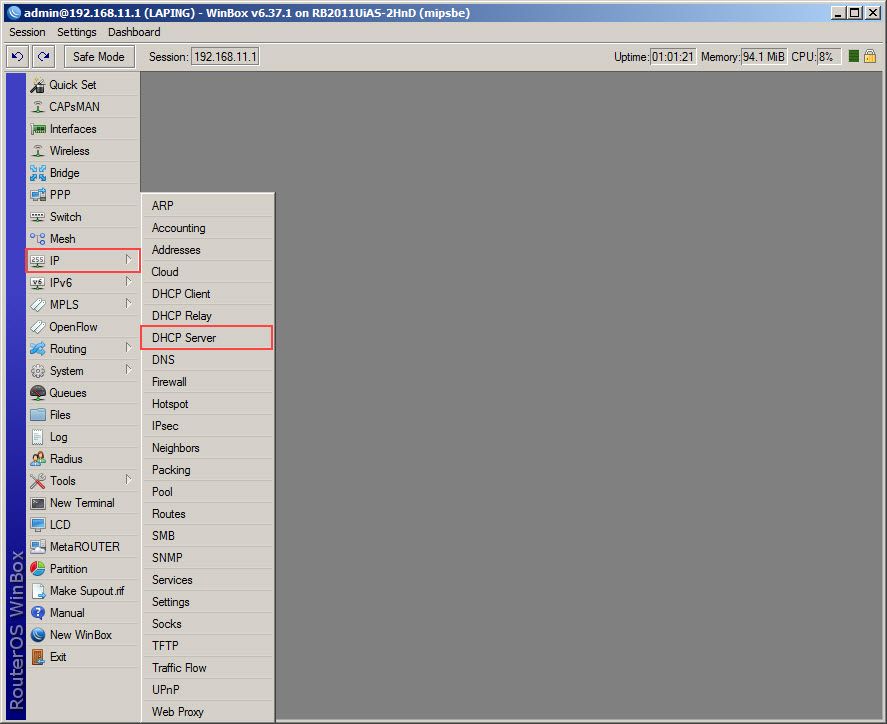
- After that click again “IP” then select “DHCP Server”(Figure 6).
Figure 6
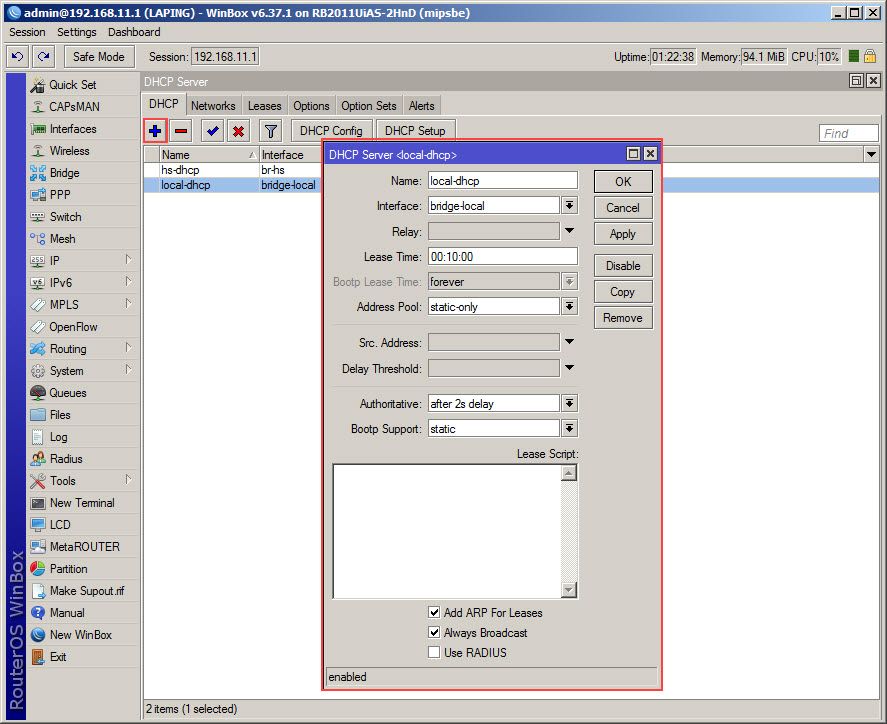
- Once the DHCP Server interface is open, click the “+” button to add DHCP (Figure7).
Figure 7
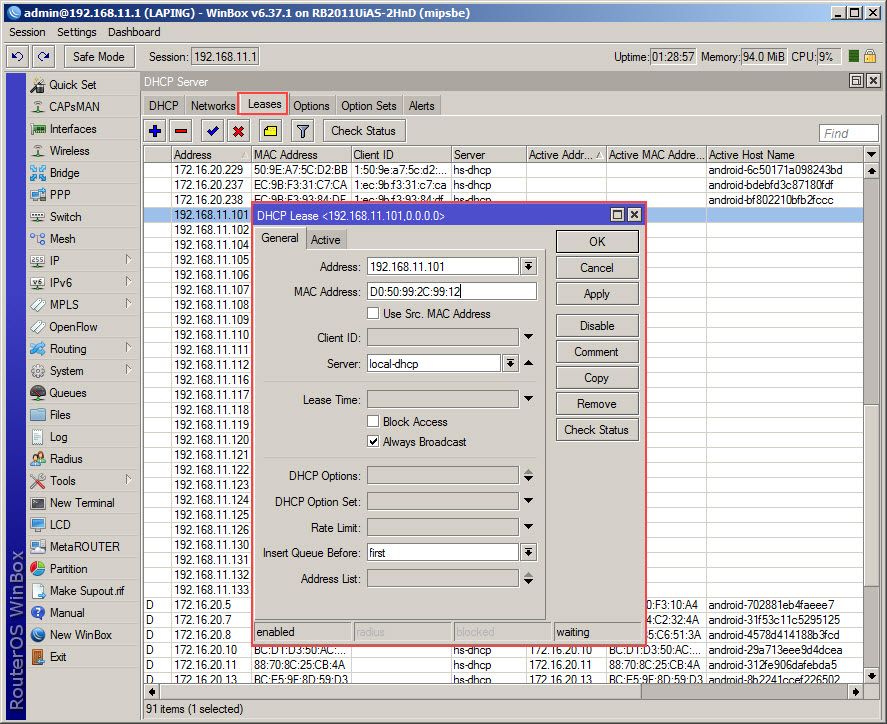
- Once the “DHCP Server” is added, click on “Leases” tab,then add all client PC “IP Address and MAC Address (Figure 8).
Figure 8
- If all CCBoot client IP Address and MAC Address were added, you can now diskless boot all clients using Mikrotik DHCP.

