16 CCBoot Active Directory
CCBoot Windows 7 client with Active Directory
The domain server installation is similar to the normal diskless installation steps. The following steps are necessary to successfully install the CCBoot server and diskless boot client.
Steps:
1. First install the Windows domain services.
Note: it is up to you if want to Install and Configure your Windows Domain Services in the same PC which is you also use as your CCBoot Server.
2. On the CCBoot Server click "Options"->"DHCP Settings"and then change the DNS address which is the same in Boot Server IP (Figure 1).
Figure 1
3. On the CCBoot Server, Choose one client and double click to open client interface, Put check on "Keep Write-Back"(Figure 2).
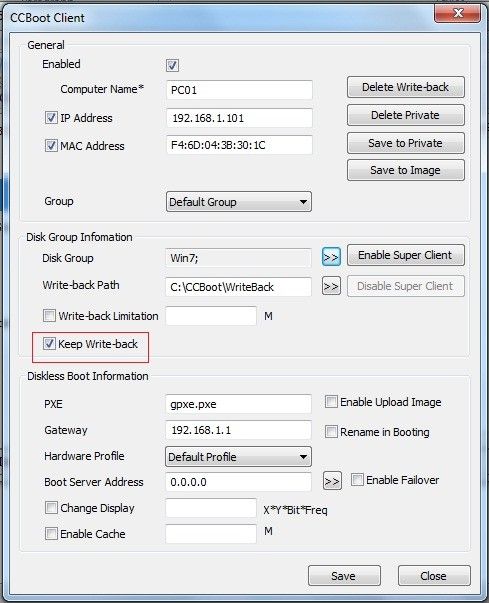
Figure 2
4. A message box will appear asking you "Do you want to delete Write-Back? Press "Yes".
5. Diskless Boot client PC and then install latest CCBoot client with AD support then reinstall CCBoot client by pressing "Install Client"button, after install the latest CCBoot client as you can see in (Figure 3).
Figure 3
6. Run "CCBoot PNP"click "Install Known NIC"put check on "Select All"and then reboot the client PC (Figure 4).
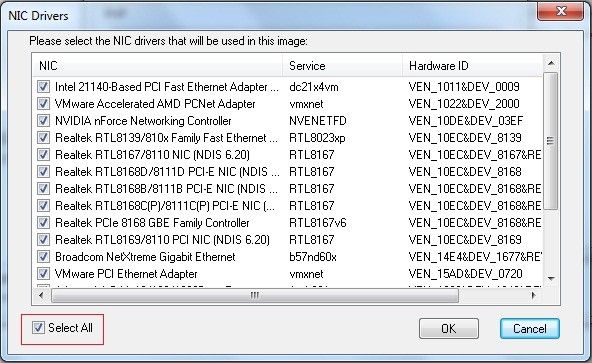
Figure 4
7. After reboot the Client Go to CCBoot Client and press "Install AD"(Figure 5) and wait for the confirmation.
Figure 5
8. After install the CCBoot client with AD, Right click "My Computer"choose "Properties"and configure this PC to join in Domain for the First Time (Figure 6) and then input your client "User Name and Password"(Figure 7).
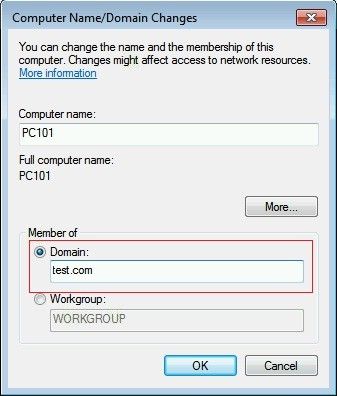
Figure .6
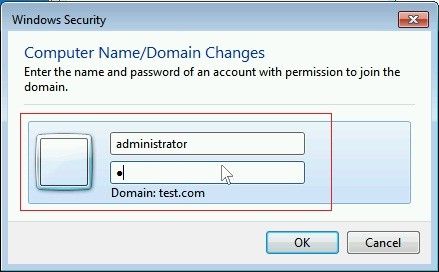
Figure 7
9. Wait for the confirmation if it’s successfully Join the Domain. If its success it will prompt you picture bellow (Figure 8). After that shutdown this PC safely.
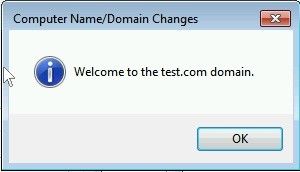
Figure 8
10. Locate the CCBoot Server installation folder. On the CCBoot Server installation Directory, copy the "CCBoot AD.exe"and paste it to CCBoot Server Desktop (Figure 9).
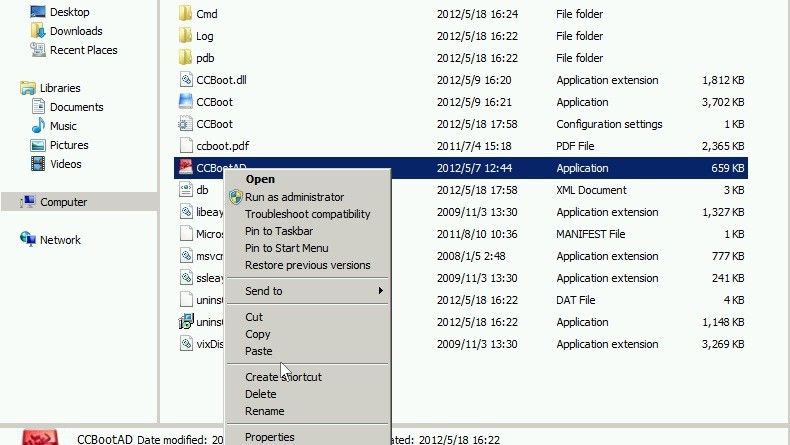
Figure 9
11. Run CCBoot AD.exe and add the client PC and then press "OK"(Figure 10).
Figure 10
12. On your Windows Domain Server open Server Manager Interface and right click and choose refresh to manually add your client PC as shown in (Figure 11).
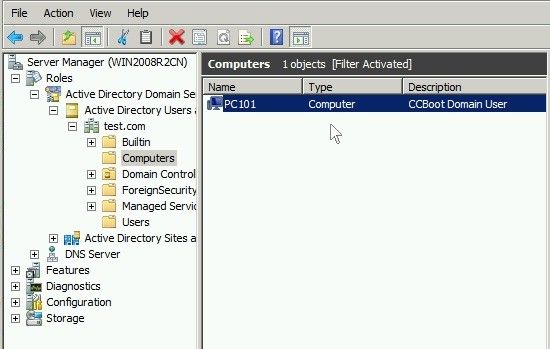
Figure 11
13. Go back to CCBoot Server, open CCBoot Main Interface and click "Options"-> click this ">>"button to add "Run Batch Command at client"(Figure 12).
Figure 12
14. And it will show the text window please input "Joindomain test.com"or the name of your Domain Server (Figure 13) this means that allows client PC to joined to the domain "test.com." and then Diskless boot the client PC again.
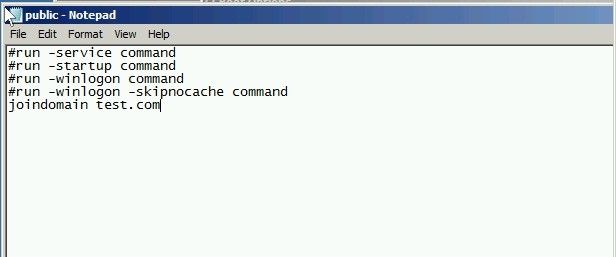
Figure 13
15. Now when you Diskless Boot the client PC you will see the login windows as shown in (Figure 14). And you can login now to Windows Domain.

Figure 14
16. Now shutdown this PC and Go back to CCBoot Server double click the client PC to open client interface, click "Save to Image"input the Image restore point and, uncheck "Keep Write-Back"and then save.
Note: If you are using Win2008 Active Directory and client OS platform is Win XP, please do the following changes in AD server.
1. Log on a Windows Server 2008-based domain controller.
2. Click Start, click Run, type gpmc.msc, and then click OK.
3. In the Group Policy Management console, expand Forest: DomainName, expand DomainName, expand Domain Controllers, right-click Default Domain Controllers Policy, and then click Edit.
4. In the Group Policy Management Editor console, expand Computer Configuration, expand Policies, expand Administrative Templates, expand System, click Net Logon, and then double-click Allow cryptography algorithms compatible with Windows NT 4.0.
5. In the Properties dialog box, click the Enabled option, and then click OK.
