7.1 Create Win XP/7 Boot Image
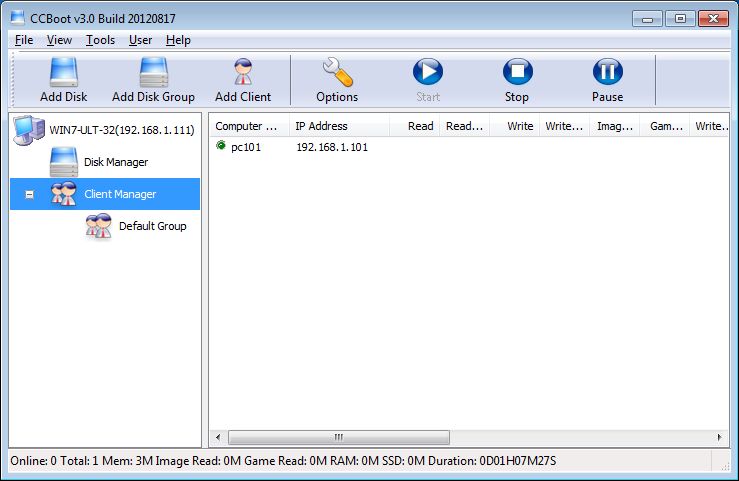
On the CCBoot server you will find a client in the client list (Figure 1) that was added by CCBoot automatically when the client PC got IP address from the CCBoot DHCP service.

Figure 1
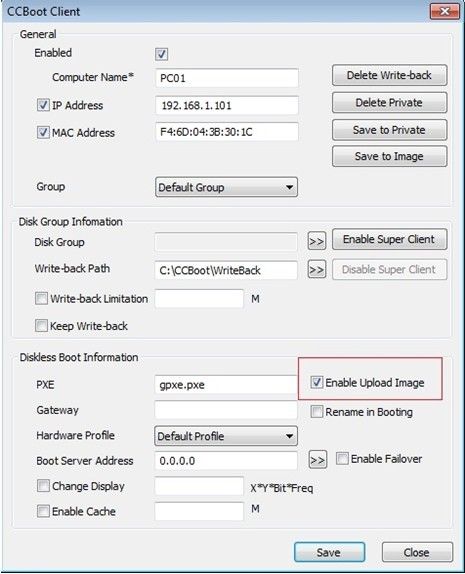
Double click the client to edit and check "Enable Upload Image" (Figure 2), and press "save"

Figure 2
Download CCBoot client installation package from: http://www.ccboot.com/download.htm. Launch ccbootsetupclient.exe and keep press the next button to the end. Then launch CCBoot client and you will see the main interface as bellow (Figure 3).

Figure 3
Press the "Install CCBoot Client" button. After finished, it will require reboot system. Reboot the client PC.
After reboot, launch CCBoot Client again, input the correct "Server IP address", it should be the IP address of the PC on which CCBoot server has been located. Input the image file name as you wish in the "Image File Name". Press the "Upload Image" button to upload the image to the CCBoot server. Then CCBoot will create an iSCSI boot image in the server "Image Save Path".
Note: CCBoot supports two types of image file format. It supports VMDK and VHD image file format. The image file format depends on the file extension you have set for the "Image File Name". For example, if you set "XP01.vmdk" as the "Image File Name", it means you will use "VMDK" image file format, while if you set "XP01.vhd", it means you will use "VHD" image file format. We recommend you using VHD format
