22.2 The Specific Operation
Above the DHCP server, click the "Start" -> "Administrative Tools" -> "Server Manager", run the "Server Manager", expand the "Roles" -> DHCP server -> Scope[192.168.1.0] -> IPv4 -> scope. Right-click the "scope", click on "Properties" pop-scope properties dialog box, select the "Advanced" tab in the "dynamic IP address allocation for the following clients" check "both" radio button. As shown below.
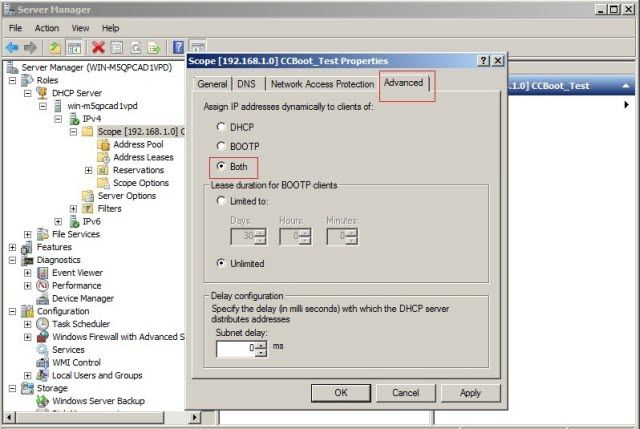
Figure 1
Expand the "Roles"-> "DHCP Server", navigate to "IPv4", right-click the IPv4 and select "Set Predefined Options". As shown below.
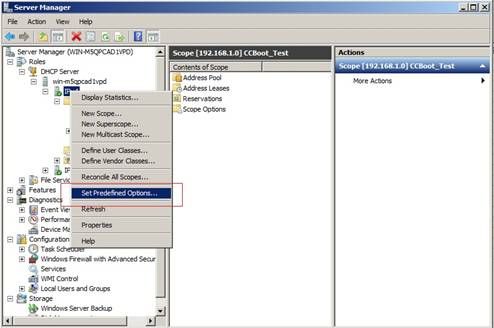
Figure 2
In the dialog box, click "Add"button, as shown below
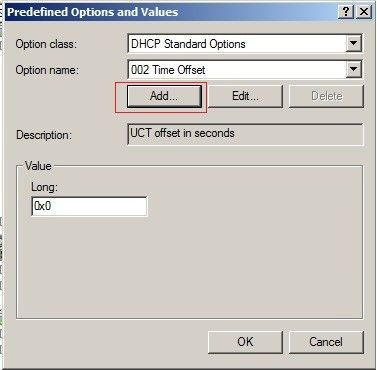
Figure 3
In the "Option Type", fill in the "Name" column inside "CCBoot Server" in the "data type" column select "string", which column in the "code", type "60" Click the OK button. As shown below.
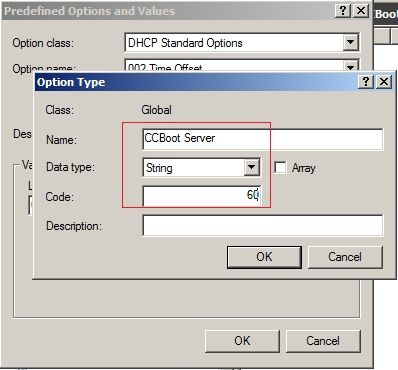
Figure 4
Expand the Roles -> DHCP server -> Win2008r2cn.test -> IPv4 -> Scope. Navigate to the "Scope Options", Right-click the "Scope Options", select the configuration options, pop-up "Scope Options"form, as shown below.
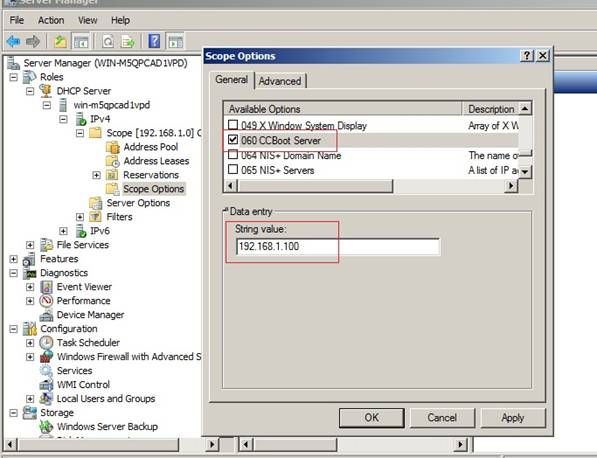
Figure 5
As shown in Figure 23-7-6, in the "scope options" in the General tab, check the column in which data items "60 CCBoot Server". "IP address", Input the CCBoot server IP, as shown in Figure 23-7-6. Check the "66 Boot Server Host Name" column in the "string value" and then input the CCBoot server IP, as shown below.
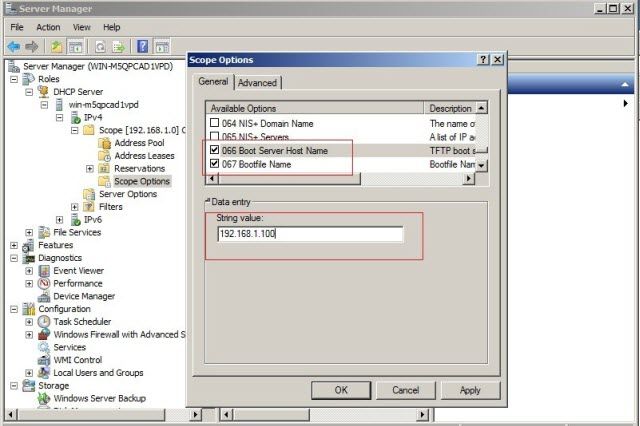
Figure 6
Check the "67 Boot file Name" fill in the string value "gpxe.pxe. Click OK, as shown below.
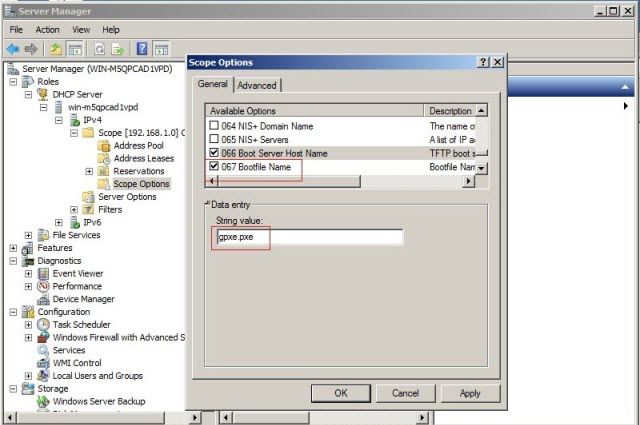
Figure 7
In the "CCBoot Options"main interface and click "DHCP Options" tab. Uncheck the "Start DHCP"check box. Check the "BOOTP Only"check box. Check the BOOTP IP allocation range set with the MS-DHCP address pool range consistent with, or within the MS-DHCP range. As shown below
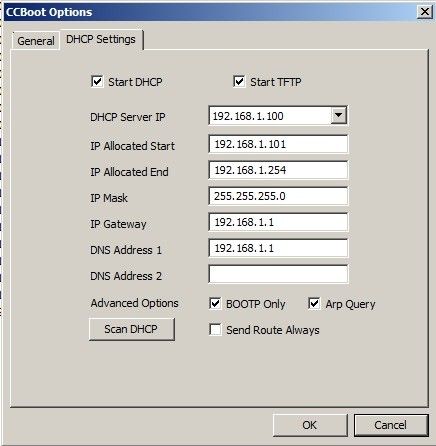
Figure 8
Related links:
